Before diving into the world of easy caramel apples, let’s take a moment to explore some delightful pairings that will elevate this sweet treat. Caramel apples are not just a dessert; they can be part of a larger culinary adventure.
One classic pairing is rich chocolate sauce. Drizzling dark chocolate over your caramel apple adds a decadent layer, with the bitterness of the chocolate beautifully balancing the sweetness of the caramel.
Nuts are another fantastic option. Whether you prefer crunchy peanuts, toasted almonds, or irresistible pecans, they add a protein punch and extra texture. Rolling the apples in your favorite nuts creates a delightful crunchy coating, making each bite even more satisfying.
For an indulgent touch, consider serving your caramel apple alongside a scoop of vanilla ice cream. The cold ice cream provides a wonderful contrast to the warm, sticky caramel, turning it into a truly luxurious dessert.
If you’re looking for something to cut through the sweetness, fruity accents are a great choice. Slices of fresh pears or tart citrus fruit add refreshing notes that balance the richness of the caramel apple, offering a delightful contrast.
With these pairings, your caramel apples become part of a flavorful, multi-dimensional experience. Now, let’s jump into this sweet adventure of caramel goodness!

I’ll never forget the first time I made easy caramel apples. It was autumn, the leaves crunched underfoot, and the air had a crispness that whispered of Halloween.
My family gathered around, and together we transformed simple apples into sticky, sweet treasures. These apples were not just a treat; they became cherished memories.
Caramel apples are the quintessential fall snack. They unite nostalgia and flavor, capturing the essence of cooler days and festive gatherings. However, they can be intimidating to some.
Fear not! This recipe will guide you step by step, making the process a breeze. Trust me; you’ll be churning out these delightful treats in no time.
You Might Also Like These Recipes!
What Are Easy Caramel Apples?
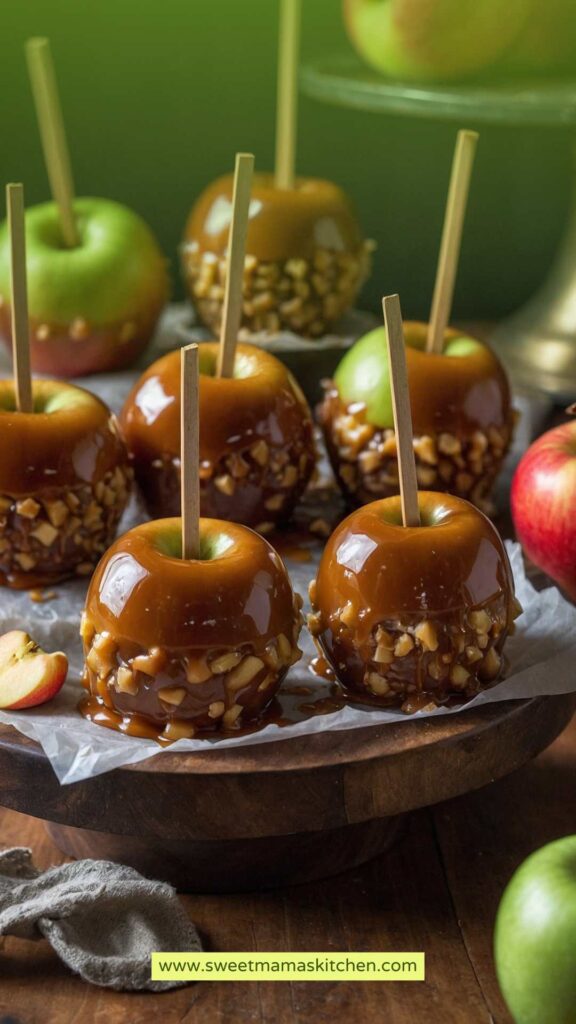
Easy caramel apples are a straightforward version of the traditional caramel-coated apple. You’re looking at Granny Smith apples, known for their tartness, dipped in smooth caramel and sometimes rolled in nuts or drizzle with chocolate.
The secret lies in using just a few ingredients, making the whole experience simple yet utterly satisfying. Each bite is a delightful contrast of textures and a dance of flavors on your palate.
What Does It Taste Like?
The moment you bite into a caramel apple, you experience a delightful crunch from the apple followed by the warm, gooey caramel. It’s a symphony of sweet and tart with a hint of saltiness if you choose to add that pinch of sea salt.
It’s a nostalgic taste that triggers memories of fairs, autumn festivals, and cozy gatherings around the bonfire.
Why This Recipe Works
Let’s break down why this easy caramel apple recipe stands out.
Simplicity: This recipe uses only five ingredients, making it accessible for anyone, regardless of baking experience—perfect for children and adults alike. The fewer the ingredients, the less fuss in the kitchen, right?
Quick Preparation: You can make these caramel apples in under 30 minutes. Melt the caramel, coat the apples, and let them set. You’ll have homemade treats faster than you can say “caramel.”
Customization: You can dress up your apples any way you like! Whether it’s nuts, chocolate, or sprinkles, the customization possibilities are endless. Everyone can make their own unique creation.
Healthier Alternative: While indulgent, making your own caramel apples means you can control the quality of ingredients. Say goodbye to preservatives and hello to fresh apples and quality caramel.
Ingredients for Easy Caramel Apples
Here’s what you need to create these sweet delights:
- 15 oz. caramel candies
- 3 Tbsp full-fat cream
- 7 small Granny Smith apples (approximately 2 1/4 lbs)
- 1/2 tsp vanilla extract
- A pinch of sea salt
- Optional toppings of your choice
Step-by-Step Instructions
Step 1: Prepare the Apples
Start by washing your Granny Smith apples thoroughly. Remove any waxy coating by scrubbing them gently under warm water. Dry them completely with a towel. Stick a wooden stick or skewer into the top of each apple.
This step is crucial, as it will make dipping easier later on.
Step 2: Prepare the Caramel
In a medium saucepan, combine the caramel candies and heavy cream. Heat this mixture over low to medium heat, stirring occasionally until everything has melted and resembles a smooth, creamy sauce.
Be careful not to let it burn; keep your eyes on it!
Step 3: Dip the Apples
Once your caramel is smooth and silky, remove it from heat. Hold an apple by the stick and dunk it into the caramel. Swirl it around to coat the apple thoroughly, letting any excess caramel drip off before setting it upright.
Step 4: Add Toppings
If you want to add toppings, you can do this while the caramel is still warm. Roll your caramel-coated apple in chopped nuts, sprinkles, or drizzle with melted chocolate for added decoration.
Step 5: Set and Chill
Place the coated apples on a parchment-lined baking sheet. Allow them to cool and set completely. You can also put them in the refrigerator for a quicker process, just watch closely as they may harden too much.
Step 6: Serve and Enjoy!
Once set, your easy caramel apples are ready to be enjoyed! Slice them up for sharing or allow everyone to bite into their personalized creation.

Notes
Here are some tips to help your caramel apple experience shine:
- Choose Fresh Apples: Crisp apples yield better results. Go for smaller, firm apples.
- Use High-Quality Caramel: It makes a noticeable difference in flavor.
- Softening Caramel: If the caramel thickens, reheat gently with a splash more cream.
- Store Properly: Keep them in a cool place, as heat will make them sticky and messy.
- Experiment: Don’t be afraid to try different toppings, flavors, or even a chocolate coating.
Nutrition Information
Easy caramel apples recipe nutrition facts

How to Store the Leftovers?
If you happen to have leftovers (though I wouldn’t count on it!), store your caramel apples in the refrigerator.
Place them in an airtight container to avoid them sticking together. They should keep well for about three days.
Sides for Easy Caramel Apples
Here are some delightful sides that complement your caramel apples beautifully:
Cheese Plate: Pairing savory cheese such as sharp cheddar or creamy brie can offset the sweetness remarkably.
Raw Veggies: Serve crunchy carrots and bell peppers with a light dip for a refreshing contrast.
Fresh Fruit Salad: A mix of berries and citrus can balance out the caramel’s richness.
Festive Drinks: Hot apple cider or pumpkin spice lattes can really tie together your autumn gathering.
Alternative Choices for Ingredients
Don’t have all the ingredients? No worries, you can swap them out as needed:
Caramel Candies: Use pre-made caramel sauce for easier coating.
Heavy Cream: Evaporated milk can work as a substitute, though the flavor may differ slightly.
Apples: While Granny Smith works best, try Honeycrisp or Fuji for a sweeter twist.
Butter: Need a bit of creaminess? Use a tablespoon of butter to enrich your caramel.
Conclusion
Making easy caramel apples is a simple yet rewarding culinary adventure. These treats bring back sweet memories while adding a fun activity to any autumn gathering.
With just a handful of ingredients and a few easy steps, you can whip up a batch that satisfies both kids and adults alike.
I encourage you to gather your loved ones and embark on this tasty adventure. Don’t forget to customize your apples with unique toppings and enjoy the delightful moments that will surely follow. Happy dipping!
You Might Also Like These Latest Recipes!

Easy Caramel Apples Recipe – Sweet Mama’s Kitchen
Description
I’ll never forget the first time I made easy caramel apples. It was autumn, the leaves crunched underfoot, and the air had a crispness that whispered of Halloween.
My family gathered around, and together we transformed simple apples into sticky, sweet treasures. These apples were not just a treat; they became cherished memories.
Ingredients
Instructions
Step 1: Prepare the Apples
-
Start by washing your Granny Smith apples thoroughly. Remove any waxy coating by scrubbing them gently under warm water. Dry them completely with a towel. Stick a wooden stick or skewer into the top of each apple.
-
This step is crucial, as it will make dipping easier later on.
Step 2: Prepare the Caramel
-
In a medium saucepan, combine the caramel candies and heavy cream. Heat this mixture over low to medium heat, stirring occasionally until everything has melted and resembles a smooth, creamy sauce.
-
Be careful not to let it burn; keep your eyes on it!
Step 3: Dip the Apples
-
Once your caramel is smooth and silky, remove it from heat. Hold an apple by the stick and dunk it into the caramel. Swirl it around to coat the apple thoroughly, letting any excess caramel drip off before setting it upright.
Step 4: Add Toppings
-
If you want to add toppings, you can do this while the caramel is still warm. Roll your caramel-coated apple in chopped nuts, sprinkles, or drizzle with melted chocolate for added decoration.
Step 5: Set and Chill
-
Place the coated apples on a parchment-lined baking sheet. Allow them to cool and set completely. You can also put them in the refrigerator for a quicker process, just watch closely as they may harden too much.
Step 6: Serve and Enjoy!
-
Once set, your easy caramel apples are ready to be enjoyed! Slice them up for sharing or allow everyone to bite into their personalized creation.
Nutrition Facts
Servings 21
- Amount Per Serving
- Calories 115kcal
- % Daily Value *
- Total Fat 5.9g10%
- Saturated Fat 2.7g14%
- Cholesterol 5mg2%
- Sodium 34mg2%
- Total Carbohydrate 14g5%
- Dietary Fiber 1g4%
- Sugars 10g
- Protein 1g2%
* Percent Daily Values are based on a 2,000 calorie diet. Your daily value may be higher or lower depending on your calorie needs.
Note
Here are some tips to help your caramel apple experience shine:
- Choose Fresh Apples: Crisp apples yield better results. Go for smaller, firm apples.
- Use High-Quality Caramel: It makes a noticeable difference in flavor.
- Softening Caramel: If the caramel thickens, reheat gently with a splash more cream.
- Store Properly: Keep them in a cool place, as heat will make them sticky and messy.
- Experiment: Don’t be afraid to try different toppings, flavors, or even a chocolate coating.


