Before we dive into the delightful realm of homemade glazed doughnuts, let's chat about what you can pair with these sweet treats. Glazed doughnuts are versatile! They can shine solo or complement a variety of beverages and dishes. Coffee, Milk, Fruit Salad, Yogurt. Ready to get into the sweet stuff? Let’s unveil the magic of homemade glazed doughnuts!
What Are Homemade Glazed Doughnuts?
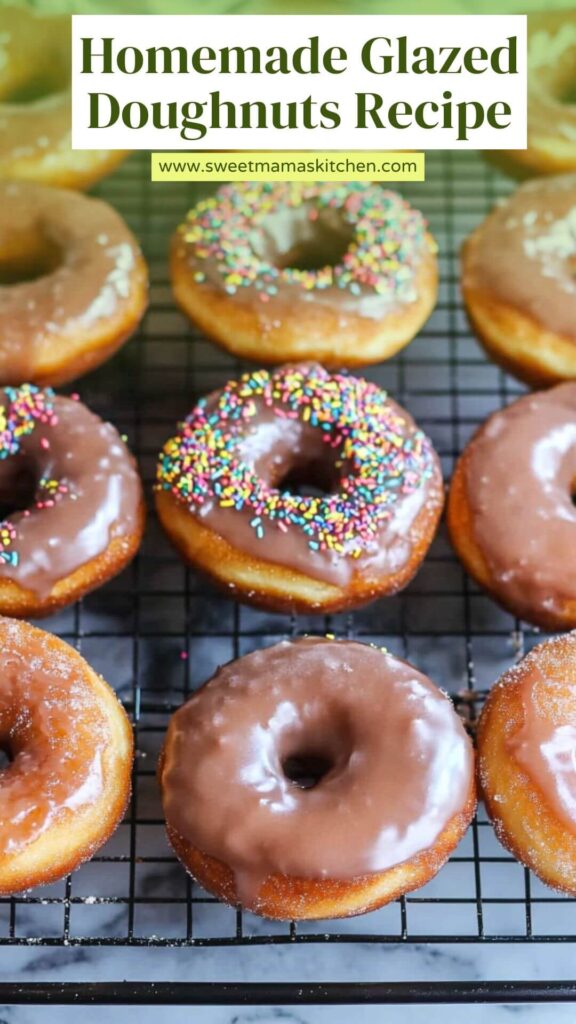
Homemade glazed doughnuts are sweet, fried pastries glazed with a sugary coating that offers a shine as beautiful as it is delicious. The magic happens when you mix a simple yeast dough, let it prove, then fry it to golden perfection, and finally, dunk it into a sweet glaze.
Why go homemade? Simply put, the taste and texture. Store-bought versions often lack the freshness or the soft, fluffy bites that emerge from your kitchen. Each doughnut will feel like a warm hug, offering a balance of lightness while still being indulgently sweet.
Why Does This Recipe Work?
Let me share why this doughnut recipe is something you'll want to keep near your stovetop.
1. Fresh Ingredients Matter: Utilizing fresh eggs, whole milk, and high-quality butter makes a difference. The flavors interweave to create a doughnut that bursts with warmth and sweetness. You can taste the quality in every bite.
2. Yeast Power: The use of instant yeast allows for quicker rising. No more hours of waiting! This quicker process means you spend less time fretting over dough and more time enjoying the fruits of your labor.
3. Simple Steps: The recipe is straightforward. With easy-to-follow steps, even a novice baker will feel confident in their ability to succeed. Trust me, it’s not rocket science!
4. Endless Customization: Want to add a twist? These doughnuts can be altered to include different flavors. Add spices, citrus zest, or a touch of cocoa to the glaze. Personalize it to your taste buds!
Ingredients You'll Need To Make These Homemade Glazed Doughnuts
Here's what you will need:
For the Donuts:
- 2 large eggs, lightly beaten
- 1 1/8 cups warm whole milk
- 1/4 cup granulated sugar
- 2 1/4 teaspoons instant or active dry yeast (that’s one package)
- 1 1/4 sticks unsalted butter (10 tablespoons, or 1/2 cup plus 2 tablespoons), melted
- 4 cups all-purpose flour
- 1/2 teaspoon fine salt
- Shortening or vegetable oil, for frying
Glaze for Hot Yeast Donuts:
- 1/2 cup unsalted butter, melted
- 2 teaspoons pure vanilla extract
- 4 cups powdered sugar
- 3 tablespoons heavy cream or milk (enough to reach your desired consistency)
- A pinch of sea salt (this balances out the sweetness nicely)
- 1/2 teaspoon ground cinnamon (optional for that extra warmth)
How To Make These?
Ready to get your hands a little sticky? Here’s the step-by-step process that leads to delicious doughnuts.
Step 1: Prepare the Dough
Start by combining the warm milk, granulated sugar, and yeast in a mixing bowl. Let it sit for about 5-10 minutes until it bubbles. This is a sign the yeast is active! In another bowl, combine the flour and salt.
Step 2: Mix and Knead
Add the melted butter and beaten eggs to the yeast mixture. Combine it with your flour and salt mix. Knead for about 5-7 minutes until the dough is smooth. If it feels too sticky, sprinkle a little more flour.
Step 3: Let It Rise
Place your dough in a greased bowl, cover it with a kitchen towel, and let it sit in a warm area for about an hour. The dough should double in size. Go ahead and take a breather while you wait.
Step 4: Roll and Cut
Once it has risen, punch it down and roll it out to about a half-inch thickness on a floured surface. Cut doughnuts using a round cutter, and don’t forget to make holes in the center!
Step 5: Second Rise
Place your cut-out doughnuts on a floured baking sheet. Cover and let them rise again for about 30 minutes.
Step 6: Heat the Oil
In a deep pan, heat your shortening or vegetable oil over medium heat. It’s crucial to ensure it reaches about 350°F for perfect frying. Use a thermometer if you have one!
Step 7: Fry Away
Carefully fry the doughnuts a few at a time, about 1-2 minutes on each side until golden brown. Let them drain on paper towels.
Step 8: Prepare the Glaze
While the doughnuts cool, mix the melted butter, powdered sugar, vanilla extract, cream or milk, sea salt, and optional cinnamon in a bowl until smooth.
Step 9: Glaze the Doughnuts
Dip each warm doughnut into the glaze. Allow any excess to drip off before placing them on a rack.
Step 10: Devour
Once they’re glazed, it’s time to relish your homemade doughnuts!
Tips
To ensure your doughnut-making experience goes smoothly, here are some handy tips:
- Don’t Rush Rising: The dough needs time to rise to achieve that fluffy texture. Patience is key!
- Check Oil Temperature: If it’s too hot, the outsides might burn while the insides stay raw. A thermometer will be your best friend.
- Experiment with Glazes: While vanilla is classic, why not try a chocolate glaze or one made from maple syrup for variety?
- Keep Doughnuts Covered: If you don’t eat them all, keep them covered to maintain that soft texture.
- Fry in Batches: To prevent cooling down the oil too much, only fry a few at a time.
Nutrition Information
When it comes to enjoying our homemade glazed doughnuts, moderation is key. Here’s a rough breakdown of the nutrition per doughnut (based on a standard size):
- Calories: 250-300
- Total Fat: 15g (Saturated Fat: 8g)
- Carbohydrates: 30g
- Sugar: 15g
- Protein: 3g
Nutritional values can vary based on portion size and specific ingredients used.
How to Store the Leftovers?
If you happen to have some leftover doughnuts (which is a rarity in my world!), here's how to store them:
- Room Temperature: Place them in an airtight container and consume them within 1-2 days for the best texture.
- Refrigerate: If you want them to last a bit longer, you can refrigerate them, but expect a slightly denser texture.
- Freeze: To freeze, place them in a freezer-safe bag with parchment paper between layers. They can last up to 2 months. Thaw them in the fridge the night before you plan to enjoy them!
What Are Some Recommended Side Dishes for Homemade Glazed Doughnuts?
Beyond pairing with drinks, you can serve doughnuts with various sides to create a delightful brunch spread. Here are a few suggestions:
1. Fresh Fruit Skewers: Brighten your plate with fresh fruit like berries, pineapple, and melon. Fruits add brightness, freshness, and are a great way to bring some balance to the sweetness.
2. Scrambled Eggs: A side of fluffy scrambled eggs can create a delightful contrast. The eggs are savory, providing a wonderful balance to the sweet doughnuts.
3. Bacon or Sausage: A salty side adds another layer of flavor. Crispy bacon or savory sausage can create that sweet and salty dynamic that’s simply wonderful.
4. Cream Cheese Frosting Dip: Why not indulge a bit more? A sweetened cream cheese dip with a hint of vanilla can take your glazed doughnuts to the next level.
Substitute Options for Ingredients
Sometimes, you may find yourself short on certain ingredients. Here are some substitutes you can easily use:
1. Eggs: If you're out of eggs, consider using 1/4 cup of unsweetened applesauce per egg. It keeps dough moist and works wonderfully in pastries.
2. Milk: Not a fan of whole milk? You can substitute with almond milk, soy milk, or any non-dairy option you prefer. Just make sure it’s unsweetened for the best results.
3. Butter: If you've run out of unsalted butter, coconut oil or margarine can serve the purpose. Melt it down, and you're good to go.
4. Flour: No all-purpose flour? You can use a gluten-free flour blend or a mix of almond flour and coconut flour, just keep in mind that the texture may change slightly.
Conclusion
Homemade glazed doughnuts are a delightful venture into the world of baking. This recipe, rooted in freshness and simplicity, encourages you to embrace the process. With just some basic ingredients and a sprinkle of enthusiasm, you can whip up doughnuts that even the finest baker would be proud of.
The joy of creating them goes as far as the joy of eating them. Whether you savor them solo or share with friends, they offer sweet memories with each bite. So roll up those sleeves, get your mixing bowl ready, and embrace the fun of creating these irresistible treats. Happy baking!
You’ll also like the following recipes!