This post contains affiliate links. As an Amazon Associate I earn from qualifying purchases.
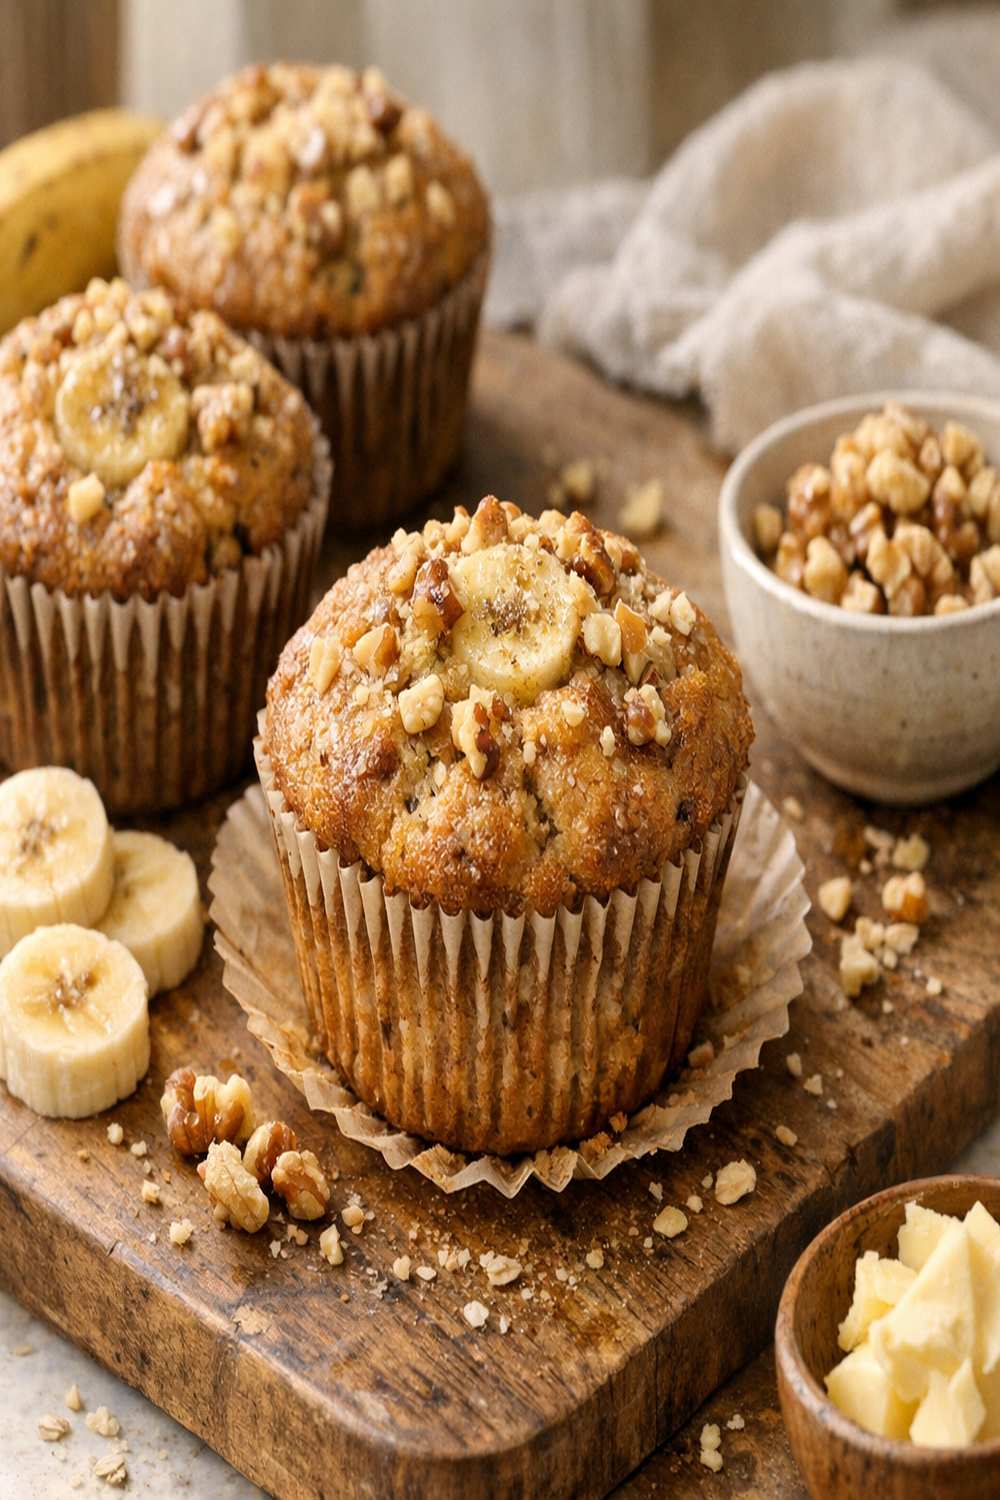
There’s something almost magical about banana muffins baking in the oven—that sweet, caramel-forward aroma that fills your entire kitchen and somehow makes chaos feel manageable. I still remember the first time my daughter came home from school asking for “those muffins Mom makes” instead of store-bought snacks, and I realized that this simple recipe had become our family’s unspoken language of love. What I didn’t know then, but understand now as a registered dietitian, is that bananas are one of nature’s most elegant baking ingredients. They contain pectin and natural sugars that caramelize beautifully during baking, creating that coveted moist crumb while their potassium content adds real nutritional value to what could easily be an empty-calorie indulgence. This recipe transforms overripe bananas—those ones you’d normally toss—into something your family will ask for by name.
The Science Behind Banana Nut Muffin Recipe
As a dietitian who spends her days balancing nutrition with flavor, I’ve learned that the best recipes aren’t accidents—they’re chemistry. This banana nut muffin recipe works because it respects how ingredients actually behave in heat. The bananas aren’t just flavor; they’re functional. When bananas reach peak ripeness (that speckled, almost-too-soft stage), their starches convert to simple sugars and their cell walls break down, making them the perfect moisture binder and natural sweetener. This means we can reduce added sugar without sacrificing tenderness or that familiar, indulgent taste your family craves.
The technique here—starting at 425°F then dropping to 350°F—is borrowed from professional bakeries for a specific reason. That initial blast creates what bakers call “oven spring,” allowing the muffins to rise quickly before the proteins set. Then the temperature drop prevents the exterior from browning too fast while the interior finishes cooking through. It’s the difference between dense, rubbery muffins and ones with that perfect, delicate crumb that practically melts on your tongue.
Why This Recipe Is Nutritionally Superior
I don’t create recipes just because they taste good—I create them because I want to feed my family something that actually nourishes them. Here’s what makes these muffins stand out nutritionally:
- Potassium – One medium banana contains about 422mg of potassium, supporting heart health and muscle function. A single muffin from this recipe provides meaningful potassium without the sodium spike of many packaged alternatives
- Resistant Starch – Using slightly underripe bananas (those with just a hint of green) increases resistant starch, which acts like fiber in your digestive system and promotes satiety longer than simple refined carbs
- Polyphenols from Walnuts or Pecans – Tree nuts add powerful antioxidants; USDA research shows nuts contribute significantly to reducing inflammation markers when eaten regularly
- B Vitamins – Whole grain flour options provide B6 and folate, supporting energy metabolism and cognitive function for growing kids and busy parents alike
Ingredient Deep Dive
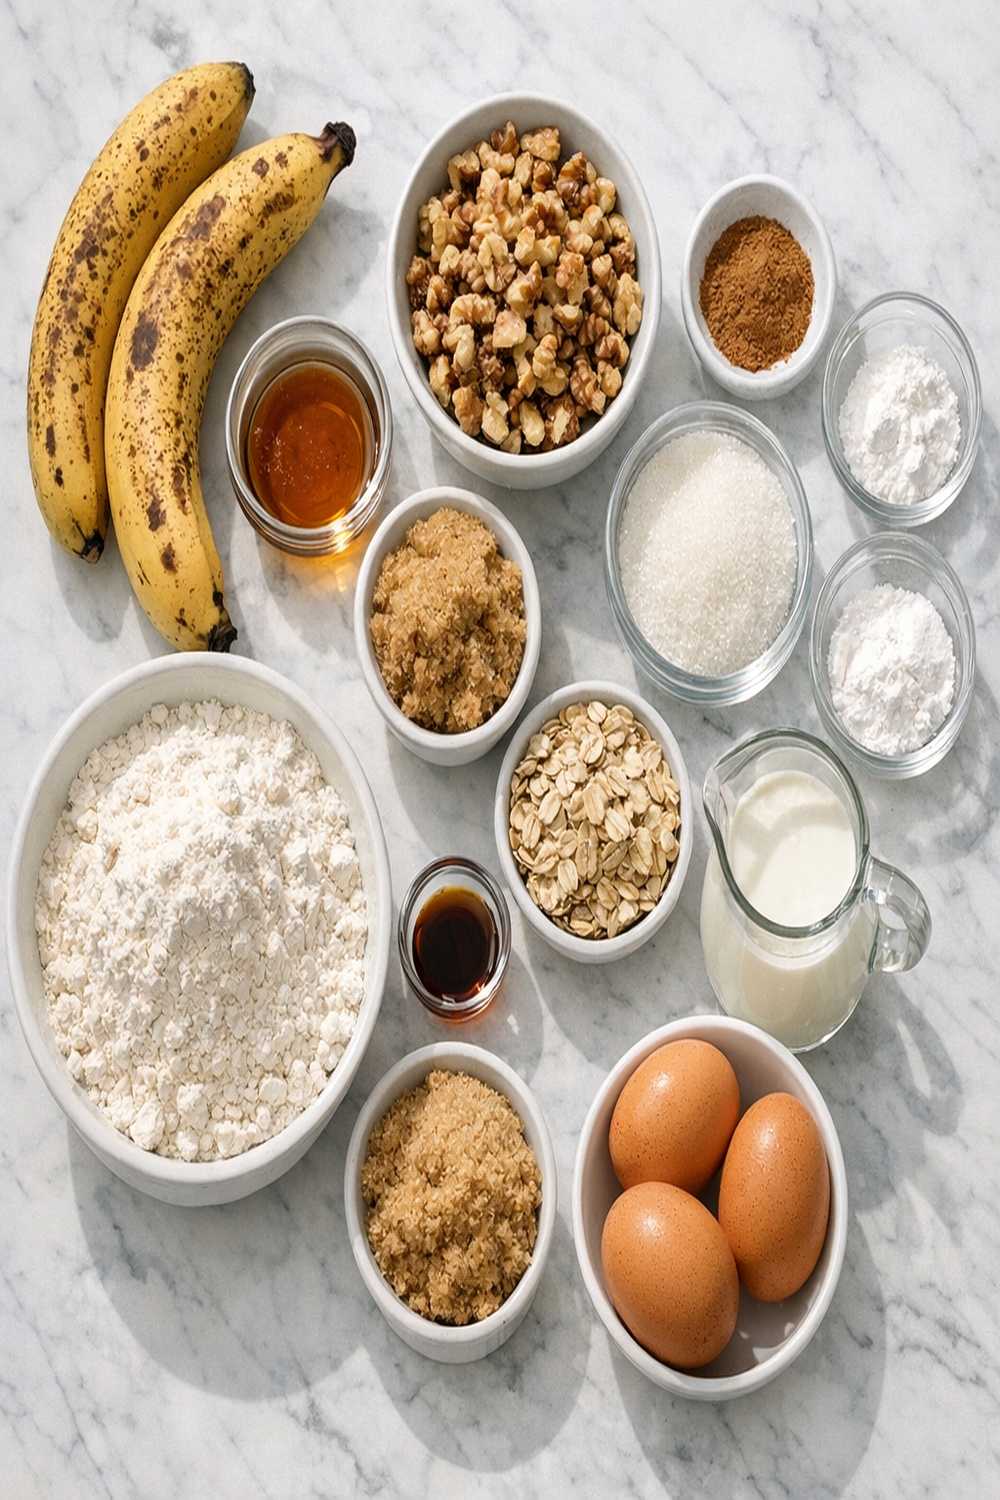
I’m particular about ingredients because I know exactly what each one does in the batter. Let me walk you through the why behind each component, so you understand this recipe at a deeper level.
For the Muffin Base
- 1 teaspoon ground cinnamon (adds warmth and natural sweetness while its polyphenols reduce oxidation of fats, keeping muffins fresher longer)
- 1 teaspoon baking soda (reacts with acidic components in bananas and brown sugar, producing carbon dioxide for additional rise and browning through the Maillard reaction)
- 1/2 teaspoon fine sea salt (amplifies sweetness perception and controls fermentation rate, preventing over-rise)
- 1/4 teaspoon freshly grated nutmeg (enhances the complexity of banana flavor through volatile compounds; freshly grated is non-negotiable for maximum aromatic impact)
- 1 and 1/2 cups all-purpose flour, spooned and leveled (provides structure through gluten development; the spooning method prevents over-packing which would create dense muffins)
- 1 teaspoon baking powder (acid-base leavening that activates immediately when wet, creating lift in the first few minutes of baking)
For the Wet Mixture
- 2/3 cup packed light brown sugar (hygroscopic properties pull moisture into the crumb, keeping muffins tender for days; the molasses in brown sugar adds depth)
- 2 tablespoons whole milk, full-fat (adjusts batter consistency to the perfect thickness while the fat contributes to muffin tenderness)
- 1 and 1/2 cups mashed bananas, about 4 medium or 3 large very ripe bananas (provides moisture, natural sweetness, and pectin for binding; riper bananas mean more sugar conversion and easier mashing)
- 1 large egg, room temperature (emulsifies wet and dry ingredients while providing structure through protein coagulation; room temperature ensures smooth incorporation)
- 6 tablespoons unsalted butter, melted and slightly cooled (adds richness and tenderness through fat coating flour particles, preventing excess gluten development; cooling slightly prevents cooking the egg)
- 1 teaspoon pure vanilla extract, not imitation (the vanillin compounds enhance perceived sweetness and add aromatic complexity that complements banana perfectly)
For the Mix-Ins
- 1 cup chopped raw walnuts or pecans, roughly chopped (adds textural contrast and heart-healthy monounsaturated fats; raw nuts stay crunchier than pre-toasted during baking)
- 1/2 teaspoon ground ginger, optional but recommended (creates warming spice complexity that professionals use to elevate banana flavor without adding more sweetener)
Makes 12 standard muffins or 24 mini muffins
The Technique: How to Make Banana Nut Muffin Recipe Properly
The magic happens in the method. I’ve baked these hundreds of times—for my kids’ school fundraisers, for Sunday morning breakfasts, for the moments when I need something that tastes homemade but comes together in under 10 minutes of hands-on time. Let me guide you through each step with the precision that comes from both professional training and real-world kitchen chaos.
Step 1: Prepare Your Oven and Pan
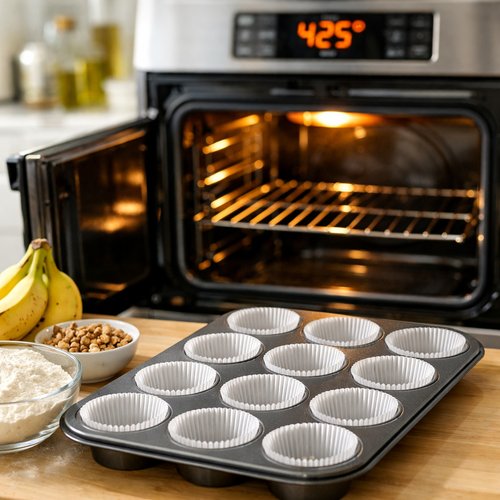
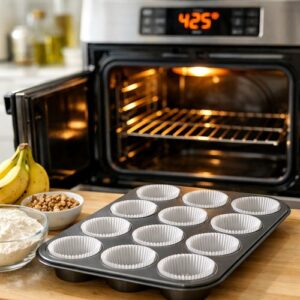
Preheat your oven to 425°F (218°C) while you gather your ingredients. This isn’t just busywork—a properly preheated oven is essential for immediate oven spring. Use either nonstick spray (my preference for easy cleanup) or insert paper liners into your 12-count muffin pan. If using liners, the paper helps muffins bake evenly and pull away cleanly without sticking to the pan’s edges. This step takes 2 minutes but makes the difference between frustration and success.
Step 2: Combine Your Dry Ingredients
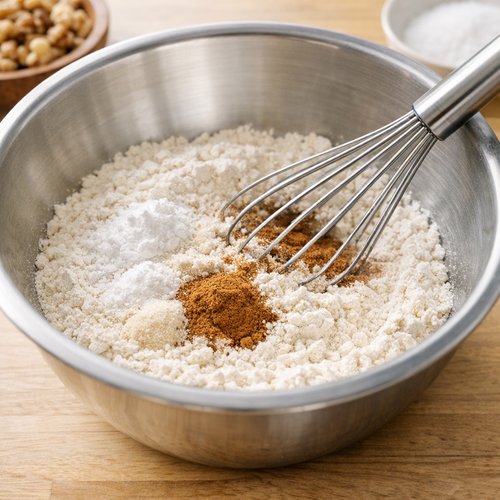
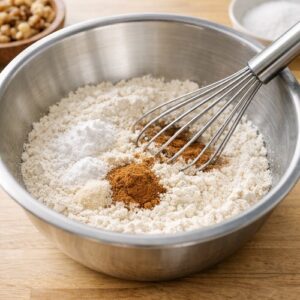
In a medium mixing bowl, whisk together the flour (spooned and leveled, never scooped directly from the bag), baking powder, baking soda, salt, cinnamon, and nutmeg. Whisk for about 15-20 seconds, making sure the leavening agents distribute evenly throughout the flour. This even distribution is critical—clumps of baking soda will create bitter, metallic-tasting spots in your finished muffins. Set this bowl aside.
Step 3: Prepare and Combine Wet Ingredients
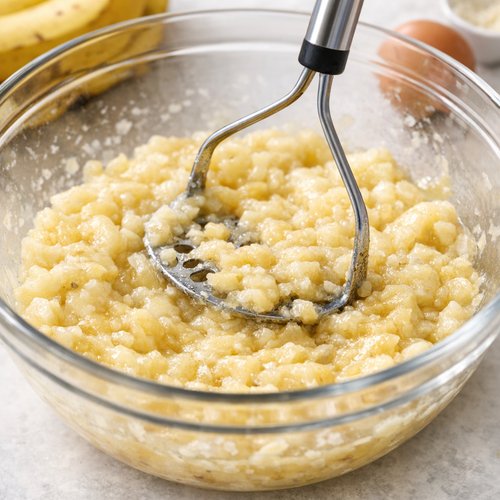
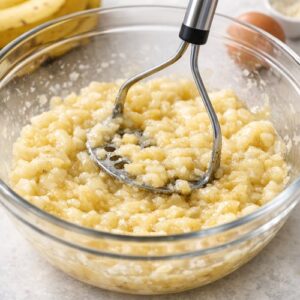
Mash your bananas in a large mixing bowl until mostly smooth (some small pieces are fine and actually create nice texture variation). The bananas should be very ripe with brown speckles or even browning on the peel—this is when their starch-to-sugar conversion is maximized. Add your melted and slightly cooled butter, packed brown sugar, room-temperature egg, vanilla extract, and milk to the mashed bananas. Using an electric mixer on medium speed or whisking vigorously by hand, beat these wet ingredients together for about 1 minute until well combined and creamy. You should see the mixture lighten slightly and become more homogeneous.
Step 4: The Critical Fold
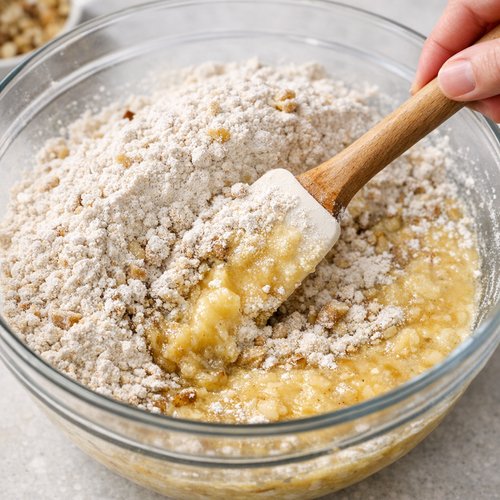
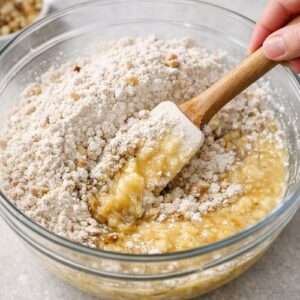
Pour the dry ingredient mixture directly into the wet ingredients. Using a rubber spatula or wooden spoon, gently fold the mixture together using about 12-15 strokes until just combined. This is where many home bakers go wrong—over-mixing activates gluten, creating tough, dense muffins with tunnels (large air holes). You should see some small flour streaks remaining when you stop folding. The batter should be thick and chunky, not smooth. If you’re adding nuts, fold them in at this final stage so they’re distributed evenly without being crushed.
Step 5: Fill Your Muffin Pan
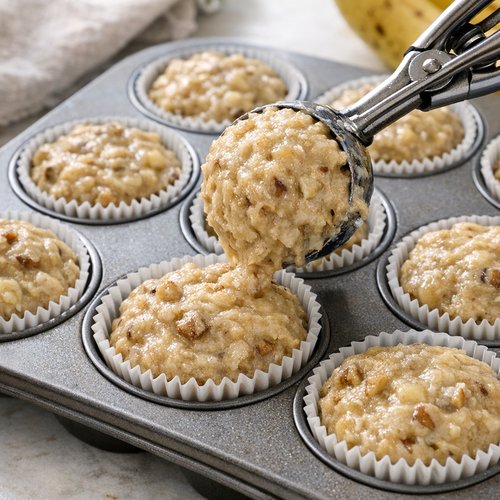
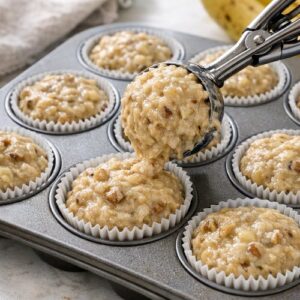
Spoon the batter into your prepared muffin cups, filling each one all the way to the rim. I use an ice cream scoop for this—it ensures uniform sizing and even baking. Slightly mound the tops; they’ll level out as they bake. At this point, you can bake immediately or cover and refrigerate for up to 24 hours. Cold batter actually bakes more evenly because the rise happens more gradually.
Step 6: The Two-Temperature Bake
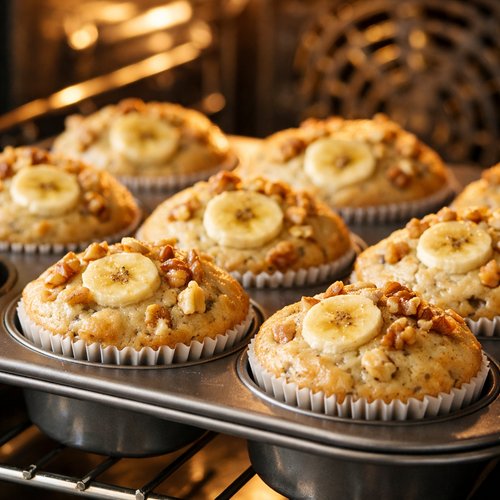
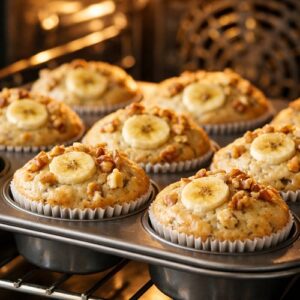
Place the filled muffin pan in your 425°F oven for exactly 5 minutes. You’ll see the muffins begin to rise almost immediately—this is oven spring, and it’s essential for light, airy texture. After 5 minutes, keeping the muffin pan in the oven, carefully reduce the temperature to 350°F (177°C) and bake for an additional 16-18 minutes21-23 minutes. The muffins are done when a toothpick inserted into the center of the largest muffin comes out clean or with just a few moist crumbs. The tops should be golden brown, and the edges should pull slightly away from the pan.
Step 7: Cool Properly
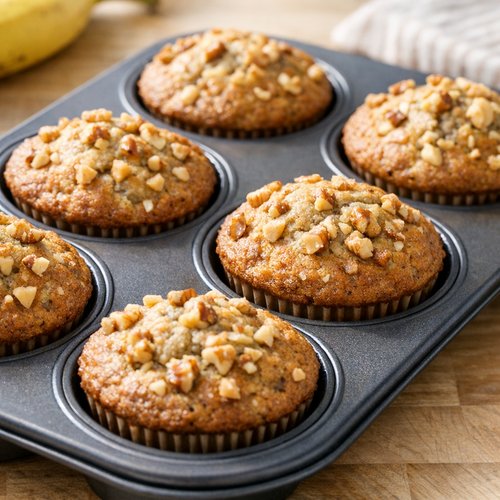
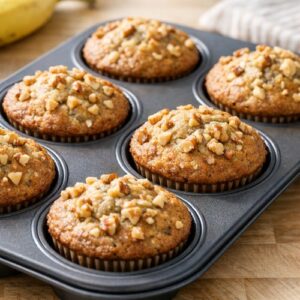
Allow the muffins to cool in the pan for exactly 5 minutes. This cooling period lets the structure set without the residual heat continuing to cook the interiors. After 5 minutes, transfer them to a wire cooling rack. This rack placement is important—setting them directly on a counter traps steam against the bottom, creating a soggy base. Complete cooling takes about 20 minutes. Resist the urge to eat them immediately; they’ll hold together better when fully cooled.
Professional Tips From the Kitchen
- Use the Ripeness Test for Maximum Flavor – The darker the banana peel (almost black with brown spotting), the higher the sugar content and the more intense the banana flavor in your finished muffins. If your bananas aren’t quite ripe enough, place them in a paper bag with an apple or avocado for 1-2 days to accelerate ripening through ethylene gas
- Measure Flour by Weight When Possible – Scooping flour directly compacts it, and you’ll end up using about 20% more than intended. My scale has been the single biggest game-changer in my baking consistency. If measuring by volume, spoon flour into your measuring cup and level with a knife
- Toast Your Nuts Before Chopping – I spread my walnuts on a sheet pan at 350°F for 8-10 minutes before chopping. This activates their oils and deepens their flavor profile. Your muffins will taste noticeably more sophisticated and nutty
- Freeze Muffins When Peak Texture – Freeze cooled muffins in an airtight container for up to 3 months. Thaw at room temperature for 30 minutes. The frozen-then-thawed muffin actually has a superior crumb structure because ice crystals create micro-channels during freezing and thawing that stay tender
- Don’t Skip the Milk – That small amount of milk adjusts the batter to perfect consistency. Without it, the batter becomes too thick and the muffins bake up dense. With too much milk, they become cupcake-like rather than properly muffin-textured
Ingredient Substitutions and Their Impact
- Brown Sugar → Coconut Sugar: Coconut sugar has a lower glycemic index and more complex molasses-like flavor. Use the same amount, but know that muffins may brown slightly faster due to lower moisture content in coconut sugar. Monitor during the final 5 minutes of baking
- Unsalted Butter → Melted Coconut Oil: A one-to-one substitution that creates a slightly lighter, more tender crumb. The flavor shifts from buttery richness to a subtle coconut undertone. Use refined coconut oil if you want zero coconut flavor, virgin if you want aromatic coconut notes
- Whole Milk → Almond Milk or Oat Milk: Full-fat plant-based milks work beautifully here and contribute nearly identical fat content for tenderness. The flavor remains virtually unchanged, making this perfect for dairy-free baking
- Walnuts → Pecans or Almonds: Pecans give a buttery, softer texture; almonds provide a slightly earthier, crunchier bite. Both work perfectly in equal quantities. Avoid using crushed nuts from the can—buy them whole and chop them yourself for maximum texture control
- All-Purpose Flour → Whole Wheat Pastry Flour: This creates a more tender whole grain option than regular whole wheat. Use a one-to-one substitution; the muffins will be slightly denser but more nutritious, with earthy undertones that complement banana beautifully
Dietary Adaptations
Gluten-Free Version: Replace the all-purpose flour with a 1:1 gluten-free flour blend that contains xanthan gum (Bob’s Red Mill or King Arthur work perfectly). The structure will be identical, though some people notice a slightly grainier mouthfeel. I’ve made these for friends’ celiac children without detection.
Dairy-Free Adaptation: Use melted coconut oil instead of butter and full-fat canned coconut milk or oat milk for the dairy milk component. The result is beautifully tender and actually flavorful, with subtle coconut undertones that pair wonderfully with banana. This version is my go-to when bringing muffins to school events where allergies are a concern.
Vegan Version: Replace the egg with a “flax egg” (1 tablespoon ground flaxseed mixed with 3 tablespoons water, sitting for 5 minutes). Use coconut oil and plant-based milk as noted above. The muffins will be slightly less tender than the original due to the egg’s emulsifying properties, but still delicious and surprisingly moist from the banana and flax combination.
Lower-Carb Adaptation: This is more challenging with banana recipes since bananas are inherently carb-forward. For a lower-carb version, reduce bananas to 1 cup and add 1/4 cup almond flour plus 1/4 cup unsweetened applesauce (this maintains moisture). Replace brown sugar with a monk fruit or erythritol blend. The texture won’t be identical—it will be denser—but flavor remains excellent and you’ll cut carbs by nearly 40%.
Can I Store Banana Nut Muffin Recipe?
Storage science matters here because I want you to enjoy these at their absolute best. Bananas contain high moisture content, which means these muffins actually improve slightly over the first two days as residual moisture distributes evenly through the crumb.
Room Temperature Storage: Keep muffins in an airtight container at room temperature for 3-4 days. The airtight environment prevents moisture loss while the container blocks oxidation that causes staling. Don’t store uncovered or in a sealed plastic bag, which traps too much humidity and creates a soggy texture.
Refrigerator Storage: Covered in an airtight container, muffins stay fresh in the refrigerator for up to 7 days. The cool temperature slows mold growth and starch retrogradation (the process that makes baked goods dry). Remove to room temperature 30 minutes before eating so the crumb reaches optimal texture.
Freezer Storage: This is where I store most of my batch. Allow muffins to cool completely, then wrap individually in parchment paper and place in a freezer bag or airtight container. They’ll keep for up to 3 months. Thaw at room temperature for 30-40 minutes, or reheat from frozen in the oven at 350°F for 12-15 minutes wrapped in foil (the foil prevents over-browning while maintaining moisture). You can also microwave from frozen for 60-90 seconds, though oven reheating produces superior texture.
Pro Tip for Busy Moms: I bake these on Sunday afternoons and freeze in portion packs of 3. On weekday mornings when I’m juggling work meetings and school pickups, I pull out muffins to thaw while we have breakfast. It’s genuinely faster than most convenience options and infinitely better tasting.
Nutrition Information
Here’s the detailed nutrition breakdown for one muffin from this recipe (based on USDA data for the base ingredients, with walnuts included):
Calories: 285 | Total Fat: 14g | Saturated Fat: 4g | Unsaturated Fat: 9g | Cholesterol: 22mg | Sodium: 198mg | Total Carbohydrates: 37g | Dietary Fiber: 2g | Net Carbs: 35g | Protein: 5g | Potassium: 287mg | Iron: 1.2mg | Calcium: 45mg
Expert’s Nutritional Tip: Notice the healthy fat-to-carb ratio here. The walnuts and butter contribute monounsaturated and saturated fats that slow carbohydrate absorption, preventing the blood sugar spike you’d get from a similar-sized refined bakery muffin. This means more sustained energy through your morning, which is why my kids don’t hit a 10 AM crash after eating these before school. The potassium content also supports healthy blood pressure regulation—one muffin provides about 8% of an adult’s daily need.
What Can I Serve With Banana Nut Muffin Recipe?
I’ve learned that flavor pairing isn’t random—it’s chemistry. Banana muffins contain volatile compounds (esters and aldehydes) that are complemented beautifully by acidic, cooling, and creamy elements. Here’s what I serve alongside these muffins at home and at school events:
- Thick Greek Yogurt with Honey – The acidity of yogurt cuts through the muffin’s sweetness while protein adds satiety. Honey adds floral notes that echo the banana’s natural sweetness. This is my favorite pairing for the “breakfast experience”
- Unsalted Butter Spread on a Warm Muffin – The fat creates a luxurious mouthfeel while allowing flavor compounds to dissolve better on your tongue. Serve immediately after pulling from the oven or reheating
- Cream Cheese Mixed With Cinnamon – The dairy fat and slight tang of cream cheese provide the perfect foil to banana’s sweetness. The cinnamon echoes the spices already in the muffin, creating cohesion
- Vanilla Lattes or Strong Black Coffee – The bitterness and warmth complement banana perfectly. This is what I pair with muffins for my own breakfast during work
- Fresh Berries on the Side – The tartness of raspberries or blackberries provides textural and flavor contrast. Their anthocyanins also add anti-inflammatory compounds that complement the polyphenols already in the walnuts
If you’re looking for other baked goods to round out your repertoire, try my these homemade cookies for a completely different texture and flavor profile, or my this simple cake if you want another vegetable-forward baked classic that uses similar techniques.
Make-Ahead and Meal Prep Guide
As a working dietitian and mother, I’ve built my kitchen around make-ahead strategies. These muffins are one of my secret weapons for bringing order to chaos. Here’s exactly how I prep them:
Batter Prep (Up to 24 Hours Ahead): Prepare the batter completely through the final folding step, then transfer to your prepared muffin pan. Cover tightly with plastic wrap and refrigerate. Cold batter actually bakes more evenly because the rise happens more gradually and gently. Bake directly from the refrigerator—no need to bring to room temperature—but add 2-3 minutes to your baking time.
Sunday Batch Strategy: I bake two full pans on Sunday afternoons while working on meal prep for the week. One pan goes into the airtight container on the counter (for this week’s breakfasts), and one gets wrapped and frozen in portions. This gives me grab-and-go breakfasts for two weeks without the daily baking effort. I typically batch-make twice monthly, which means I always have homemade muffins available.
Pre-Portioned Freezer Packs: Wrap cooled muffins individually in parchment, then place 3 muffins in labeled quart-size freezer bags with the date and reheating instructions. This way, busy mornings become as simple as pulling out one bag and reheating in a 350°F oven for 12 minutes while you make coffee.
Common Mistakes to Avoid
- Scooping Flour Directly Into the Measuring Cup – This compacts flour, leading to 20-30% more flour than intended and resulting in dense, dry muffins. Always spoon flour gently into your cup and level with a knife, or better yet, use a kitchen scale
- Over-Mixing the Batter – I see this constantly with baking beginners. The moment you see streaks of flour remaining, stop mixing. Over-mixing overdevelops gluten, creating tough, tunnel-filled muffins with a texture more like rubbery cake. Fold gently using 12-15 strokes maximum
- Using Insufficiently Ripe Bananas – Bananas need brown speckles or actual browning for maximum sugar content and easiest mashing. Using barely-ripe bananas gives you dense, less flavorful muffins because the starches haven’t fully converted to sugars. If your bananas are underripe, place them in a paper bag for 1-2 days
- Skipping the Temperature Reduction – The two-temperature bake (425°F then 350°F) isn’t optional; it’s essential. Starting high gives oven spring; dropping the temperature prevents burning the exterior while the interior finishes cooking. Baking at a single temperature of 375°F produces uneven, either-dense-or-dry results
Seasonal Variations
Spring/Summer Version: Add 1/2 cup fresh lemon zest and replace the nutmeg with cardamom for a bright, floral variation. The acidity of lemon zest cuts through the banana’s richness beautifully. Fresh herbs like basil or mint can be finely minced and added with the nuts for subtle herbal undertones
Fall/Winter Version: Increase the cinnamon to 1.5 teaspoons, add 1/4 teaspoon cloves, and stir in 1/2 teaspoon ground ginger. This creates a spice-forward muffin that feels like autumn in a bite. These variations pair beautifully with hot apple cider or chai lattes
Summer Tropical Variation: Replace 1/3 of the bananas with mashed pineapple (drained well to avoid excess moisture). Add 1/4 cup unsweetened shredded coconut to the dry ingredients. This creates a subtle pineapple-coconut undertone that still centers banana as the primary flavor. My kids’ summer camp requests these specifically
Holiday Gift Version: Add 1/2 teaspoon rum extract or brandy extract to your wet ingredients. Increase nutmeg slightly. These bake up beautifully for holiday gift baskets and feel more sophisticated while remaining familiar to your everyday recipe. The extract adds aromatic complexity without the alcohol

Banana Nut Muffin Recipe
Ingredients
Method
- Preheat your oven to 425°F (218°C) while you gather your ingredients. This isn't just busywork—a properly preheated oven is essential for immediate oven spring. Use either nonstick spray (my preference for easy cleanup) or insert paper liners into your 12-count muffin pan. If using liners, the paper helps muffins bake evenly and pull away cleanly without sticking to the pan's edges. This step takes 2 minutes but makes the difference between frustration and success.
- In a medium mixing bowl, whisk together the flour (spooned and leveled, never scooped directly from the bag), baking powder, baking soda, salt, cinnamon, and nutmeg. Whisk for about 15-20 seconds, making sure the leavening agents distribute evenly throughout the flour. This even distribution is critical—clumps of baking soda will create bitter, metallic-tasting spots in your finished muffins. Set this bowl aside.
- Mash your bananas in a large mixing bowl until mostly smooth (some small pieces are fine and actually create nice texture variation). The bananas should be very ripe with brown speckles or even browning on the peel—this is when their starch-to-sugar conversion is maximized. Add your melted and slightly cooled butter, packed brown sugar, room-temperature egg, vanilla extract, and milk to the mashed bananas. Using an electric mixer on medium speed or whisking vigorously by hand, beat these wet ingredients together for about 1 minute until well combined and creamy. You should see the mixture lighten slightly and become more homogeneous.
- Pour the dry ingredient mixture directly into the wet ingredients. Using a rubber spatula or wooden spoon, gently fold the mixture together using about 12-15 strokes until just combined. This is where many home bakers go wrong—over-mixing activates gluten, creating tough, dense muffins with tunnels (large air holes). You should see some small flour streaks remaining when you stop folding. The batter should be thick and chunky, not smooth. If you're adding nuts, fold them in at this final stage so they're distributed evenly without being crushed.
- Spoon the batter into your prepared muffin cups, filling each one all the way to the rim. I use an ice cream scoop for this—it ensures uniform sizing and even baking. Slightly mound the tops; they'll level out as they bake. At this point, you can bake immediately or cover and refrigerate for up to 24 hours. Cold batter actually bakes more evenly because the rise happens more gradually.
- Place the filled muffin pan in your 425°F oven for exactly 5 minutes. You'll see the muffins begin to rise almost immediately—this is oven spring, and it's essential for light, airy texture. After 5 minutes, keeping the muffin pan in the oven, carefully reduce the temperature to 350°F (177°C) and bake for an additional 16-18 minutes21-23 minutes. The muffins are done when a toothpick inserted into the center of the largest muffin comes out clean or with just a few moist crumbs. The tops should be golden brown, and the edges should pull slightly away from the pan.
- Allow the muffins to cool in the pan for exactly 5 minutes. This cooling period lets the structure set without the residual heat continuing to cook the interiors. After 5 minutes, transfer them to a wire cooling rack. This rack placement is important—setting them directly on a counter traps steam against the bottom, creating a soggy base. Complete cooling takes about 20 minutes. Resist the urge to eat them immediately; they'll hold together better when fully cooled.
Notes
FAQs
Why Are My Muffins Sinking in the Middle?
This happens for one of two reasons: either the batter was over-mixed (developing too much gluten, which over-rises and then collapses), or the muffins weren’t baked long enough and the interior structure hadn’t fully set before you removed them from the oven. Check doneness with a toothpick—it should come out clean or with just a few moist crumbs. Also verify your oven temperature with an independent oven thermometer; many home ovens run 25-50°F hotter or cooler than their display indicates. Sinking is also common if you open the oven door during the final 5 minutes of baking, causing a temperature drop that interrupts structure-setting.
Can I Use Frozen Bananas for This Recipe?
Absolutely, but with one important adjustment. Thaw frozen bananas completely at room temperature and drain away any excess liquid before mashing. Frozen bananas release more water than fresh ones, which will throw off your wet-to-dry ratio. If your batter seems too loose after adding thawed bananas, reduce the milk by 1 tablespoon. The flavor will be identical to fresh since freezing doesn’t damage banana’s flavor compounds, though the texture will be slightly mushier, which actually helps with mashing.
How Do I Know When My Bananas Are Ripe Enough?
The speckled, almost-too-brown-to-eat stage is when bananas reach maximum sugar content and minimum starch. Visually, look for a peel that’s mostly yellow with brown speckles covering 25-50% of the surface. Squeeze gently—the banana should yield to pressure but not be mushy. If you can see brown areas forming on the skin, you’re in the perfect window. If the peel is completely black or you see liquid, the banana is past its prime for muffins (though still fine for smoothies). At grocery stores, I specifically look for the banana bunches destined for the discount bin—those “overripe” ones are exactly what I want.
What’s the Difference Between This Recipe and a Banana Bread Recipe?
The primary difference is the baker’s percentage (the proportion of liquid to flour) and mixing method. Muffin batter is thicker with less liquid, and muffins are mixed using the “muffin method” (gently folding wet into dry), while banana bread uses more liquid and often creams butter and sugar first. Banana bread bakes longer at a lower temperature and produces a denser, more tender, more cake-like crumb. These muffins have a firmer structure and fluffier crumb because of the thicker batter and higher initial baking temperature. Functionally, they’re similar, but the texture experience is distinctly different.
Can I Make These Without Nuts?
Yes, and the muffins will still be delicious. Simply omit the nuts entirely or replace them with chocolate chips, dried cranberries, or shredded coconut if you want textural variation. The absence of nuts does mean the muffins will be slightly less filling and lose the healthy monounsaturated fats, but the crumb structure remains perfect. This is my go-to version for school bake sales since nut allergies are increasingly common.
Why Do Some Recipes Call for Both Baking Powder and Baking Soda?
This is a sophisticated baking technique. Baking soda (sodium bicarbonate) reacts with acids in your batter—in this case, the acidity from bananas and brown sugar—to produce immediate carbon dioxide for lift. It also promotes browning through the Maillard reaction. However, baking soda needs an acid to fully activate. Baking powder contains baking soda plus an acid (cream of tartar) plus cornstarch, so it works even without acidic ingredients. Using both ensures you get immediate rise from the acid-base reaction plus additional sustained lift from the baking powder’s delayed reaction (it has single-acting and sometimes double-acting components). The result is muffins that rise beautifully and maintain their structure. Using only one would give you less lift and less browning.
More Recipes You’ll Love
- these homemade cookies – Crispy-edged, buttery cookies featuring the same toasted pecans you love in muffins
- Best Lunch Lady Brownies Recipe – Fudgy, tender brownies that use similar mixing techniques and bake-time principles
- this fruit cobbler – Another fruit-forward recipe celebrating seasonal produce with warm spices
Making these muffins has genuinely changed how I think about feeding my family. What started as a simple way to use overripe bananas became a ritual—Sunday afternoons, warm muffins cooling on racks, the smell filling our kitchen. My kids now text me from college asking if I’m baking muffins when they’re coming home. That’s when I knew I’d gotten something