This post contains affiliate links. As an Amazon Associate I earn from qualifying purchases.
I still remember the Tuesday morning my daughter came home from school with that crushed look. Her best friend’s mom had sent apple cinnamon bread in her lunchbox, and mine? I’d packed store-bought granola bars. That night, I decided I was done buying mediocre versions of something I could make better with my own hands. But here’s the thing—every loaf I attempted came out either dense as a brick, dry by afternoon, or with apples that sank to the bottom like they were trying to escape. I was a registered dietitian teaching families about wholesome eating, and I couldn’t even nail my own quick bread. Sound familiar?
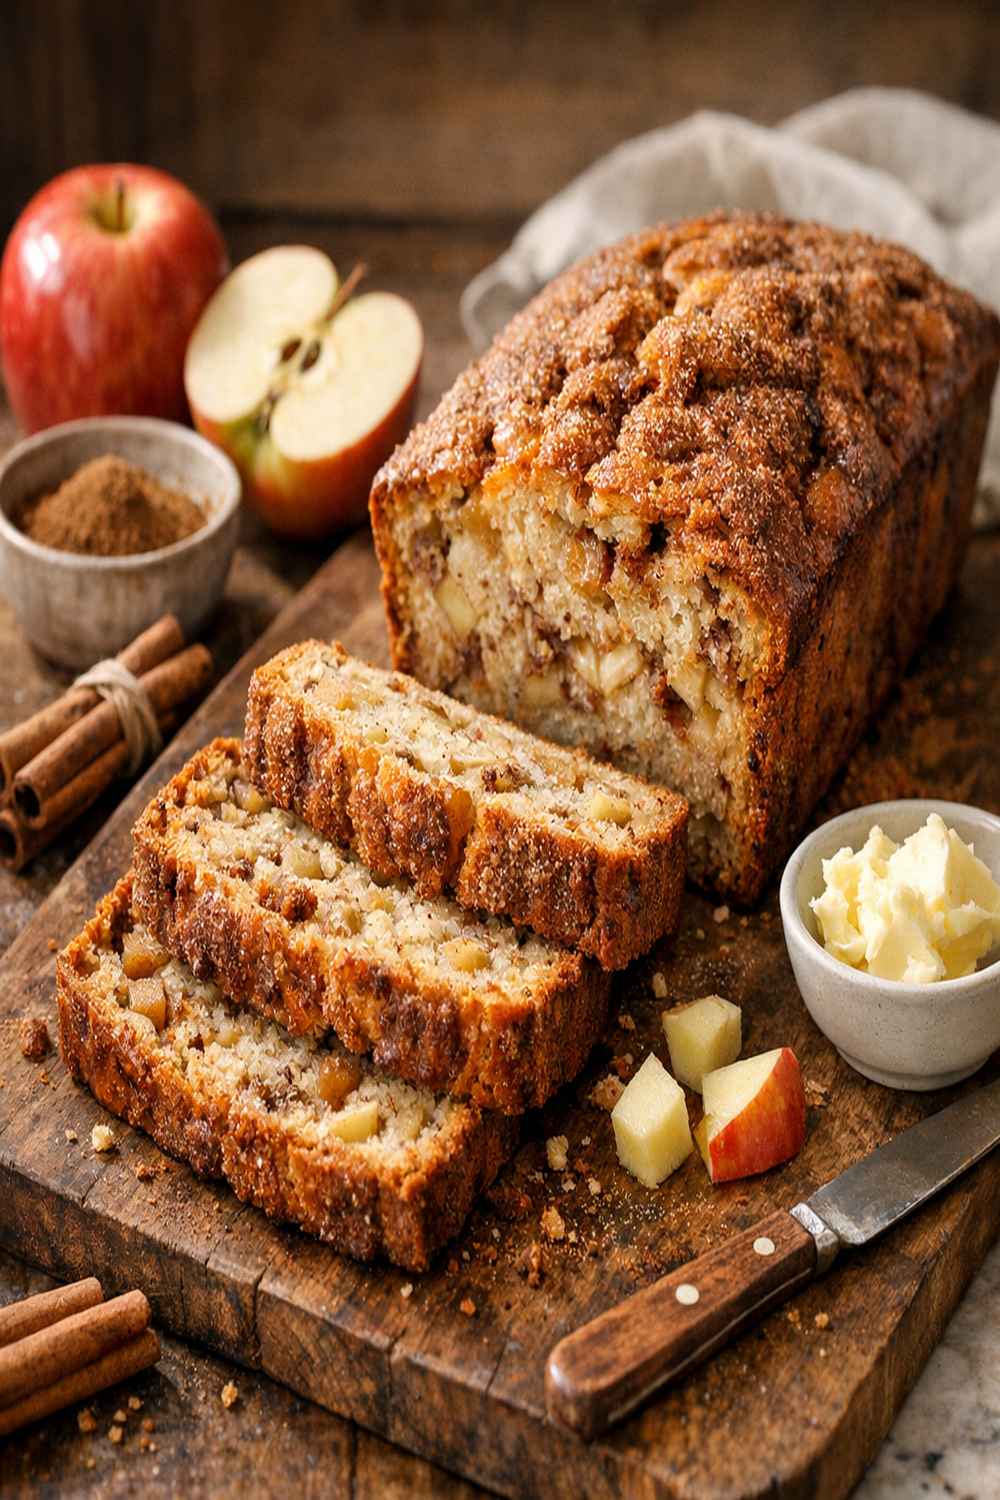
What changed everything was understanding that apple cinnamon bread isn’t just about throwing ingredients together—it’s about structure, moisture balance, and that gorgeous swirled top that makes people think you hired a bakery. I started experimenting with when to add the apples, how to layer the cinnamon sugar, and the one technique that keeps this bread impossibly moist for days. Today, I’m sharing the exact recipe and process that turned my kitchen disasters into the loaf that now gets requested by name. You’ll want to make this for breakfasts, lunchboxes, and those moments when you need something that feels homemade but doesn’t demand hours of your time.
Why Your Apple Cinnamon Bread Never Turns Out Right (And How to Fix It)
Let me be honest with you—I’ve made nearly every mistake with quick breads that exists. Dense crumb? Check. Sunken apples? Absolutely. Cinnamon flavor that’s there but not *there*. The problem isn’t you; it’s that most recipes skip over the critical details that separate a forgettable loaf from one that your family actually remembers.
As a registered dietitian and mom, I’ve learned that successful home cooking isn’t magic—it’s precision wrapped in warmth. The good news? Once you understand the “why” behind each step, this bread becomes reliable. You’ll nail it every single time, and you’ll know exactly how to troubleshoot if something feels off. This recipe solves the three biggest apple cinnamon bread failures: density (wrong mixing method), soggy centers (improper apple placement), and cinnamon flavor that whispers instead of sings (strategic layering).
What Makes This Apple Cinnamon Bread Recipe Different?
The magic here is threefold, and each element matters more than you’d think.
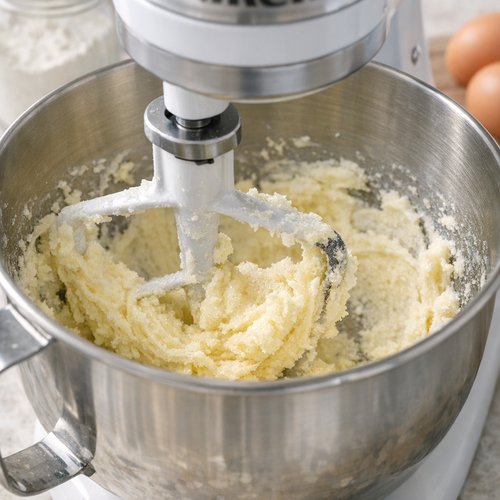
First, I use a creaming method—beating softened butter with sugar until it’s pale and fluffy. This incorporates air into the batter, creating a tender crumb instead of that hockey-puck texture. Most people skip this step or rush it. I spend a full two minutes on medium speed, and it transforms everything.
Second, the apples go between layers, not all mixed throughout. This keeps them from sinking and creates pockets of flavor and moisture distributed throughout the entire loaf. Plus, you get that stunning marbled appearance.
Third—and this is the trick that gets people asking for the recipe—I swirl the cinnamon sugar through the batter with a butter knife held vertically. This creates ribbons of flavor rather than random specks. It looks elegant, tastes intentional, and honestly makes the whole experience feel more special than it actually is.
Before You Start: What You Need to Know
I’m going to share two critical insights that most recipes gloss right over. These aren’t fancy techniques—they’re the foundation of why this loaf works.
- Room temperature is non-negotiable for the wet ingredients. Your eggs and milk should be at about 68–70°F before you start mixing. Cold ingredients don’t incorporate smoothly, which means you end up with streaky batter and uneven baking. I pull my eggs and milk out of the fridge 15 minutes before I start.
- Apple choice changes everything. You need an apple that’s firm enough to hold its shape during baking but flavorful enough to matter. Honeycrisp, Gala, or Fuji are your friends. Mealy apples (looking at you, Red Delicious) will turn into mush and get lost in the batter. Also, finely chop your apples—about the size of small peas. Chunky pieces create air gaps that cause uneven browning.
The Ingredients
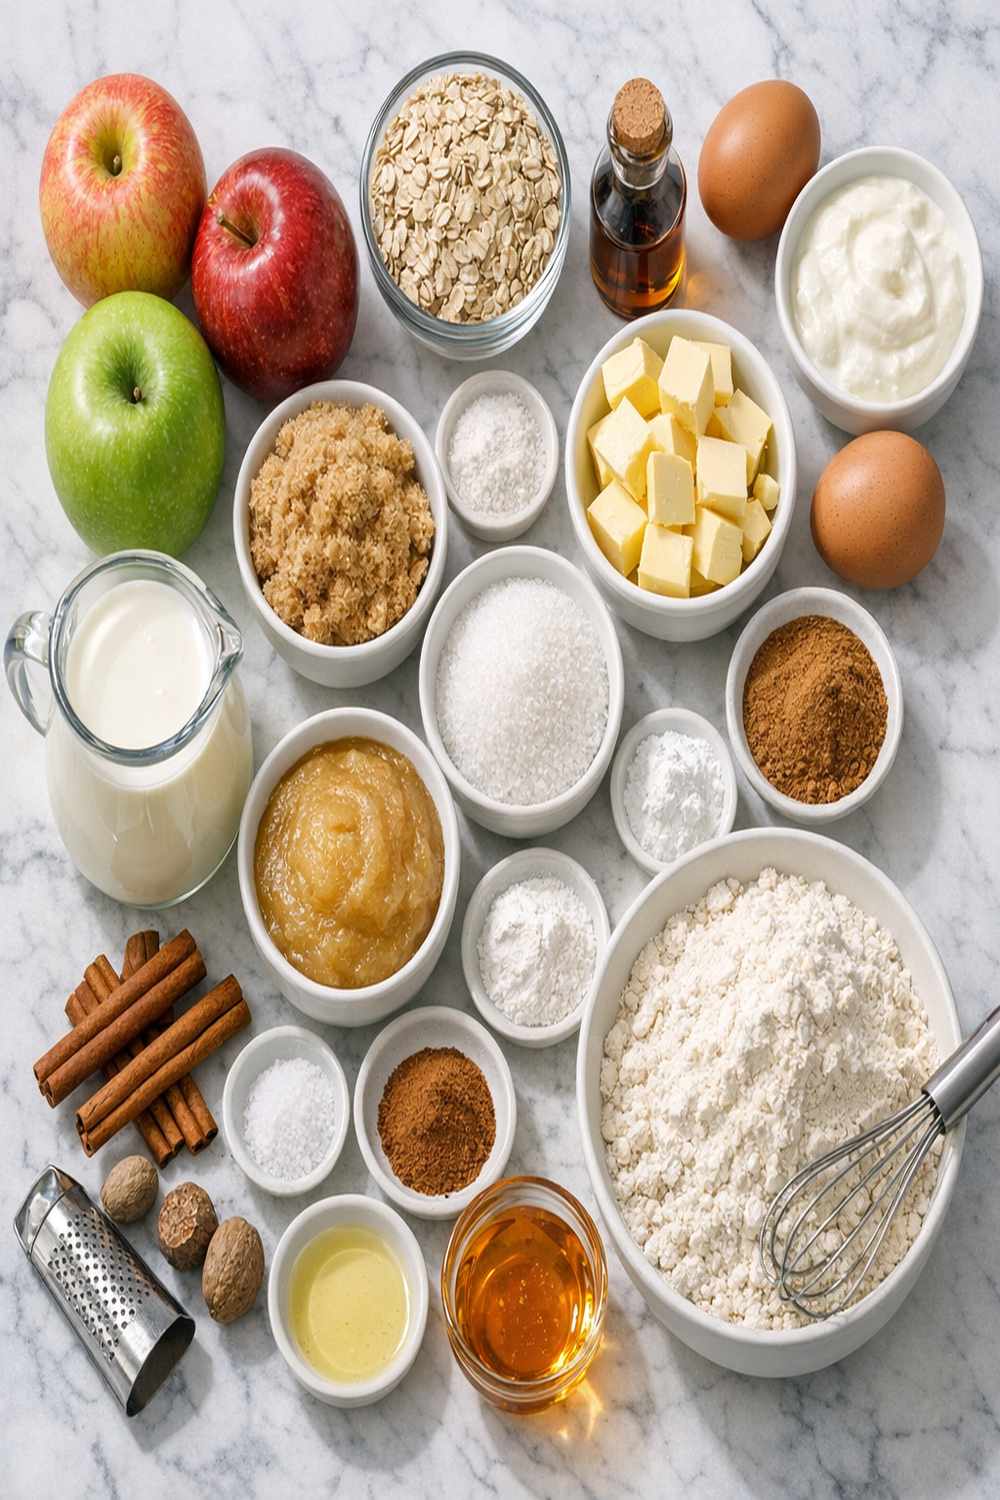
I chose these ingredients specifically because they work together like a team. The brown sugar in the cinnamon mixture brings molasses notes and moisture. The all-purpose flour gives structure without being heavy. The milk (full-fat, always) creates tenderness that feels indulgent without being dense. Let me walk you through each one so you understand *why* it matters when you’re shopping.
For the Cake
- ½ cup unsalted butter (softened to room temperature, about 68–70°F, for proper creaming)
- 1½ teaspoons baking powder (leavening agent that creates tender rise without heaviness)
- 1 large apple (Honeycrisp, Gala, or Fuji preferred, peeled and finely chopped into pea-sized pieces)
- 1½ cups all-purpose flour (spooned and leveled, never packed, for tender crumb)
- ½ cup whole milk (full-fat creates silkier crumb and prevents dryness overnight)
- ⅔ cup granulated white sugar (provides structure and lift when creamed with butter)
- 2 teaspoons pure vanilla extract (adds depth that enhances apple and cinnamon flavors)
- 2 large eggs (room temperature for smooth incorporation and better emulsification)
- 1 tablespoon fresh lemon juice (brightens apple flavor and prevents browning before baking)
For the Cinnamon Sugar Swirl
- ½ cup packed light brown sugar (molasses content adds moisture and caramel notes)
- ¼ teaspoon sea salt (balances sweetness and amplifies cinnamon flavor)
- 1½ teaspoons ground cinnamon (Ceylon cinnamon preferred for subtle sweetness over spice)
Yield: Makes one 9×5-inch loaf, approximately 10–12 slices
A quick note on the cinnamon: Ceylon (sometimes labeled “true cinnamon”) tastes brighter and less harsh than cassia cinnamon. If you only have cassia, reduce the amount to 1¼ teaspoons—it’s stronger and can overwhelm. I buy my Ceylon cinnamon in bulk from the Indian market near my house because it’s fresher and more affordable than the small containers at the grocery store.
Step-by-Step: How to Make Apple Cinnamon Bread Recipe Without Fail
I’m going to walk you through this together, and I promise each step has a reason. You’ve got this.
Step 1: Prepare Your Pan and Preheat Your Oven
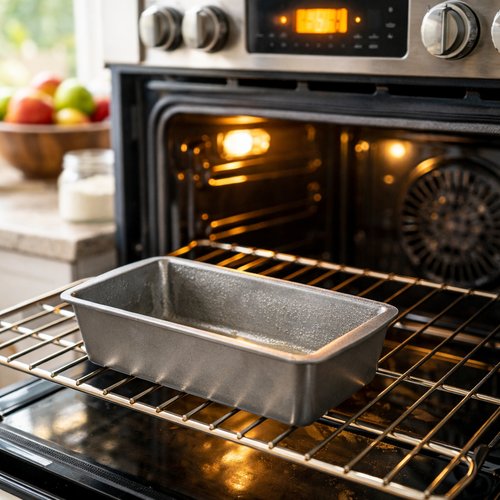
Start by preheating your oven to 350°F and positioning a rack in the center. This is the sweet spot for even baking—too high and the top browns before the center bakes through; too low and the crumb stays wet.
Now grab your 9×5-inch loaf pan. This is important: grease it generously with butter or cooking spray, then dust it lightly with flour. Don’t skip the flour step—it creates a barrier that prevents sticking even if your knife isn’t perfectly gentle during removal. I use my fingers to rub the flour into every corner, paying extra attention to the bottom and edges.
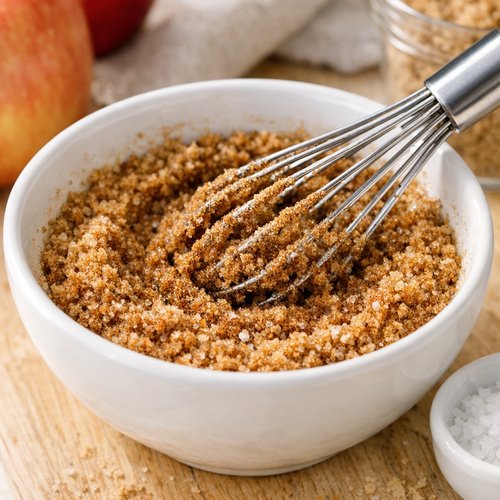
Step 2: Make Your Cinnamon Sugar Mixture
In a small bowl, whisk together your ½ cup packed light brown sugar, 1½ teaspoons cinnamon, and ¼ teaspoon sea salt. Whisk it, don’t just stir—this aerates the brown sugar and breaks up any clumps. The salt might seem odd, but salt amplifies spice flavors, making your cinnamon taste richer and more complex. Set this mixture aside. You’ll use it in two parts, so keep it visible.
Pro tip: If your brown sugar is hard and clumpy, microwave it for 10–15 seconds with a damp paper towel before measuring. It won’t affect this recipe, but it makes mixing easier.
Step 3: Prepare Your Apples
Peel, core, and finely chop your apple into pieces about the size of small peas. The consistency matters here—uniform size means even baking. Larger chunks take longer to soften and can create dry pockets in the bread. Toss your chopped apple with the tablespoon of lemon juice immediately. The acid prevents browning and adds a subtle brightness that makes the apple flavor pop without tasting sour.
Step 4: Cream Your Butter and Sugar
In a stand mixer (or by hand with an electric mixer), combine your ½ cup softened butter and ⅔ cup granulated sugar. Beat on medium speed for a full 2–3 minutes until the mixture is pale, fluffy, and resembles wet sand. This is the moment where air gets incorporated into your batter. Don’t rush it—I’ve seen people try to speed this up and end up with dense bread.
You’ll know it’s ready when the mixture has increased in volume by about 50% and looks almost mousse-like. Stop the mixer, scrape down the sides and bottom of the bowl with a spatula, and continue beating for another 30 seconds.
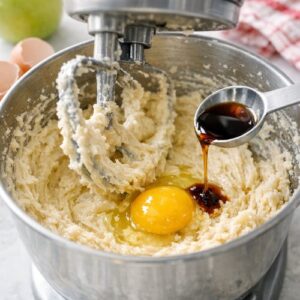
Step 5: Add Eggs and Vanilla
Add your 2 room-temperature eggs one at a time, beating on medium speed for about 20 seconds after each addition. Then add your 2 teaspoons vanilla extract. The batter might look slightly separated or curdled at this point—this is completely normal. Keep mixing for another minute, and it will come back together into a smooth, emulsified batter.
Why room temperature eggs? Cold eggs are harder to emulsify, which means your batter won’t incorporate air properly and you’ll end up with a denser crumb.
Step 6: Add Dry Ingredients and Milk
In a separate bowl, whisk together your 1½ cups all-purpose flour and 1½ teaspoons baking powder. Here’s the important part: alternate between adding dry ingredients and milk, starting and ending with dry ingredients. Add about ⅓ of the flour mixture to the butter mixture, beat briefly on low speed until just combined, then add ¼ of the milk, beat gently, then another ⅓ of flour, then the remaining milk, then the final ⅓ of flour.
Why alternate? Mixing flour and liquid separately can lead to overmixing, which develops gluten and makes the bread tough. Alternating prevents this. Stop mixing the moment you don’t see dry flour streaks anymore—do not keep beating. A few small lumps are fine. Overmixing is the silent killer of tender quick breads.

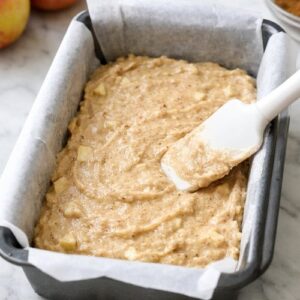
Step 7: Create the First Layer
Pour exactly half of your batter into your prepared loaf pan. Use a spatula to spread it evenly. This doesn’t need to be perfect, but aim for a relatively level surface.
Step 8: Add Your First Apple Layer
Distribute half of your lemon-coated chopped apples over the batter layer. Gently pat them down with the back of a spoon—don’t press hard, just nestle them into the batter. This keeps them from floating to the surface during baking.
Now sprinkle half of your cinnamon sugar mixture over the apples. You’ll use all of it by the end, but splitting it between two layers creates better flavor distribution.

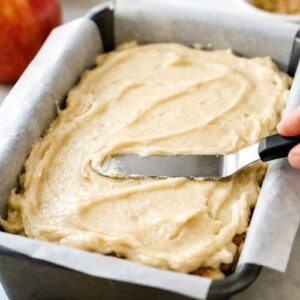
Step 9: Create the Second Batter Layer
Pour the remaining half of your batter over the apple and cinnamon sugar layer. Spread it gently to cover everything. At this point, you can’t see what’s underneath, but trust that it’s there.
Step 10: The Signature Swirl
Distribute your remaining apple pieces over the top layer of batter. Then sprinkle the remaining cinnamon sugar mixture over those apples. Now here’s the trick that makes this bread special: Using a butter knife held perfectly vertical, insert it into the batter about 1 inch from the edge. Push it straight down almost to the bottom of the pan, then drag it through the batter in a figure-eight pattern, rotating the pan as you go. You’ll make about 3–4 complete figure-eights, which creates those gorgeous ribbons of cinnamon throughout the loaf.
Why vertical instead of diagonal? A vertical knife creates defined swirls rather than streaky mess. And figure-eights distribute the cinnamon evenly instead of concentrating it in one area.

Step 11: Bake
Place your loaf pan in the center of your preheated 350°F oven. Bake for 50–55 minutes. The bread is done when a toothpick inserted into the center comes out clean or with just a few moist crumbs clinging to it (not wet batter, but not completely dry either).
About halfway through baking (around 25 minutes), your bread might start browning too quickly on top. If so, loosely tent it with aluminum foil and continue baking. This prevents the exterior from getting too dark while the interior finishes cooking.
Step 12: Cool Properly
This step separates people who get soggy bread from people who get perfect bread. Let your loaf cool in the pan for exactly 10 minutes. This allows the structure to set without trapping all the steam, which would make it gummy. After 10 minutes, run a thin knife around the edges and turn it out onto a cooling rack.
Let it cool completely on the rack before slicing—I know it smells incredible and you want to eat it immediately, but slicing warm bread results in compression and a gummy crumb. Completely cooled bread slices cleanly with a serrated knife.
The Most Common Mistakes (And How to Avoid Them)
- Skipping the creaming step or rushing through it. You end up with dense bread because there’s no air incorporated into the batter. The fix: Set a timer for 2–3 minutes and beat until the mixture is pale and increased in volume. Your bread will have a completely different texture.
- Using cold eggs straight from the fridge. Cold eggs don’t emulsify smoothly, leading to curdled-looking batter and uneven crumb. The fix: Pull eggs out of the fridge 15 minutes before you start baking. This tiny step changes everything.
- Overmixing after adding flour and milk. You develop gluten, which creates tough, dense bread instead of tender crumb. The fix: Mix on low speed and stop the moment you don’t see dry streaks. Lumps are actually good here—they disappear during baking.
- Cutting into the bread while it’s still warm. The structure hasn’t fully set, so you get compression and a gummy interior. The fix: Cool completely on a rack before slicing, even though the smell is driving you absolutely crazy.
How Do I Know When It’s Done?
Here’s the thing about baking times: every oven is different. Some run hot, some run cool. So don’t rely purely on the 50–55 minute timeframe—use your senses.
Visual cue: The top should be deep golden brown, almost caramel-colored. It shouldn’t be pale or light tan. Touch cue: The top should feel firm and spring back slightly when you press it gently with your finger. If it feels squishy, it needs more time.
The toothpick test: Insert a toothpick into the very center of the loaf (not near the edges, which bake faster). It should come out clean or with a few moist crumbs, but not wet batter. If you see liquid batter coating the toothpick, give it another 5 minutes and test again.
The knock test: Carefully turn the loaf pan on its side and tap the bottom. A fully baked bread sounds hollow and solid, not dense. This is honestly one of the most reliable indicators if you do it a few times and remember what it sounds like.
Troubleshooting: When Things Go Wrong
- Bread is dense and heavy throughout. Cause: Either you didn’t cream the butter and sugar long enough, or you overmixed the batter after adding flour. Solution: For next time, set a timer for 2–3 minutes on the creaming step and fold flour in gently. For this bake, it’s still edible—toast it and enjoy it differently.
- Bread is dry and crumbly even when fresh. Cause: You likely baked it too long or your oven runs hot. Solution: Check the bread at 45 minutes next time instead of 50. Also verify your oven temperature with an oven thermometer—many home ovens are 25–50°F off from what they display.
- Top is burned but center is still wet. Cause: Your oven rack is too high, or your oven runs hot on top. Solution: Tent with foil halfway through baking and move your rack lower next time. You can also lower the oven temperature to 325°F and bake for slightly longer (60–65 minutes).
- Apples sank to the bottom. Cause: You didn’t pat them down into the first layer, or your batter was too thin. Solution: Make sure you’re spreading the first layer of batter evenly and patting apples down gently. Also, ensure your batter isn’t runny—it should coat a spoon but still hold its shape.
Can I Store Apple Cinnamon Bread Recipe?
Yes, and it actually gets better over time as flavors meld. Here’s how I manage storage in my kitchen:
Room temperature (best for the first 2 days): Wrap cooled bread in plastic wrap or place it in a sealed container. It stays tender and flavorful. After day 2, it begins to dry out a bit.
Refrigerator (extends life to 5–7 days): Wrap tightly in plastic wrap and store in an airtight container. This slows staling but can make the texture slightly more compact. I use this method when I need to make bread ahead for busy weeks.
Freezer (best option for longer storage, up to 3 months): Slice the bread, wrap individual slices in plastic wrap, then place them all in a freezer-safe zip-top bag with the air pressed out. This way you can thaw individual slices as needed. Toast frozen slices directly in the toaster for about 2 minutes and they taste fresh-baked.
Pro tip: If your bread has been in the fridge and feels dense, toasting brings it back to life. The heat reactivates the crumb structure and makes it feel tender again.
Expert’s Nutritional Insight
As a registered dietitian, I want you to understand what’s actually in this bread and why it works nutritionally. One slice (based on a 10-slice loaf) contains approximately 245 calories, 8 grams of protein, 12 grams of fat, and 32 grams of carbohydrates, with about 2 grams of fiber from the apple and whole grain structure.
Here’s what matters: The whole milk and unsalted butter provide fat-soluble vitamins (A, D, and E) that help absorb those nutrients and keep you satisfied longer. This isn’t a low-fat food, and it shouldn’t be. The fat is what makes this bread taste rich and keeps it moist for days. One slice is a perfectly reasonable breakfast or snack when paired with protein—I often serve mine with a dollop of Greek yogurt or almond butter.
The apple contributes soluble fiber, which supports digestive health and helps stabilize blood sugar. This is why the bread doesn’t cause a sharp glucose spike despite being a sweet treat. The cinnamon actually has research behind it showing it may help moderate blood sugar response as well.
What Can I Serve With Apple Cinnamon Bread Recipe?
This bread is beautifully flexible. Here’s how I serve it depending on the moment:
- For breakfast with Greek yogurt and a drizzle of honey – the protein in yogurt balances the sweetness and makes it a complete morning meal
- Toasted with almond butter – creates a satisfying snack that keeps you full for hours
- With a simple dusting of powdered sugar for a more elegant presentation – feels like bakery food with zero effort
- Alongside coffee or chai tea – the warm spices complement both beautifully
- Warmed with whipped cream for dessert – sounds indulgent, feels simple
If you’re looking to expand your bread repertoire beyond apple cinnamon, my Banana Chocolate Bread Recipe Moist uses similar techniques and is perfect for when you have ripe bananas on the counter. And if you want to explore other flavor-forward bakes, my this simple cake teaches the same moisture-management principles applied to cake.
Make-Ahead Guide: Because Busy Moms Need Options
I understand that baking doesn’t always happen when you want it to. Here’s how I use this recipe when I’m planning ahead:
Prep the batter the night before: Mix everything except the apples up through step 6. Cover the bowl and refrigerate overnight. In the morning, fold in the prepared apples (toss them with lemon juice right before using) and proceed with layering. You might need to add 3–5 minutes to the baking time since the batter will be cold.
Bake double batches on Sunday: I make two loaves at once, cool one completely, wrap it, and freeze it. During the week when chaos hits, I have a ready-made breakfast or after-school snack. One slice toasted with almond butter has saved my sanity more times than I can count.
Freeze the sliced bread: After baking and cooling, slice the loaf and place slices on a parchment-lined baking sheet in the freezer for 2 hours. Once frozen solid, transfer them to a freezer bag. This prevents them from sticking together, and you can pull out exactly how many slices you need.
Seasonal Variations: Keeping Things Fresh Year-Round
The beauty of this recipe is how adaptable it is. Here are my favorite seasonal tweaks:
Fall (September–November): Substitute half the apple (one medium apple) with ½ cup fresh or canned pumpkin puree. Add ¼ teaspoon ground nutmeg and ⅛ teaspoon ground ginger to your cinnamon sugar mixture. You get apple-spice bread that feels cozy without any pumpkin spice lattes.
Winter (December–February): Add ¼ cup dried cranberries (chopped finely) mixed into your cinnamon sugar. The tartness cuts through the sweetness beautifully and adds a festive pop of color. Toast this version and serve with cream cheese for a simple brunch addition.
Spring (March–May): Use one medium apple plus ½ cup fresh or frozen blueberries (don’t thaw if frozen). The blueberries give you antioxidants and a subtle tartness. Add ½ teaspoon lemon zest to your cinnamon sugar mixture for brightness.
Summer (June–August): Since stone fruits are at their peak, try substituting the apple with one large peach, peeled and finely chopped. Add ¼ teaspoon almond extract to your vanilla. This creates a peach-cinnamon bread that tastes like summer in every bite. If you love stone fruits, also check out my this fruit cobbler for another way to celebrate the season.
Apple Cinnamon Bread Recipe
Ingredients
Method
- Start by preheating your oven to 350°F and positioning a rack in the center. This is the sweet spot for even baking—too high and the top browns before the center bakes through; too low and the crumb stays wet. Now grab your 9x5-inch loaf pan. This is important: grease it generously with butter or cooking spray, then dust it lightly with flour. Don't skip the flour step—it creates a barrier that prevents sticking even if your knife isn't perfectly gentle during removal. I use my fingers to rub the flour into every corner, paying extra attention to the bottom and edges.

- In a small bowl, whisk together your ½ cup packed light brown sugar, 1½ teaspoons cinnamon, and ¼ teaspoon sea salt. Whisk it, don't just stir—this aerates the brown sugar and breaks up any clumps. The salt might seem odd, but salt amplifies spice flavors, making your cinnamon taste richer and more complex. Set this mixture aside. You'll use it in two parts, so keep it visible. Pro tip: If your brown sugar is hard and clumpy, microwave it for 10–15 seconds with a damp paper towel before measuring. It won't affect this recipe, but it makes mixing easier.
- Peel, core, and finely chop your apple into pieces about the size of small peas. The consistency matters here—uniform size means even baking. Larger chunks take longer to soften and can create dry pockets in the bread. Toss your chopped apple with the tablespoon of lemon juice immediately. The acid prevents browning and adds a subtle brightness that makes the apple flavor pop without tasting sour.

- In a stand mixer (or by hand with an electric mixer), combine your ½ cup softened butter and ⅔ cup granulated sugar. Beat on medium speed for a full 2–3 minutes until the mixture is pale, fluffy, and resembles wet sand. This is the moment where air gets incorporated into your batter. Don't rush it—I've seen people try to speed this up and end up with dense bread. You'll know it's ready when the mixture has increased in volume by about 50% and looks almost mousse-like. Stop the mixer, scrape down the sides and bottom of the bowl with a spatula, and continue beating for another 30 seconds.

- Add your 2 room-temperature eggs one at a time, beating on medium speed for about 20 seconds after each addition. Then add your 2 teaspoons vanilla extract. The batter might look slightly separated or curdled at this point—this is completely normal. Keep mixing for another minute, and it will come back together into a smooth, emulsified batter. Why room temperature eggs? Cold eggs are harder to emulsify, which means your batter won't incorporate air properly and you'll end up with a denser crumb.
- In a separate bowl, whisk together your 1½ cups all-purpose flour and 1½ teaspoons baking powder. Here's the important part: alternate between adding dry ingredients and milk, starting and ending with dry ingredients. Add about ⅓ of the flour mixture to the butter mixture, beat briefly on low speed until just combined, then add ¼ of the milk, beat gently, then another ⅓ of flour, then the remaining milk, then the final ⅓ of flour. Why alternate? Mixing flour and liquid separately can lead to overmixing, which develops gluten and makes the bread tough. Alternating prevents this. Stop mixing the moment you don't see dry flour streaks anymore—do not keep beating. A few small lumps are fine. Overmixing is the silent killer of tender quick breads.
- Pour exactly half of your batter into your prepared loaf pan. Use a spatula to spread it evenly. This doesn't need to be perfect, but aim for a relatively level surface.
- Distribute half of your lemon-coated chopped apples over the batter layer. Gently pat them down with the back of a spoon—don't press hard, just nestle them into the batter. This keeps them from floating to the surface during baking. Now sprinkle half of your cinnamon sugar mixture over the apples. You'll use all of it by the end, but splitting it between two layers creates better flavor distribution.
- Pour the remaining half of your batter over the apple and cinnamon sugar layer. Spread it gently to cover everything. At this point, you can't see what's underneath, but trust that it's there.
- Distribute your remaining apple pieces over the top layer of batter. Then sprinkle the remaining cinnamon sugar mixture over those apples. Now here's the trick that makes this bread special: Using a butter knife held perfectly vertical, insert it into the batter about 1 inch from the edge. Push it straight down almost to the bottom of the pan, then drag it through the batter in a figure-eight pattern, rotating the pan as you go. You'll make about 3–4 complete figure-eights, which creates those gorgeous ribbons of cinnamon throughout the loaf. Why vertical instead of diagonal? A vertical knife creates defined swirls rather than streaky mess. And figure-eights distribute the cinnamon evenly instead of concentrating it in one area.
- Place your loaf pan in the center of your preheated 350°F oven. Bake for 50–55 minutes. The bread is done when a toothpick inserted into the center comes out clean or with just a few moist crumbs clinging to it (not wet batter, but not completely dry either). About halfway through baking (around 25 minutes), your bread might start browning too quickly on top. If so, loosely tent it with aluminum foil and continue baking. This prevents the exterior from getting too dark while the interior finishes cooking.
- This step separates people who get soggy bread from people who get perfect bread. Let your loaf cool in the pan for exactly 10 minutes. This allows the structure to set without trapping all the steam, which would make it gummy. After 10 minutes, run a thin knife around the edges and turn it out onto a cooling rack. Let it cool completely on the rack before slicing—I know it smells incredible and you want to eat it immediately, but slicing warm bread results in compression and a gummy crumb. Completely cooled bread slices cleanly with a serrated knife.
Notes
FAQs
Can I use whole wheat flour instead of all-purpose flour?
Yes, but with modifications. Whole wheat flour is thirstier than all-purpose flour, meaning it absorbs more liquid. If you substitute 100% whole wheat, increase the milk to ¾ cup and add another ¼ teaspoon baking powder. The bread will be denser and nuttier, which some people prefer. I typically do a 50/50 blend—¾ cup all-purpose and ¾ cup whole wheat—for a middle ground that’s still tender but more nutritious.
What’s the best way to store this at room temperature without it drying out?
Wrap the cooled loaf tightly in plastic wrap, then place it in a bread box or sealed container away from direct light and heat. A bread box is ideal because it maintains humidity while allowing slight air circulation. The plastic wrap is key—it prevents moisture loss. Check it after 2 days; if it feels like it’s starting to dry, pop individual slices in the freezer.
Can I reduce the sugar without completely changing the recipe?
You can reduce the white sugar to ½ cup, but don’t reduce the brown sugar in the swirl—those molasses notes are important for flavor balance. The trade-off is the bread won’t rise quite as much and won’t brown as deeply. I don’t recommend going lower than this, as the sugar is doing structural work in the batter, not just adding sweetness.
Why does my bread have tunnels or large air pockets inside?
Tunneling happens when you overmix the batter after adding flour, which develops gluten and creates big air bubbles instead of small, even crumbs. Solution: Mix on low speed and stop the moment you don’t see dry streaks. It’s also possible you over-creamed the butter and sugar, incorporating too much air initially. Aim for 2–3 minutes of creaming, not more.
Can I make this recipe in muffin tins instead of a loaf pan?
Absolutely. Divide the batter between a greased 12-cup muffin tin following the same layering method (half batter, apples and cinnamon, remaining batter, apples and cinnamon swirl). Bake at 350°F for 20–25 minutes instead of 50–55. The smaller size means faster baking, so check them at 18 minutes. These make perfect grab-and-go breakfasts and freeze beautifully. You can even wrap individual muffins and freeze them for up to 3 months.
More Recipes You’ll Love
- these fresh muffins – uses the same creaming technique for tender crumb and pairs perfectly with coffee
- this simple cake – for when you want to explore more spiced flavors in a different format
- Blueberry Bar Recipe – another fruit-forward bake with similar texture principles
A Final Word From My Kitchen to Yours
You now have the knowledge to bake apple cinnamon bread that’s tender, flavorful, and stays moist for days. More importantly, you understand the *why* behind each step, which means you can troubleshoot if something feels off and even adapt this recipe to your preferences.
I still make this every couple of weeks. My kids know the smell of it baking means something special is about to happen. That friend of my daughter’s? She asks for my version now, and I love sharing it with her family. This bread has a way of doing that—turning a simple breakfast into a moment that matters.
Grab your apples, preheat your oven, and bake with confidence. You’re going to make something absolutely delicious, and your family is going to remember it. Happy cooking!