This post contains affiliate links. As an Amazon Associate I earn from qualifying purchases.
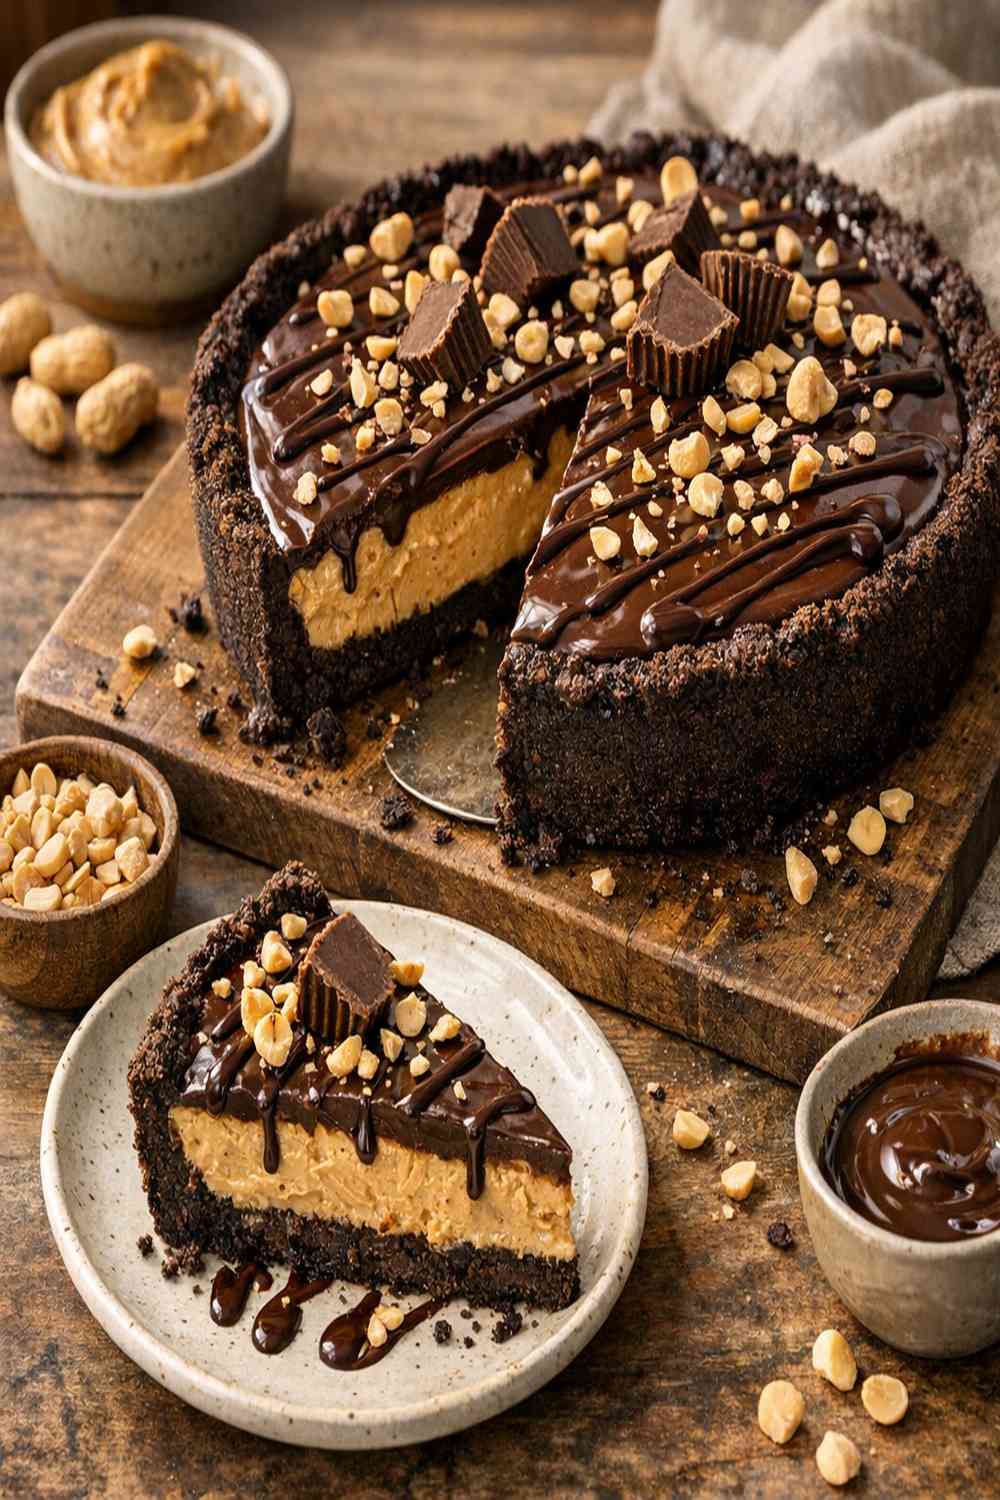
Getting kids to eat chocolate peanut butter pie feels impossible—until you try this approach. I’m Susan Roberts, a registered dietitian and California mom who’s learned that the secret to feeding a picky family isn’t hiding nutrition; it’s creating moments where everyone wants to dig in together. This no-bake pie has become my answer to “Mom, what’s for dessert?” on nights when I need something that feels indulgent but actually works nutritionally. It’s rich enough to satisfy chocolate cravings, creamy enough to win over texture-sensitive eaters, and simple enough that my kids genuinely ask to help make it. If you’re looking for other show-stopping desserts that families love, my these fresh muffins and Brookie Recipe are family favorites in our house too.
Chocolate Peanut Butter Pie Recipe the Whole Family Will Actually Eat (Picky Eaters Included)
I’ll never forget the first time I made this pie for my youngest’s birthday party. She’s my texture-sensitive kiddo—the one who picks out “weird” bits from everything and makes dining out feel like negotiating a peace treaty. I was genuinely nervous. But something magical happened when that creamy peanut butter layer met the silky chocolate ganache. She asked for seconds. Then thirds. Even my husband, who usually waves off dessert, sat at the kitchen counter with a fork and a slice, savoring every bite.
What made this moment so special wasn’t just the taste—it was watching her feel proud that she’d helped create it. This pie became a kitchen memory, not just food on a plate. That’s exactly what I want to share with you today.
Why Kids Love This Version
As a registered dietitian, I’ve learned that kids don’t eat what we force them to eat; they eat what they feel proud to have made or excited to discover. This chocolate peanut butter pie hits multiple sensory notes that children respond to positively, while keeping ingredients you can actually pronounce.
- Cookies-and-cream crust that feels like dessert magic – Kids already love Oreos, so beginning with a familiar favorite builds confidence immediately. There’s no “sneaking” happening here; they know exactly what’s going into their pie, which removes anxiety for picky eaters.
- Silky peanut butter layer that’s neither too sweet nor too dense – Many peanut butter desserts veer toward tooth-achingly sweet, but the balance here feels more like a treat and less like eating pure sugar. Kids notice that difference even if they can’t articulate it.
- Glossy chocolate ganache that feels fancy but tastes familiar – There’s something about that professional-looking finish that makes kids feel like they’re eating something restaurant-quality. It’s confidence on a plate.
- No-bake preparation means less time waiting and more time tasting – Kids have short attention spans and shorter patience fuses. This pie chills rather than bakes, which means fewer opportunities for frustration and more opportunities for excitement.
How to Get Kids Involved in Making This
One of my favorite parts about this recipe is how naturally it divides into age-appropriate tasks. Kitchen involvement builds food confidence and creates eating enthusiasm that no amount of “just try it” can manufacture.
- Ages 3-5: Crushing and helping press the crust – Let toddlers work with the food processor (supervised, of course) to hear those Oreos break down, or put them in a Ziploc bag and let them smash with a rolling pin or wooden spoon. Little hands love the sensory experience, and they’re genuinely helping. Once the crumbs are ready, let them help press the mixture into the pie pan, even if it’s messy. They’ll be invested in what comes next because they started it.
- Ages 6-9: Measuring and mixing the peanut butter layer – School-age kids are ready for measuring responsibility and can handle an electric mixer (with your hands nearby for safety). Let them measure the peanut butter, powdered sugar, and softened butter. They can operate the mixer on low speed while you supervise, and they’ll get genuine pride from creating that creamy layer. This is where math meets cooking naturally.
- Ages 10+: Managing the chocolate ganache with guidance – Older kids can handle heating cream on the stovetop with close supervision, learning the difference between a simmer and a boil. They can pour hot cream over chocolate (you control the heating element and the final pour), whisk the mixture smooth, and develop real cooking skills. This is where they start understanding technique, not just following steps.
The Ingredients – Hidden Nutrition, Visible Deliciousness
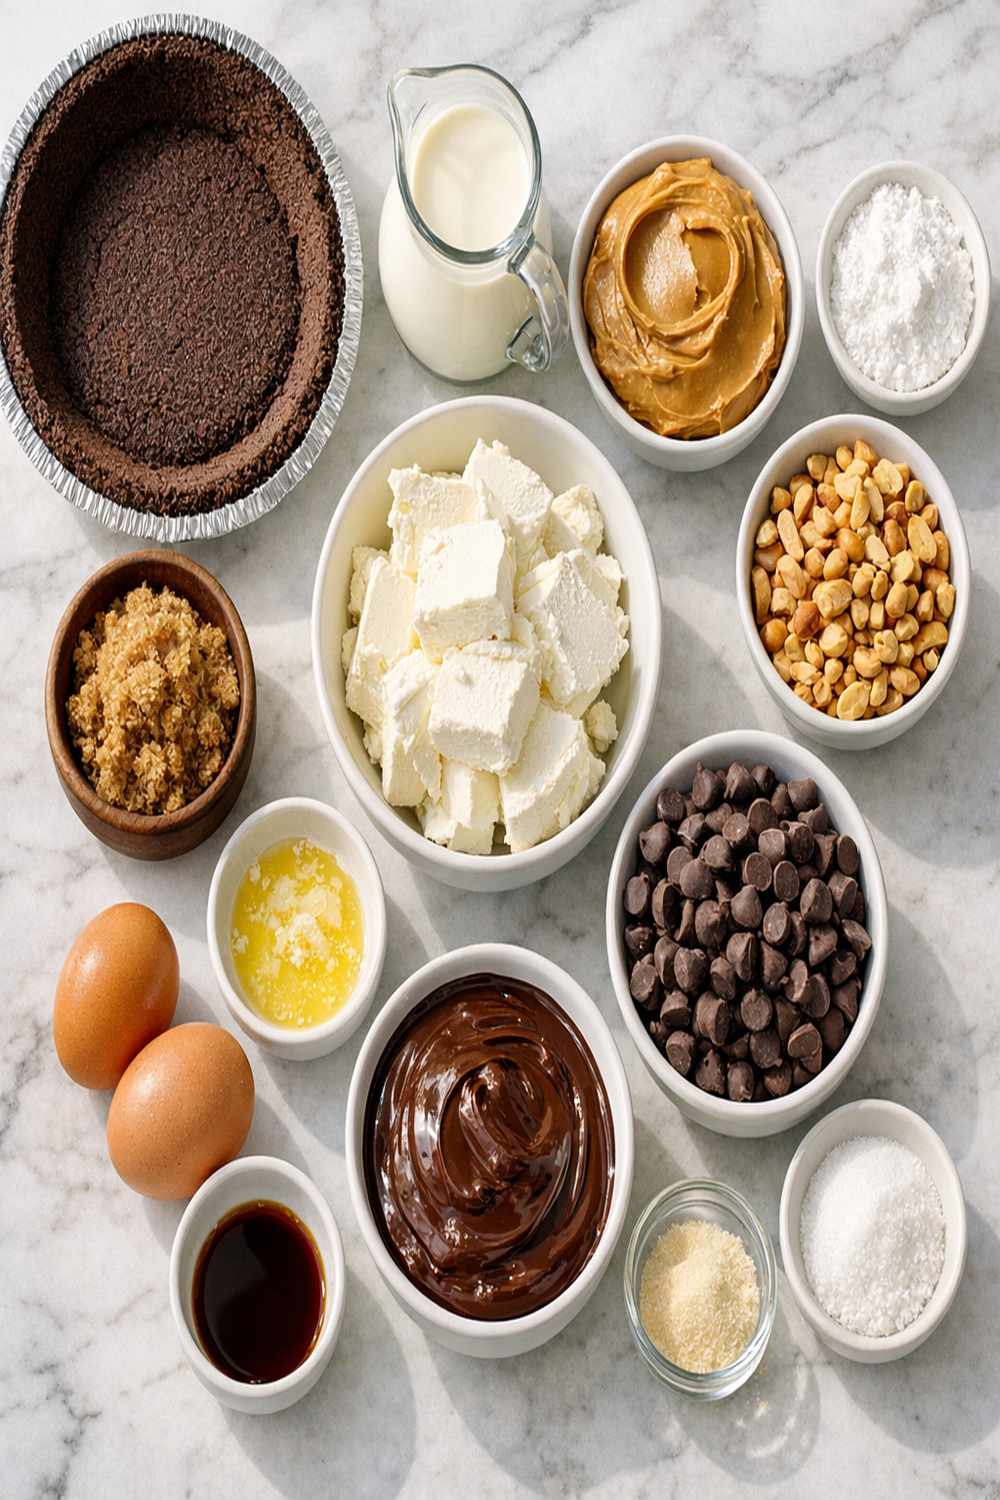
Here’s the registered dietitian truth: this pie isn’t trying to masquerade as health food. It’s dessert. But quality dessert ingredients create a nutritionally superior version of indulgence. The peanut butter brings protein and healthy fats that sustain rather than spike blood sugar. The dark chocolate (if you choose it) offers antioxidants. And the whole combination creates a dessert that actually satisfies, meaning kids eat smaller portions and feel more satisfied.
For the Oreo Cookie Crust
- 36 whole Oreo cookies (about one 14.3-ounce package; look for fresh packages near the back of the shelf)
- 8 tablespoons unsalted butter (melted and slightly cooled, measured carefully)
For the Peanut Butter Layer
- 8 tablespoons unsalted butter (softened to room temperature, never melted)
- 1½ cups creamy natural peanut butter (the kind with just peanuts and salt, no added oils; stir well before measuring)
- 1 cup powdered sugar (spooned and leveled, never packed into the measuring cup)
For the Chocolate Ganache
- 1 cup semi-sweet or dark chocolate chips (use quality chocolate you’d actually eat on its own)
- 2 tablespoons creamy peanut butter (same type as above)
- ¼ teaspoon sea salt (optional but highly recommended; it balances chocolate intensity)
- ½ cup heavy whipping cream (full-fat, cold from the refrigerator)
Makes 8 generous slices or 10 modest slices, depending on your family’s appetite and serving style.
How to Make Chocolate Peanut Butter Pie Recipe for the Whole Family
This is genuinely one of the most forgiving recipes you’ll ever make. There are no exact temperatures, no proofing times, no room for failure if you follow the basic logic. It’s a celebration of texture meeting flavor, and your family participates at every single stage.
Step 1: Create Your Cookie Crust Foundation
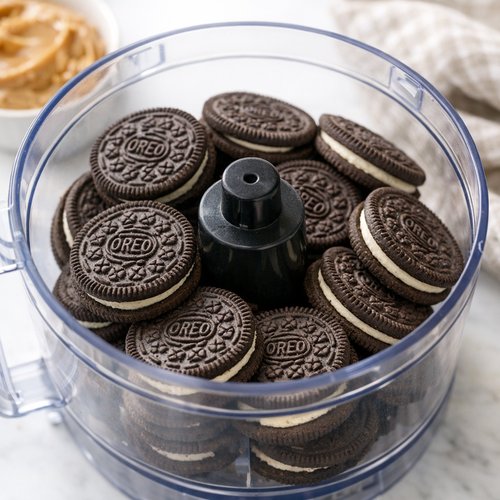
Start by placing your whole Oreo cookies into a food processor. (If you don’t have one, a blender works beautifully, or use the classic Ziploc bag and rolling pin method if you want the kids fully involved in the sensory experience.) Pulse until you have fine crumbs—aim for the texture of wet sand, not powder. This usually takes about 30-40 seconds in a food processor.
Pour your melted butter into a separate bowl and stir in the Oreo crumbs until every piece is moistened. The mixture should resemble damp chocolate soil. If it feels too dry, add a touch more melted butter, one tablespoon at a time.
Safety note: Keep kids away from the food processor blade, and if using the Ziploc method, supervise closely to prevent seal ruptures. Once the mixture is ready, let kids help press it firmly into your pie pan, working from the center outward and up the sides. Freeze for 10 minutes while you move to the next layer.
Step 2: Whip Together the Peanut Butter Magic
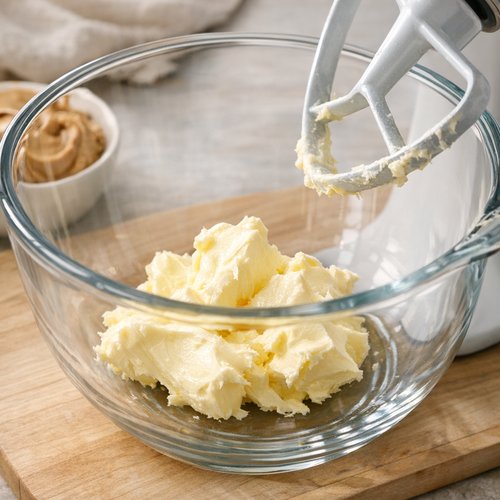
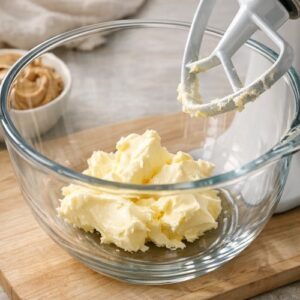
While the crust sets, place your softened butter into a large mixing bowl (or the bowl of a stand mixer if you have one). Make sure this butter is genuinely soft—it should leave an indent when you press it with your finger but shouldn’t be greasy. Add your peanut butter and powdered sugar to the same bowl.
Beat on low speed for about 2-3 minutes, using a hand mixer or stand mixer. You’re aiming for a completely smooth, creamy consistency with no visible streaks of butter. The mixture should look like fluffy peanut butter frosting.
Pro tip: If your mixture seems a bit stiff, add one tablespoon of heavy cream and beat again. This creates an even silkier texture that spreads beautifully.
Remove your frozen crust from the freezer and spread this peanut butter mixture into an even layer, smoothing the top with a spatula. Place the pie back in the freezer while you create the ganache.
Step 3: Prepare Your Chocolate Components
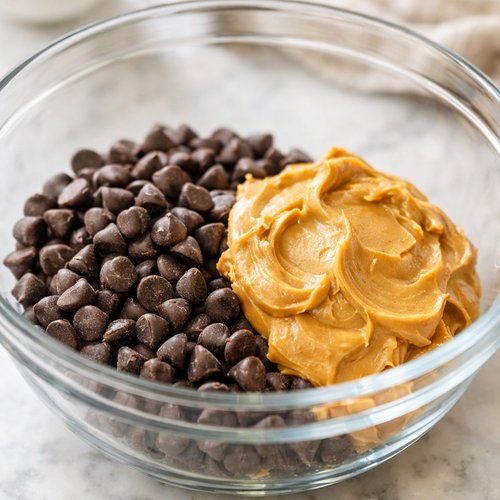
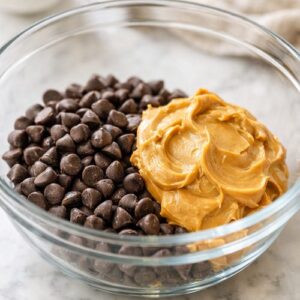
Measure your chocolate chips and peanut butter into a large heat-proof bowl (glass works beautifully so you can see what’s happening). This is a perfect task for older kids—they can handle the dry measuring and pouring.
In a small saucepan, pour your heavy whipping cream over medium-high heat. You’re looking for it to reach a gentle rolling simmer—it should show active bubbles around the edges and small wisps of steam, but it shouldn’t be a furious boil. This usually takes about 3-4 minutes. Keep kids at a safe distance from the stovetop, and supervise this step closely.
Step 4: Create the Silky Ganache
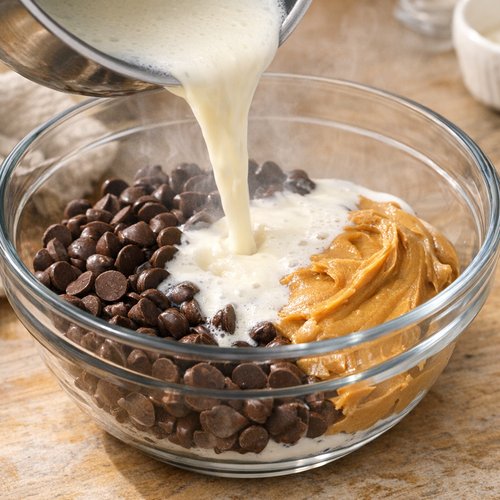
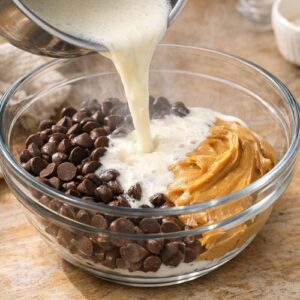
Once your cream is gently simmering, carefully pour it over the chocolate chips and peanut butter in your heat-proof bowl. Let it sit undisturbed for exactly 5 minutes. This rest period allows the heat of the cream to melt the chocolate gently, creating a smooth emulsion rather than a grainy mess.
After 5 minutes, begin whisking slowly and deliberately until everything is completely smooth and glossy. You’ll feel the chocolate soften and incorporate into the cream. If you see any small flecks of unmelted chocolate, keep whisking gently; they’ll eventually give way.
If you added that pinch of sea salt, whisk it in now. It creates a beautiful complexity that makes people ask “What is that flavor?” without being able to identify it.
Step 5: Layer and Chill to Perfection
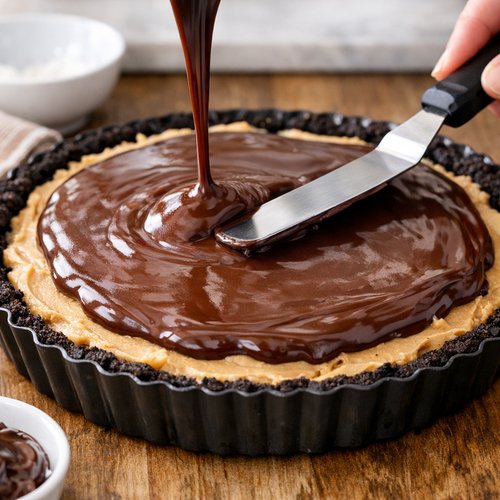
Remove your pie from the freezer and carefully pour the warm chocolate ganache over the peanut butter layer. Smooth it gently with a spatula, working from the center outward. Don’t worry about it being absolutely perfect—that rustic elegance is part of the charm.
Return the pie to the refrigerator (no need for the freezer at this point) and let it chill, loosely covered with plastic wrap, for at least 1 hour. Ideally, allow 2-3 hours or even overnight for the flavors to meld and the texture to set into that perfect firm-but-creamy consistency.
Customization Station: Let Everyone Build Their Own
One of the most powerful tools in my parenting-and-nutrition toolkit is the simple act of giving kids control. When picky eaters get to customize their own plate, they’re infinitely more likely to eat what’s on it. This pie lends itself beautifully to customization.
Consider setting up a “pie bar” where family members can choose their own serving style:
- The Purist Slice – Traditional three-layer pie served cold, straight from the refrigerator. This is textbook perfection and what most people will choose.
- The Warm Version – Let pie sit at room temperature for 5-10 minutes so the peanut butter layer becomes softer and more mousse-like while the chocolate stays set. Some kids prefer this warmer texture.
- The Topping Bar – Set out optional toppings: crushed Oreos, chopped peanuts, mini chocolate chips, a drizzle of peanut butter, or a dollop of whipped cream. Let family members customize their own slice. It sounds indulgent, but it returns control to the eater and creates excitement around dessert.
- The Mini Version – Use a smaller pie pan or muffin tin to create individual servings. Kids are often more willing to finish a smaller portion that feels specially made for them.
Scaling for Different Family Sizes
This recipe scales beautifully, and I’ve made it in quantities ranging from half-sized (feeding two people) to doubled (feeding a crowd). Here’s how:
For a family of 2-3: Make the full recipe as written. You’ll have leftovers, which actually improves after sitting in the refrigerator for a day or two as flavors meld. Portion out individual slices and wrap in plastic wrap for grab-and-go desserts throughout the week.
For a family of 4-5: This is the sweet spot for the full recipe. You’ll have 8-10 slices total, which means everyone gets seconds if they want them, or you’ll have some for the next day.
For a family of 6+: Double the entire recipe and use a 10-inch pie pan or split between two standard 9-inch pans. Layer the crust and fillings as written, and increase your chilling time by 30-45 minutes for the larger volume.
For individual servings: Divide the crust ingredients between 6-8 ramekins or small mason jars, pressing lightly. Layer the peanut butter mixture, then top with chocolate ganache. These “pie cups” are perfect for lunchboxes, single servings, or when you’re feeding people with different preferences.
Can I Store Chocolate Peanut Butter Pie Recipe?
This is where the pie gets even more practical for busy families. Storage is genuinely simple.
Refrigerator storage: Cover the pie loosely with plastic wrap and refrigerate for up to 5 days. The texture remains perfect—the chocolate ganache stays set but still creamy, and the peanut butter layer maintains its silky consistency.
Freezer storage: Wrap individual slices tightly in plastic wrap, then aluminum foil, and freeze for up to 3 weeks. Thaw in the refrigerator for 2-3 hours before serving, or eat straight from the frozen state if you prefer a firmer, almost mousse-like texture (some of my kids actually prefer it frozen).
Lunchbox tip: Pack a slice in an insulated container with an ice pack. It’ll thaw by lunchtime to a perfect eating consistency, transforming an ordinary school lunch into something genuinely special.
Make-ahead magic: This pie actually tastes better the next day. Make it the evening before serving, and you’ll notice the layers have melded into a more cohesive, sophisticated flavor profile.
Nutrition Information
Per slice (based on 8 slices), this pie provides approximately:
- Calories: 485
- Total Fat: 32g (saturated fat: 14g)
- Protein: 11g
- Carbohydrates: 48g (dietary fiber: 2g, sugar: 38g)
- Sodium: 285mg
Here’s what I want you to understand from a registered dietitian perspective: yes, this is a dessert, and it has sugar. But that 11 grams of protein per slice (courtesy of the peanut butter) creates satiety and slows sugar absorption compared to a sugary dessert with no protein. The healthy fats from peanut butter improve nutrient absorption and support brain development in growing kids.
That said, portion control matters. A proper slice—roughly one-eighth of the pie—is genuinely satisfying and leaves kids feeling full rather than hungry for more sugar thirty minutes later. The chocolate also contains flavonoids, which research from the USDA shows have antioxidant properties, though I wouldn’t recommend eating pie as your primary antioxidant source.
Expert’s Nutritional Tip: The combination of peanut butter and chocolate creates what’s called a “flavor-taste” pairing that satisfies on a neurological level. When kids eat this pie, their brain registers genuine satisfaction, not just sweetness. This is why they’re content with a single slice rather than asking for thirds. Understanding this has changed how I approach feeding my family—sometimes the most nutritionally sound choice is the one that actually satisfies.
What to Serve Alongside for a Complete Family Meal
Dessert doesn’t have to stand alone. Consider these simple accompaniments that round out the experience without overshadowing the star of the show. If you’re serving this as a special treat after dinner, fresh fruit provides color and lightness. If you’re making it the centerpiece of a dessert table, pair it with complementary flavors.
- Fresh berries (raspberries, strawberries, or blackberries) – Their tartness cuts through the richness of the pie beautifully, and kids love picking them from the plate individually. Plus, they add visual contrast that makes the dessert feel more special.
- Vanilla ice cream or whipped cream – A small dollop alongside a slice transforms it into something feel-good without being over the top. Let kids choose whether they want it.
- Milk (cold or warm, depending on preference) – This is pure California dietitian wisdom: a glass of cold milk alongside chocolate peanut butter pie feels like coming home. Warm milk creates a cozy, after-dinner vibe.
- Fresh apple slices or pear wedges – Something about the clean crunch of fresh fruit next to a creamy dessert appeals to even texture-sensitive eaters.
If you’re looking for other desserts to pair with this pie for a full dessert spread, my these homemade cookies and these homemade cookies complement this beautifully without competing with the flavors.

Chocolate Peanut Butter Pie Recipe
Ingredients
Method
- Start by placing your whole Oreo cookies into a food processor. (If you don't have one, a blender works beautifully, or use the classic Ziploc bag and rolling pin method if you want the kids fully involved in the sensory experience.) Pulse until you have fine crumbs—aim for the texture of wet sand, not powder. This usually takes about 30-40 seconds in a food processor. Pour your melted butter into a separate bowl and stir in the Oreo crumbs until every piece is moistened. The mixture should resemble damp chocolate soil. If it feels too dry, add a touch more melted butter, one tablespoon at a time. Safety note: Keep kids away from the food processor blade, and if using the Ziploc method, supervise closely to prevent seal ruptures. Once the mixture is ready, let kids help press it firmly into your pie pan, working from the center outward and up the sides. Freeze for 10 minutes while you move to the next layer.
- While the crust sets, place your softened butter into a large mixing bowl (or the bowl of a stand mixer if you have one). Make sure this butter is genuinely soft—it should leave an indent when you press it with your finger but shouldn't be greasy. Add your peanut butter and powdered sugar to the same bowl. Beat on low speed for about 2-3 minutes, using a hand mixer or stand mixer. You're aiming for a completely smooth, creamy consistency with no visible streaks of butter. The mixture should look like fluffy peanut butter frosting. Pro tip: If your mixture seems a bit stiff, add one tablespoon of heavy cream and beat again. This creates an even silkier texture that spreads beautifully. Remove your frozen crust from the freezer and spread this peanut butter mixture into an even layer, smoothing the top with a spatula. Place the pie back in the freezer while you create the ganache.
- Measure your chocolate chips and peanut butter into a large heat-proof bowl (glass works beautifully so you can see what's happening). This is a perfect task for older kids—they can handle the dry measuring and pouring. In a small saucepan, pour your heavy whipping cream over medium-high heat. You're looking for it to reach a gentle rolling simmer—it should show active bubbles around the edges and small wisps of steam, but it shouldn't be a furious boil. This usually takes about 3-4 minutes. Keep kids at a safe distance from the stovetop, and supervise this step closely.
- Once your cream is gently simmering, carefully pour it over the chocolate chips and peanut butter in your heat-proof bowl. Let it sit undisturbed for exactly 5 minutes. This rest period allows the heat of the cream to melt the chocolate gently, creating a smooth emulsion rather than a grainy mess. After 5 minutes, begin whisking slowly and deliberately until everything is completely smooth and glossy. You'll feel the chocolate soften and incorporate into the cream. If you see any small flecks of unmelted chocolate, keep whisking gently; they'll eventually give way. If you added that pinch of sea salt, whisk it in now. It creates a beautiful complexity that makes people ask "What is that flavor?" without being able to identify it.
- Remove your pie from the freezer and carefully pour the warm chocolate ganache over the peanut butter layer. Smooth it gently with a spatula, working from the center outward. Don't worry about it being absolutely perfect—that rustic elegance is part of the charm. Return the pie to the refrigerator (no need for the freezer at this point) and let it chill, loosely covered with plastic wrap, for at least 1 hour. Ideally, allow 2-3 hours or even overnight for the flavors to meld and the texture to set into that perfect firm-but-creamy consistency.

FAQs
Can I use natural peanut butter with the oil on top instead of creamy peanut butter?
Yes, absolutely. I actually prefer natural peanut butter for the flavor depth, but you need to stir it well before measuring so you’re getting a consistent ratio of peanuts to oil. The peanut butter layer might feel slightly less dense, but it’ll still be delicious. Some people stir the oil into the peanut butter thoroughly, while others pour off excess oil before measuring. Both approaches work; just be consistent.
My kids are allergic to peanuts. Can I make this with almond butter or sunflower seed butter instead?
Completely. Sunflower seed butter creates a slightly less sweet profile, which some people prefer. Almond butter shifts the flavor toward nuttier and more sophisticated. Use the same measurements—1½ cups for the middle layer, 2 tablespoons for the ganache. The texture will be nearly identical, and honestly, some families prefer the variation. My neighbor makes this with tahini for a Middle Eastern twist that’s genuinely stunning.
What if I don’t have a food processor to crush the Oreos?
Use a blender, a rolling pin and Ziploc bag, a meat mallet, or even the bottom of a glass. The Ziploc bag method is actually my favorite because kids can do most of the work, it’s less cleanup, and there’s genuine sensory satisfaction in the smashing. Place the Oreos in a sealed bag and let the kids go wild for 5 minutes. It’s therapy and dessert preparation combined.
My pie cracked slightly when I poured the hot ganache over the peanut butter layer. Is it ruined?
Not even close. Those cracks add character, and honestly, nobody will notice or care once it’s sliced and served. If it bothers you aesthetically, a small crack is perfect for melting in a tiny drizzle of extra chocolate ganache. It heals the appearance and tastes like an intentional design choice.
Can I make this ahead for a party, and how far in advance?
Yes, make it up to 2 days ahead. Store it covered in the refrigerator, and it’ll actually taste better because the flavors meld. Remove it from the refrigerator about 10 minutes before serving if you like it slightly softer. For a party, individual “pie cups” in small jars or ramekins are gorgeous, can be made 24 hours ahead, and transport beautifully. Just keep them cold until serving.
Common Mistakes to Avoid
Here’s what I’ve learned from making this pie dozens of times and watching others make it:
Mistake 1: Using cold, hard butter for the peanut butter layer. Cold butter won’t incorporate smoothly and creates a grainy texture. Soften your butter at room temperature for 30-45 minutes before starting. You should be able to leave a clear fingerprint in it. If you forget, cut it into small cubes and let it sit for 15 minutes—it’ll soften faster.
Mistake 2: Boiling the cream instead of simmering it. A vigorous boil can cause the cream to break slightly or create little specks when it hits the chocolate. You want a gentle, rolling simmer—small bubbles around the edges, not an aggressive boil. This creates a smooth, glossy ganache every time.
Mistake 3: Chilling for too long without covering the pie. The refrigerator absorbs odors, and uncovered pie will take on that subtle freezer taste. Always cover with plastic wrap, even loosely. It also prevents the chocolate from drying out slightly on top.
Mistake 4: Cutting the pie while it’s too cold. Straight from the refrigerator, it’s quite firm. Let it sit at room temperature for 5-10 minutes before slicing. You’ll get cleaner cuts and a more pleasant eating texture. Use a sharp knife and wipe it between cuts for presentation.
Seasonal Variations
While this pie is genuinely perfect year-round, small tweaks create seasonal versions that feel fresh and intentional:
Spring/Summer Version: Lighten the feel by using white chocolate chips mixed with the dark chocolate (do half and half), or add a tablespoon of fresh lemon zest to the ganache for brightness. Serve with fresh strawberries or raspberries.
Fall Version: Add a teaspoon of cinnamon and a quarter-teaspoon of cayenne pepper to the peanut butter layer. The warmth feels seasonal, and the cayenne adds depth without heat. Serve with apple cider for dunking (or sipping separately).
Winter Version: Create a peppermint chocolate ganache by stirring a quarter-teaspoon of peppermint extract and a handful of crushed candy canes into the chocolate layer. It transforms the pie into something holiday-appropriate and feels like a completely different dessert.
Make-Ahead Guide: Professional Meal Prep Edition
As a registered dietitian and working mom, I’ve learned that the secret to feeding a family isn’t cooking daily; it’s cooking strategically and storing smartly. This pie is one of my make-ahead champions.
Option 1: Complete Assembly Sunday Evening Make the entire pie on Sunday and refrigerate until Friday. Slice individual portions on Sunday evening or Monday morning, wrap them in plastic wrap and then foil, and freeze. Thaw in the refrigerator as needed for grab-and-go desserts throughout the week. This works beautifully for lunchboxes.
Option 2: Crust and Peanut Butter Layer Prep Make the crust and peanut butter layer together (up to Step 2) and refrigerate for up to 3 days. Make the ganache fresh the day you’re serving. This gives you homemade freshness with maximum convenience.
Option 3: Individual Cup Prep Layer the crust and fillings into small mason jars or ramekins up to 24 hours ahead. These are stunning for hosting and require zero plating on serving day. Pack them straight from the refrigerator into a cooler if you’re bringing them somewhere.
More Family-Friendly Recipes
- this simple cake – Another no-bake wonder that feels fancy but comes together in 30 minutes
- this simple cake – A creamy, sophisticated dessert that surprisingly appeals to kids
- these homemade cookies – A crowd-pleaser that makes the kitchen smell incredible
I genuinely believe that some of the most important moments in family life happen around food. Not the food itself necessarily, but the act of creating something together, watching it transform, and then sharing it. This chocolate peanut butter pie has become part of my family’s story. It’s the dessert my kids request for their birthdays, the one they help me make, and the one they’re genuinely proud to serve to friends.
When my youngest asked to make this pie again last month (her third time), I realized it wasn’t about the chocolate or the peanut butter anymore. It was about standing on a stool in our California kitchen, feeling capable, feeling included, feeling like her contribution mattered. That’s what I hope you and your family experience when you make this together.
Happy cooking!