This post contains affiliate links. As an Amazon Associate I earn from qualifying purchases.
If you’ve always wanted to make a flourless dairy-free chocolate cake but felt intimidated by its elegant simplicity, this is your starting point. I promise you—this cake is actually easier than traditional layer cakes, and it tastes like something from a high-end bakery. No special equipment, no mysterious techniques. Just real chocolate, a few pantry staples, and about 40 minutes of your time. Whether you’re navigating dietary restrictions, exploring whole-food desserts, or simply craving something decadent that doesn’t require flour or butter, this recipe delivers. I created this specifically for families like mine who want restaurant-quality results on a Tuesday night. Ready to become a flourless cake person? Let’s go.
How to Make Flourless Dairy-Free Chocolate Cake for the First Time (You’ve Got This)
I’ll never forget the first time I attempted a flourless chocolate cake—it was for my daughter’s school bake sale, and I was absolutely convinced I’d mess it up. I’d spent years perfecting traditional cakes with flour and buttercream, and something about the idea of a cake with no flour felt like I was breaking all the rules I’d learned as a dietitian. I worried it would be dense, gummy, or collapse the moment I turned it out of the pan.
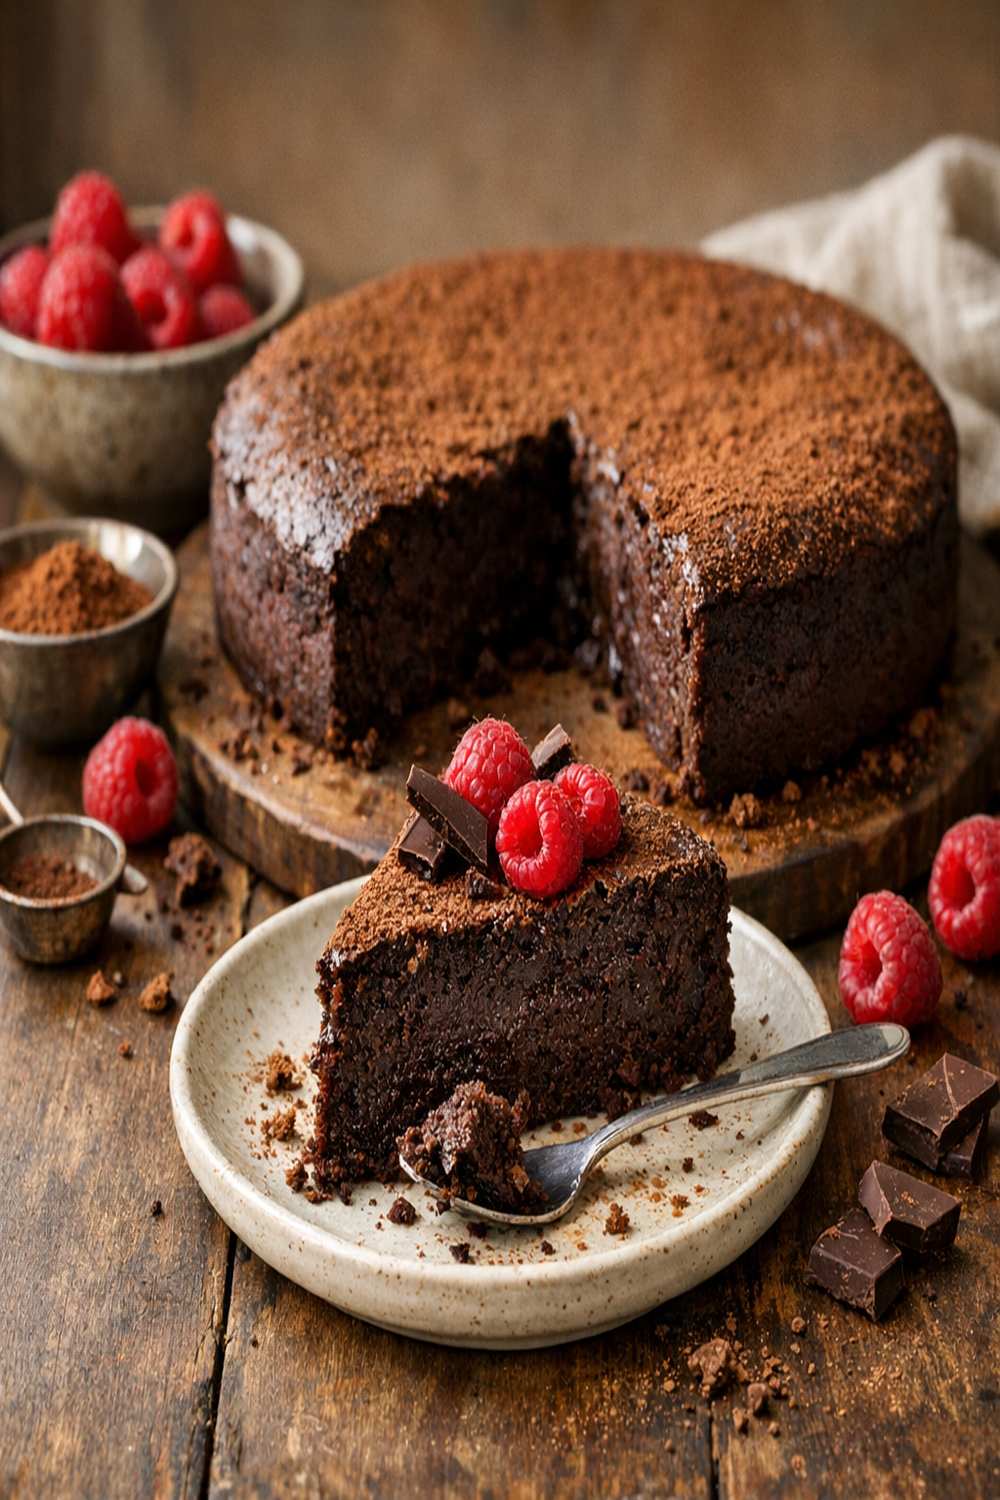
But here’s what shocked me: it was genuinely better than most cakes I’d made before. The texture was silky and fudgy—almost like flourless brownies had a sophisticated older sibling. The chocolate flavor sang without any flour muddying it. And when parents asked for the recipe (especially those avoiding gluten or dairy), I realized I’d stumbled onto something special.
That cake taught me something I now tell every home baker: sometimes the “fancy” recipe is actually the simpler one. This flourless version requires less technique than you’d think, and it comes together in stages that feel very manageable, even for a first-timer. If you can melt chocolate and stir eggs, you can make this cake.
What to Expect Before You Start
Let me set your expectations so there are no surprises. This cake is genuinely straightforward, but it does have a few personality quirks you should know about upfront. Understanding what’s normal will help you feel confident every step of the way.
- Baking time is quick (25-30 minutes) – This isn’t a 45-minute cake. The crackly top appears fast, and the center will jiggle slightly when you pull it from the oven. This is exactly what you want. The cake continues to set as it cools, creating that signature fudgy interior. First-timers often worry the cake is underbaked, but trust the jiggle test.
- The batter looks shockingly thin – Unlike traditional cake batter, flourless chocolate cake batter resembles thick pudding or mousse. It should be pourable but not thin like pancake batter. When you first add eggs one at a time, you might think something went wrong. It didn’t. This is the magic happening.
- The cake deflates slightly as it cools – Don’t panic. A 2-inch cake will settle to about 1.5 inches as it cools, which is completely normal and actually desirable. It means the interior is setting into that silky, fudgy texture.
- Coconut oil is essential here – Unlike butter-based cakes, the coconut oil keeps this cake supremely moist and dairy-free. Don’t substitute with vegetable oil (it won’t provide enough flavor) or cold oil (it won’t blend smoothly).
Equipment You’ll Need (And What You Can Skip)
One of my favorite things about this recipe is that you probably already own everything required. No stand mixer, food processor, or fancy gadgets needed. Here’s exactly what will make your life easier:
- One 9-inch round cake pan – Any standard cake pan works. I prefer dark nonstick pans because they conduct heat evenly and prevent overbrowning on the edges. If you only have a glass pan, reduce oven temperature by 25 degrees to prevent the sides from getting too crispy.
- Parchment paper – This is your secret weapon for easy removal. Cut a circle slightly larger than your pan’s base and press it in after greasing. It prevents sticking and gives you confidence when turning the cake out.
- One microwave-safe mixing bowl (large) – You’ll melt chocolate here, then build the entire batter in this same bowl. One bowl means minimal cleanup and fewer things to wash.
- A silicone spatula or wooden spoon – For stirring chocolate and folding in the cocoa powder. Silicone is my preference because it scrapes the bowl cleanly and won’t scratch nonstick surfaces.
- A microwave – For gentle chocolate melting. A double boiler works beautifully too, but honestly, the microwave method is faster and just as reliable once you learn the rhythm.
- An oven thermometer (optional but honestly game-changing) – Oven temperatures vary wildly between homes. A $5 oven thermometer ensures your cake bakes perfectly every time. I learned this the hard way after three batches.
The Ingredients – A Beginner’s Shopping Guide
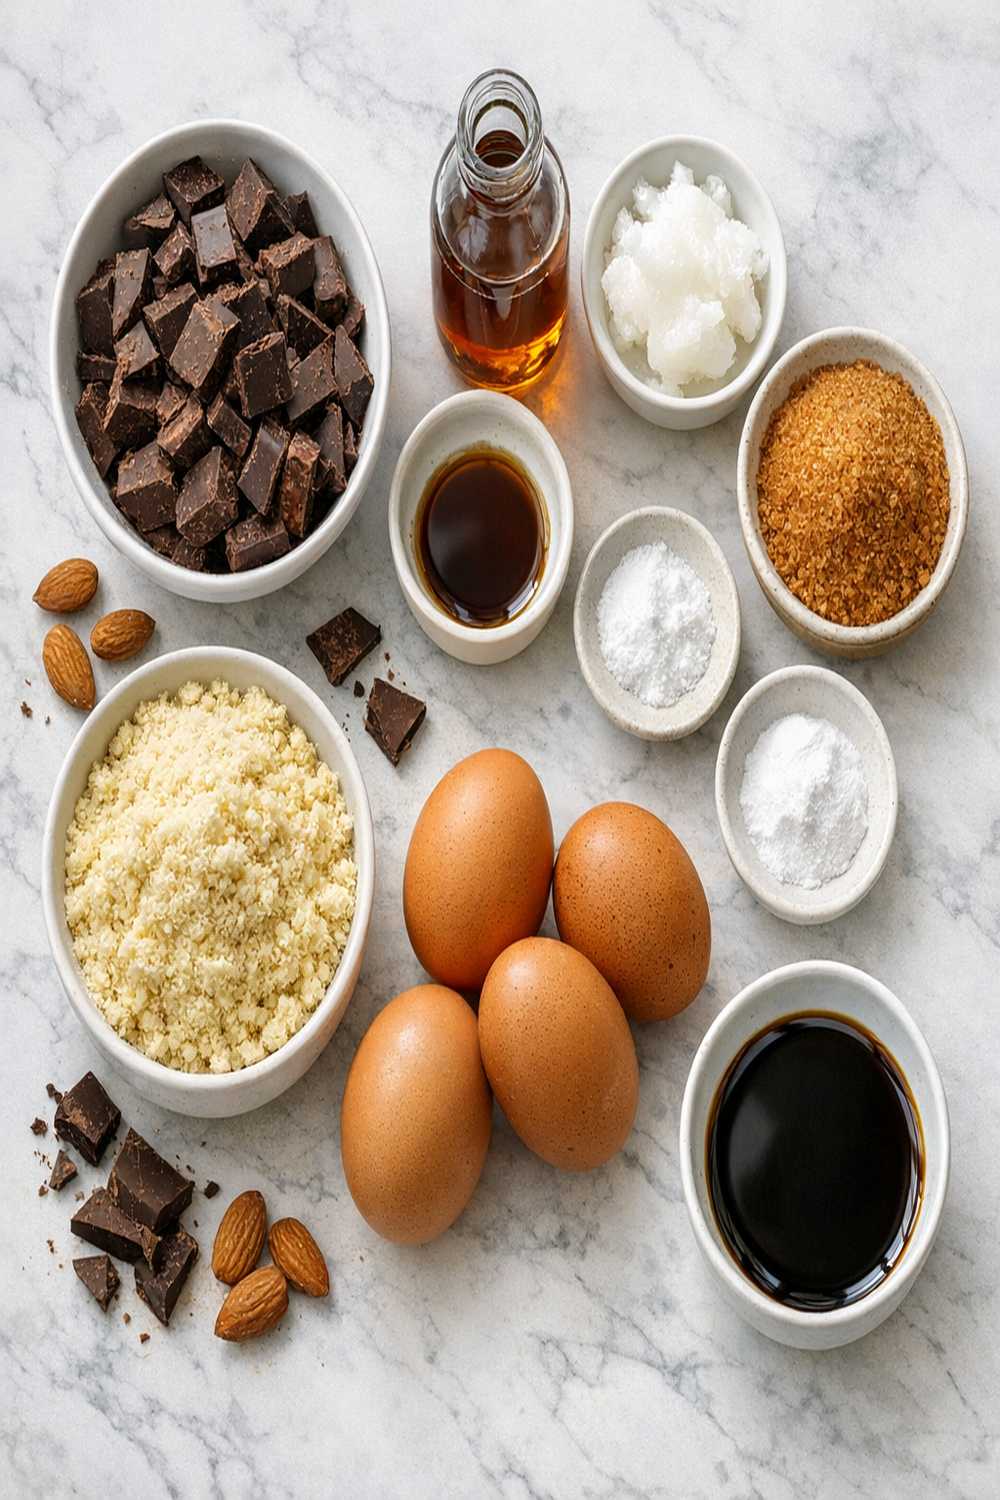
Every single ingredient in this cake matters because there’s no flour to hide behind. You’re tasting pure chocolate, quality coconut oil, and the delicate structure created by eggs. Let me walk you through where to find each one and exactly what to look for.
For the Cake
- 5 large eggs, room temperature (room-temperature eggs blend more smoothly with the chocolate mixture and create a better crumb)
- 7 ounces bittersweet dark chocolate, roughly chopped (look for 70% cacao content at specialty grocers, Costco, or Trader Joe’s—I prefer brands like Ghirardelli or Lindt because they melt smoothly)
- ¾ cup refined coconut oil at room temperature (not virgin, which has coconut flavor—refined coconut oil is neutral-tasting and ideal for baking; found in the baking aisle near oils)
- ½ teaspoon vanilla extract, pure (optional but adds subtle depth to the chocolate flavor)
- ¼ teaspoon espresso powder (optional but highly recommended—just a pinch deepens chocolate flavor without making it taste like coffee)
- 1⅓ cups organic cane sugar (white sugar works fine too—this is what provides sweetness and helps create the cake’s structure)
- 1 tablespoon unsweetened cocoa powder (Dutch-processed or natural—both work, though Dutch-processed has a deeper chocolate flavor)
- ¼ teaspoon coarse sea salt like Maldon (the final sprinkle that makes chocolate sing by balancing sweetness—don’t skip this)
For Serving (Optional)
- Powdered sugar for dusting (about 1 tablespoon per serving, optional)
- Dairy-free whipped cream, coconut yogurt, or fresh berries (pairs beautifully for serving)
Where to Find These at Your Regular Grocery Store: Quality chocolate is non-negotiable here because it’s literally the star ingredient. I buy mine from the baking aisle or bulk section. Refined coconut oil lives near other oils. Eggs should come from your dairy case, and I always grab the ones that are room temperature (or let yours sit out while you gather other ingredients). Cocoa powder and sea salt are in the baking aisle, often near the chocolate chips.
Beginner-Friendly Swaps: If you can’t find refined coconut oil, melted butter works in a pinch (though it’s not dairy-free). If 70% chocolate feels expensive, 60% works too—just add 1 extra teaspoon of cocoa powder to compensate. Espresso powder is truly optional, but even a tiny pinch transforms this from “good” to “people-asking-for-the-recipe” good.
Step-by-Step: Your First Flourless Dairy-Free Chocolate Cake
I’m going to walk you through this like I’m standing in your kitchen beside you. Read through all the steps once before you start, then come back here as you cook. This isn’t a recipe where surprises pop up—every stage builds logically on the last.
Step 1: Prepare Your Pan and Preheat the Oven
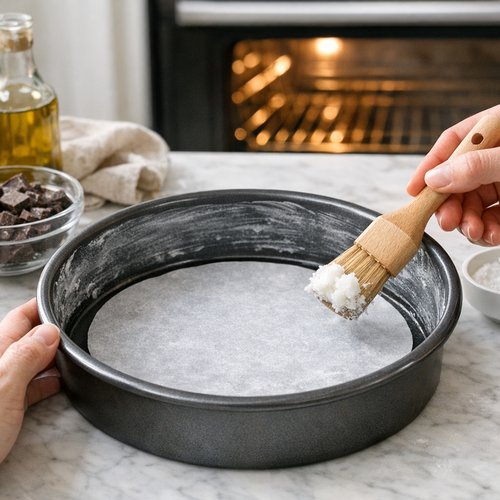
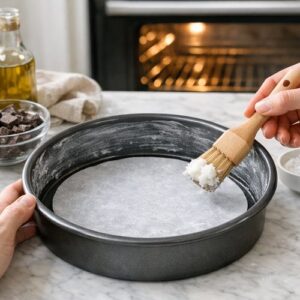
Turn your oven on to 375°F right now—don’t wait. Ovens need 15-20 minutes to reach full temperature, and you want the oven hot and ready when your batter is ready. While the oven preheats, take your 9-inch round cake pan and brush the bottom and sides lightly with refined coconut oil. I use about ½ teaspoon total, applied with a folded paper towel or clean fingers. Then tear a piece of parchment paper about 6 inches square and press it into the bottom of the pan, smoothing out air bubbles. The oil acts like glue, holding the parchment in place. This step eliminates 90% of demolition cakes, so I’m very serious about it.
Step 2: Chop Your Chocolate and Gather Your Melting Ingredients
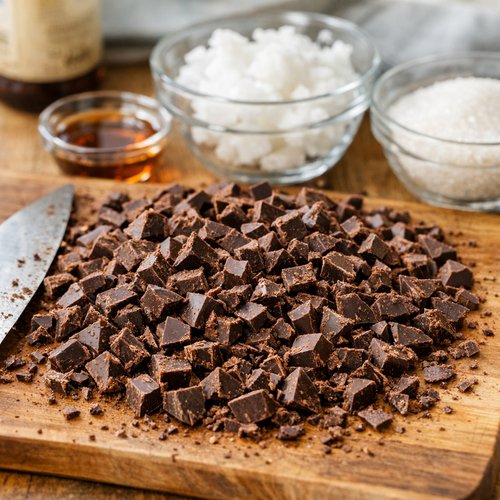
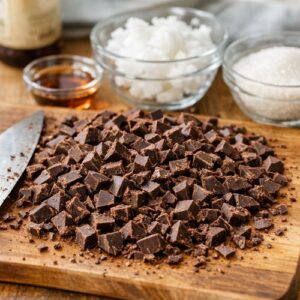
Take your 7 ounces of bittersweet chocolate and chop it into pieces roughly the size of your pinky fingernail. Smaller pieces melt faster and more evenly, which prevents overheating. Place the chopped chocolate and ¾ cup of coconut oil (at room temperature—this is important because cold oil will cool down hot chocolate and make it thick) into a large microwave-safe bowl. Don’t start melting yet; just get everything staged and ready. Having ingredients prepped before you start microwave melting prevents scrambling when heat is involved.
Step 3: Melt Chocolate and Coconut Oil Gently
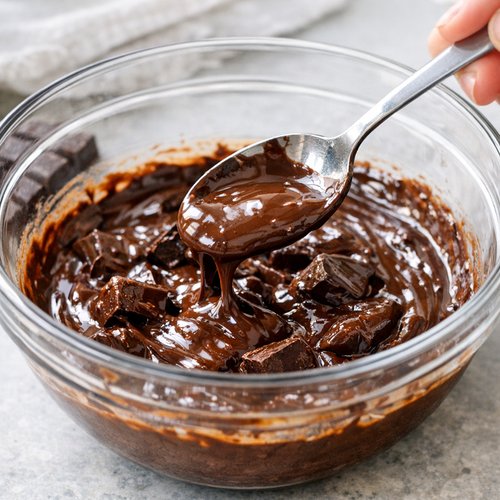
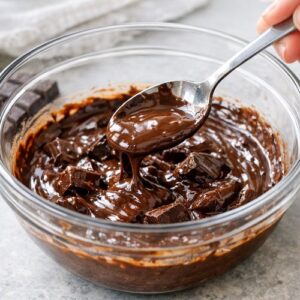
Microwave the chocolate-oil mixture in 30-second intervals, stirring thoroughly after each burst. This gradual approach prevents chocolate from seizing or becoming grainy. After the first 30 seconds, stir for about 10 seconds, then microwave for another 30 seconds. Continue until the mixture is completely smooth and shiny, with no visible chocolate chunks remaining. This usually takes 60-90 seconds total, depending on your microwave’s power. When it’s done, the mixture should look glossy and pourable—like warm chocolate pudding. The chocolate should feel warm to your touch, not hot. If it’s steaming hot, let it cool for 30 seconds before moving to the next step, because you’re about to add raw eggs, and you don’t want them to scramble.
Step 4: Add Sugar and Mix Until Incorporated
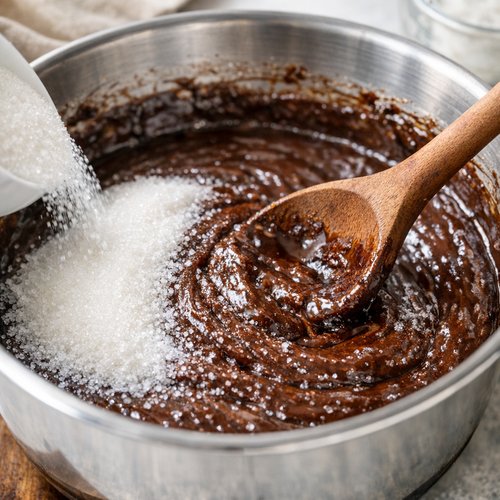
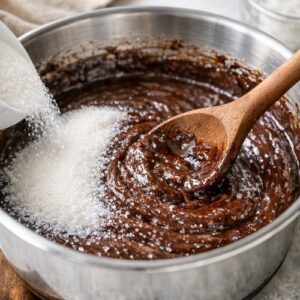
Pour 1⅓ cups of sugar into the warm chocolate mixture and stir well for about 30 seconds. The sugar should distribute evenly throughout, and the mixture will become slightly thicker and lighter in color—almost like chocolate frosting. This is your creaming step without a mixer. Don’t worry about achieving volume; you’re simply distributing the sugar throughout so it dissolves evenly. Stir until no visible sugar grains remain.
Step 5: Add Eggs One at a Time
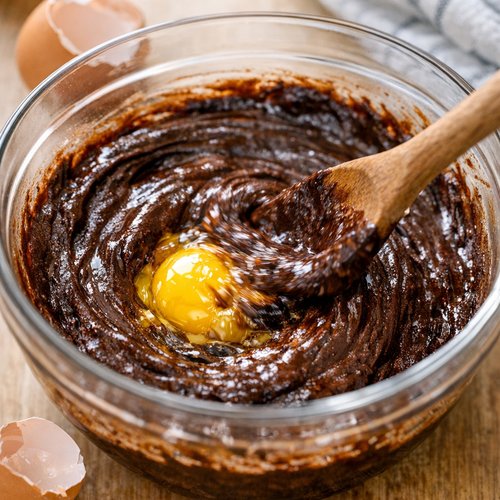
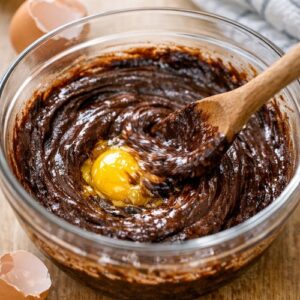
This step is crucial, so I’m going to be very specific. Crack one room-temperature egg into the chocolate mixture and stir vigorously for about 30 seconds. The batter will look jiggly, almost like it’s not blending—this is exactly right. The egg will eventually incorporate, creating a slightly thicker mixture. Once the first egg is mostly integrated (small streaks are fine), crack in the second egg and repeat. Continue this process with all five eggs, one at a time. Each egg should be mostly incorporated before adding the next, though you don’t need a perfectly smooth mixture between additions. After all five eggs are in, you’ll have a batter that resembles thick, creamy pudding or mousse. This batter should jiggle slightly when you shake the bowl and pour slowly from a spoon. If it looks thin and runny like regular cake batter, something went wrong; if it looks thick and chunky, keep stirring—eggs sometimes take a moment to fully incorporate.
Step 6: Add Cocoa Powder, Vanilla, and Espresso Powder
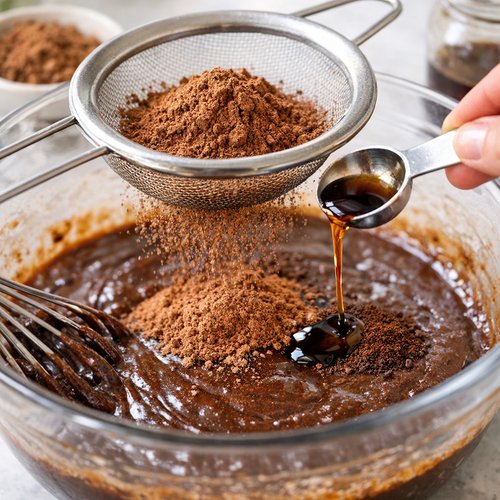
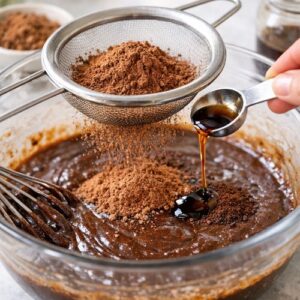
Sift 1 tablespoon of unsweetened cocoa powder directly into the batter (sifting prevents lumps). Add ½ teaspoon of pure vanilla extract (optional but wonderful) and ¼ teaspoon of espresso powder if you have it (also optional but transforms the chocolate flavor). Stir everything together gently until the cocoa powder completely disappears and the batter is uniform in color. This should take about 1 minute of stirring. The batter should now look like rich, thick chocolate mousse—no streaks of cocoa powder visible anywhere.
Step 7: Pour Batter Into Prepared Pan
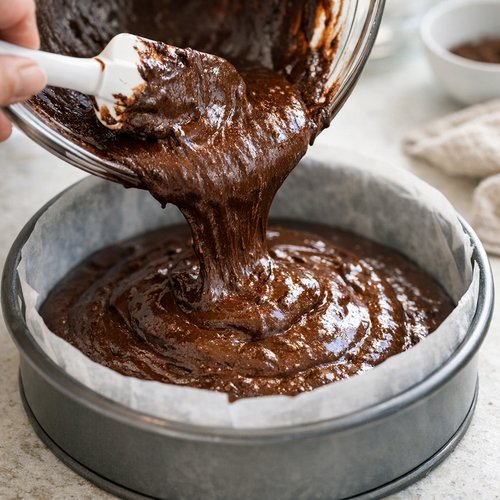
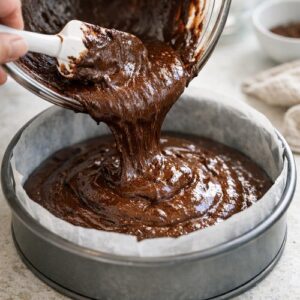
Carefully pour the batter into your prepared cake pan, using a spatula to scrape out every last bit into the bowl (this batter doesn’t waste easily). Smooth the top gently with the spatula—you’re aiming for a roughly even surface, not a perfectly smooth one. Some rustic texture on top is beautiful. The batter should fill the pan about three-quarters of the way full.
Step 8: Season the Top and Bake
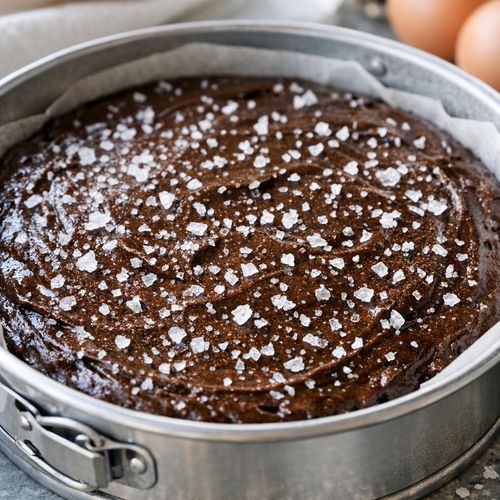
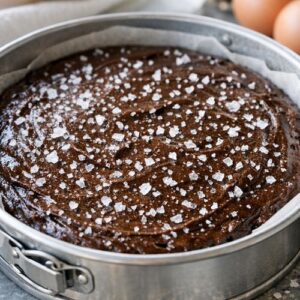
Before the cake goes into the oven, sprinkle the top evenly with ¼ teaspoon of coarse sea salt (like Maldon). The salt crystals sit on top of the cake, and as it bakes, they create little pockets of salty-sweet flavor that make people stop mid-bite and ask what makes your cake taste so special. It’s the secret weapon. Place the pan in your preheated 375°F oven and set a timer for 25 minutes. Check the cake at 25 minutes by looking at the top—it should be crackly and set-looking, and when you gently shake the pan side-to-side, the center should jiggle just slightly, like Jell-O. If the entire cake jiggles like it’s liquid inside, bake for another 2-3 minutes and check again. If you smell chocolate burning at any point, reduce your oven temperature to 350°F immediately—your oven runs hot, which is fixable next time. The cake is done when the edges look set and firm, the top is visibly crackled, and the very center has just a slight wobble.
Step 9: Cool Completely Before Serving
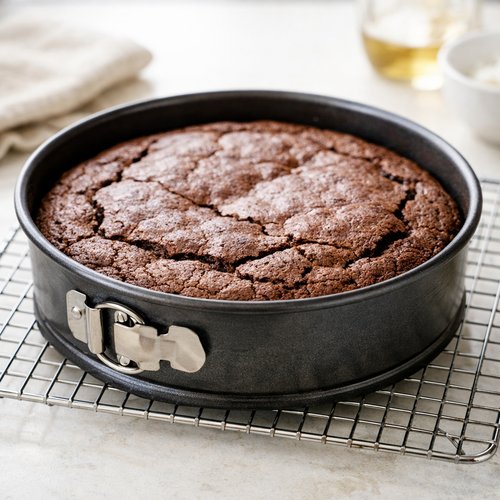
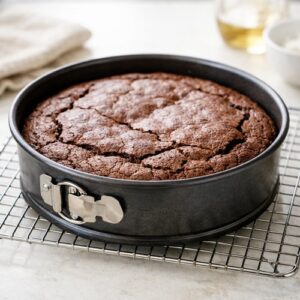
Remove the cake from the oven and place it on a heat-safe surface or cooling rack. Let it sit in the pan for exactly 10 minutes—no more, no less. During these 10 minutes, the cake continues setting slightly, which makes it easier to turn out. After 10 minutes, run a thin knife around the edges of the cake to loosen it from the pan, then place a plate upside-down over the top of the pan. Holding the plate and pan together firmly, flip the cake onto the plate. You should hear a soft release sound. Carefully remove the pan and peel away the parchment paper. Now place another plate (clean side up) on top of the cake and flip it again so the beautiful crackly top is facing upward. This flip protects the delicate cake from breaking while also creating that stunning crackled presentation. Let the cake cool completely at room temperature for at least 1 hour before slicing. As it cools, you’ll notice it deflates slightly and firms up—this is the magic happening. The interior continues setting into that silky, fudgy texture that makes this cake irresistible.
How to Tell If You Did It Right
Success at every stage has clear, obvious signs. If you hit these markers, you’re on track for a beautiful cake:
- Chocolate mixture after melting looks glossy, shiny, and pourable – The color should be rich brown, not burnt or grainy. It should feel warm to touch, not hot to the point of steaming.
- Batter after eggs are added looks like thick chocolate mousse – This jiggly, pudding-like consistency is correct and means eggs are properly incorporated. The batter should leave a slight trail when you drag a spoon through it, and it should pour slowly from a bowl—not runny, not stiff.
- Top of cake while baking develops visible cracks – Around the 20-minute mark, you’ll notice the surface starting to look slightly crackled and set. This is the moisture evaporating from the top while the interior stays fudgy.
- Cake center jiggles very slightly when pan is shaken – This small jiggle (not a full wobble) means the interior is perfectly fudgy. A cake that’s completely stiff has overbaked slightly and will be drier.
- Cake smells intensely, irresistibly chocolatey – If you smell burnt chocolate, your oven is too hot and you need to adjust next time.
- Cake deflates about half an inch as it cools – This gentle settling is completely normal and actually desirable, indicating the interior is achieving that signature silky texture.
What Went Wrong? Beginner Fixes
- Cake is too dense and heavy, almost fudge-like – This usually means the eggs were cold when added (they didn’t blend smoothly) or you overbaked slightly. Next time, bring eggs to room temperature by setting them on the counter 30 minutes before baking. If you’re overbaking, start checking at 23 minutes instead of 25. This cake should be fudgy, but not quite brownie-dense.
- Cake didn’t rise at all and looks sunken in the middle – The most common cause is opening the oven door too early or slamming it shut, which deflates the cake. Resist the urge to peek! Also, if your oven temperature is off, the cake won’t rise properly. Invest in an oven thermometer for $5—it’s the best insurance policy. If this happens, you’ve still got a delicious (if flatter) cake; just slice it thinner.
- Cake fell apart when I flipped it out of the pan – This usually means you didn’t cool it long enough in the pan (give it the full 10 minutes) or you skipped the parchment paper step. Next time, the parchment is non-negotiable because it creates a protective barrier. If the cake breaks, don’t despair—pieces over ice cream and coconut whipped cream become a beautiful parfait.
- Top is burnt or too dark while interior is underdone – Your oven runs hot. Use an oven thermometer to confirm, and reduce the temperature to 350°F next time. You might also need to cover the top loosely with foil after 15 minutes of baking to prevent darkening while the interior finishes cooking.
- Batter separated or looked curdled when I added eggs – Cold eggs are the culprit. Always bring eggs to room temperature by setting them on the counter for 30 minutes before baking. Cold eggs won’t blend smoothly with the warm chocolate mixture and can cause separation.
Your Next Steps After Mastering This
Making this flourless chocolate cake teaches you skills that transfer to dozens of other recipes. Once you’ve conquered this one, you’ve essentially mastered the art of tempering chocolate (learning to melt it gently without overheating), incorporating eggs without overmixing (which applies to mousses, soufflés, and custards), and understanding how structure works in flourless baking. These same techniques apply to mousses, molten lava cakes, and flourless brownies.
Next, try my this simple cake, which applies these chocolate-melting and egg-incorporating skills to a showstopping layered creation. Or explore Brookie Recipe, which combines cookie and brownie textures using similar chocolate techniques. You’ve now entered a world where “simple ingredients” and “restaurant-quality results” aren’t mutually exclusive.
Can I Store Flourless Dairy-Free Chocolate Cake?
Absolutely, and this cake actually improves slightly with rest. Store your cooled cake in an airtight container at room temperature for up to 2 days—the interior becomes even more silky and fudgy as it sits. If you want to keep it longer, refrigerate it for up to 5 days in an airtight container, bringing it to room temperature for 30 minutes before serving to restore the silky texture. The cold temperatures firm up the texture slightly.
For freezing, wrap the cooled cake tightly in plastic wrap and then foil, and freeze for up to 3 months. Thaw at room temperature for about 1 hour before serving—the cake will taste fresh because there’s no flour to dry out during storage. Individual slices freeze beautifully too, which is my go-to move when I want to enjoy cake for one without the temptation of an entire cake in the fridge. Do not refrigerate the cake if you plan to serve it the same day; room temperature storage keeps the texture softest and most luxurious.
Nutrition Information
Based on USDA nutritional database values for the ingredients listed, one slice (assuming 8 equal slices) contains approximately 320 calories, 22g fat (mostly from coconut oil), 32g carbohydrates (primarily from sugar), 4g protein (from eggs), and 2g fiber. This cake is naturally high in antioxidants from the dark chocolate, which contains polyphenols linked to cardiovascular benefits. The eggs provide choline, essential for brain health, and the coconut oil contains MCT fats that some research suggests may support energy metabolism (though more studies are ongoing).
As a registered dietitian, here’s my expert take: This cake is indulgent but not “guilty” in my book. Yes, it’s rich in sugar and fat, but these are whole-food sources (real chocolate, coconut oil, eggs) rather than processed additives. A single slice provides genuine satisfaction because of the intensity of flavor and richness—you’re not reaching for a second slice like you might with a fluffy, less-satisfying cake. I serve this at dinner parties knowing it’s made from quality ingredients, and when friends with dietary restrictions ask about ingredients, I can genuinely tell them there’s nothing mysterious inside.
What Can I Serve With Flourless Dairy-Free Chocolate Cake?
This cake is stunning on its own, but a few simple additions elevate it to special-occasion status:
- Dairy-free whipped coconut cream – Chill a can of full-fat coconut milk overnight, scoop out the solid portion (discard the liquid), whip with a touch of powdered sugar and vanilla extract, and dollop generously on each slice.
- Fresh berries (raspberries, strawberries, or blackberries) – The bright acidity cuts through the richness beautifully. Add a small handful to each plate alongside the cake.
- A drizzle of warm chocolate ganache – Melt 2 ounces of chocolate with 3 tablespoons of coconut milk, and drizzle over slices just before serving for extra elegance.
- Vanilla dairy-free yogurt or coconut yogurt – A spoonful alongside the cake adds a creamy, tangy contrast that balances the sweetness.
- Candied lemon peel or fresh mint – A small garnish feels incredibly fancy and adds sophisticated flavor without much work.
- Coffee on the side – Pair with a strong espresso or coffee to deepen the chocolate experience. The bitter coffee and sweet chocolate are made for each other.
For special occasions, I love serving this alongside something light and bright—like a simple this simple cake. The contrast between rich chocolate and bright citrus makes both desserts shine even brighter.
Make-Ahead Guide: Planning for Success
One of my favorite things about this recipe as a busy parent is how flexible it is for advance preparation. Here’s my real-world make-ahead strategy:
The Day Before: Bake the cake completely, cool it fully, and store it in an airtight container at room temperature. The flavor actually deepens overnight, and the interior becomes even more silky. This is the ideal timing because the cake has rested but is still moist and fresh.
Two Days Before: You can store it refrigerated for up to 5 days, which is helpful for weekend entertaining. Remove from the fridge 30 minutes before serving to bring it back to room temperature, restoring the silky texture. Cold cake tastes slightly firmer, which some people actually prefer.
Up to Three Months Ahead: Wrap the cooled cake in plastic wrap, then foil, and freeze. Thaw at room temperature for about 1 hour before serving. This works beautifully for advance party planning or for keeping emergency dessert on hand for unexpected guests.
My Professional Tip: Make the chocolate mixture in advance (melted chocolate + coconut oil + sugar, cooled and stored in a sealed container) and keep it in the fridge for up to 3 days. When you’re ready to bake, just reheat gently in the microwave for 20 seconds, add room-temperature eggs, and proceed. This cuts active baking time in half when you need a quick dessert. I’ve done this countless times when dinners run late and we still want homemade dessert.
Seasonal Variations: Adapting This Cake Year-Round
While this cake is beautiful as written, I love tweaking it based on what’s fresh and what the season calls for. Here are my favorite seasonal spins:
Winter (Spiced Version): Add ¼ teaspoon ground cinnamon, ⅛ teaspoon ground cayenne pepper, and a tiny pinch of cardamom to the cocoa powder step. This creates a warm, spiced chocolate cake that feels cozy with holiday spices. The cayenne is subtle but deepens the chocolate flavor mysteriously.
Spring (Mint Version): Add ½ teaspoon peppermint extract (not peppermint flavoring) in place of the vanilla extract. Top with fresh mint leaves for garnish, and serve alongside fresh berries. The mint brings a bright, refreshing quality to the rich chocolate.
Summer (Orange Version): Add ½ teaspoon orange extract and the zest of one organic orange (finely grated) to the batter. Serve with fresh raspberries or blackberries and a touch of orange zest on top. This feels light and summery while maintaining the cake’s luxurious quality.
Fall (Apple Pairing): Make the cake as written, but serve it alongside Apple Pie Egg Rolls for a beautiful composed dessert. The warm, spiced apple and cold chocolate combination is incredible.
Expert’s Nutritional Insight: Why This Cake Works
As a registered dietitian, I’m often asked why flourless cakes are better than traditional flour-based cakes. The answer goes beyond just removing an ingredient. When you remove flour, you’re removing the main source of refined carbohydrates that spikes blood sugar quickly. In this cake, eggs provide the primary structure (through their proteins) rather than starch. This means the sugar content is more slowly absorbed, creating a less dramatic blood sugar spike. Additionally, because eggs and chocolate are so much more satisfying than flour-based cakes, people typically eat smaller portions—a thin slice of this cake is far more satisfying than a large slice of traditional cake, which naturally reduces overall sugar and calorie intake. The healthy fats from coconut oil and dark chocolate (which contains polyphenols and magnesium) make this feel less like indulgence and more like self-care. I’m not claiming this is a “health food,” but I’m confident it’s a more thoughtful dessert choice than most cake options.
Common Beginner Mistakes to Avoid
Mistake 1: Using cold eggs – This is the #1 reason cakes turn out dense or have odd texture. Eggs added to a warm chocolate mixture must be room temperature, or they’ll shock the mixture and create separation. Set eggs on the counter 30 minutes before baking—this single step eliminates most texture problems.
Mistake 2: Skipping the parchment paper – I know it seems like an extra step, but this paper is what prevents demolition cakes. After one failed flip, you’ll understand why this step matters. The cake is delicate, and parchment is its protector.
Mistake 3: Opening the oven door too early – Every time you open that door, you let heat escape and can deflate the rising cake. The cake is done when it passes the jiggle test (slight wobble in center, not full liquid movement). Resist the urge to peek before 23 minutes.
Mistake 4: Using dark chocolate that’s too high in cacao content – I recommend 70% because it has enough sugar to taste balanced. Going above 75% makes the cake taste bitter unless you’re a dark-chocolate purist. Similarly, don’t use milk chocolate (too sweet) or white chocolate (won’t work—it’s not real chocolate chemically and behaves differently).

Flourless Dairy Free Chocolate Cake Recipe
Ingredients
Method
- Turn your oven on to 375°F right now—don't wait. Ovens need 15-20 minutes to reach full temperature, and you want the oven hot and ready when your batter is ready. While the oven preheats, take your 9-inch round cake pan and brush the bottom and sides lightly with refined coconut oil. I use about ½ teaspoon total, applied with a folded paper towel or clean fingers. Then tear a piece of parchment paper about 6 inches square and press it into the bottom of the pan, smoothing out air bubbles. The oil acts like glue, holding the parchment in place. This step eliminates 90% of demolition cakes, so I'm very serious about it.
- Take your 7 ounces of bittersweet chocolate and chop it into pieces roughly the size of your pinky fingernail. Smaller pieces melt faster and more evenly, which prevents overheating. Place the chopped chocolate and ¾ cup of coconut oil (at room temperature—this is important because cold oil will cool down hot chocolate and make it thick) into a large microwave-safe bowl. Don't start melting yet; just get everything staged and ready. Having ingredients prepped before you start microwave melting prevents scrambling when heat is involved.
- Microwave the chocolate-oil mixture in 30-second intervals, stirring thoroughly after each burst. This gradual approach prevents chocolate from seizing or becoming grainy. After the first 30 seconds, stir for about 10 seconds, then microwave for another 30 seconds. Continue until the mixture is completely smooth and shiny, with no visible chocolate chunks remaining. This usually takes 60-90 seconds total, depending on your microwave's power. When it's done, the mixture should look glossy and pourable—like warm chocolate pudding. The chocolate should feel warm to your touch, not hot. If it's steaming hot, let it cool for 30 seconds before moving to the next step, because you're about to add raw eggs, and you don't want them to scramble.
- Pour 1⅓ cups of sugar into the warm chocolate mixture and stir well for about 30 seconds. The sugar should distribute evenly throughout, and the mixture will become slightly thicker and lighter in color—almost like chocolate frosting. This is your creaming step without a mixer. Don't worry about achieving volume; you're simply distributing the sugar throughout so it dissolves evenly. Stir until no visible sugar grains remain.
- This step is crucial, so I'm going to be very specific. Crack one room-temperature egg into the chocolate mixture and stir vigorously for about 30 seconds. The batter will look jiggly, almost like it's not blending—this is exactly right. The egg will eventually incorporate, creating a slightly thicker mixture. Once the first egg is mostly integrated (small streaks are fine), crack in the second egg and repeat. Continue this process with all five eggs, one at a time. Each egg should be mostly incorporated before adding the next, though you don't need a perfectly smooth mixture between additions. After all five eggs are in, you'll have a batter that resembles thick, creamy pudding or mousse. This batter should jiggle slightly when you shake the bowl and pour slowly from a spoon. If it looks thin and runny like regular cake batter, something went wrong; if it looks thick and chunky, keep stirring—eggs sometimes take a moment to fully incorporate.
- Sift 1 tablespoon of unsweetened cocoa powder directly into the batter (sifting prevents lumps). Add ½ teaspoon of pure vanilla extract (optional but wonderful) and ¼ teaspoon of espresso powder if you have it (also optional but transforms the chocolate flavor). Stir everything together gently until the cocoa powder completely disappears and the batter is uniform in color. This should take about 1 minute of stirring. The batter should now look like rich, thick chocolate mousse—no streaks of cocoa powder visible anywhere.
- Carefully pour the batter into your prepared cake pan, using a spatula to scrape out every last bit into the bowl (this batter doesn't waste easily). Smooth the top gently with the spatula—you're aiming for a roughly even surface, not a perfectly smooth one. Some rustic texture on top is beautiful. The batter should fill the pan about three-quarters of the way full.
- Before the cake goes into the oven, sprinkle the top evenly with ¼ teaspoon of coarse sea salt (like Maldon). The salt crystals sit on top of the cake, and as it bakes, they create little pockets of salty-sweet flavor that make people stop mid-bite and ask what makes your cake taste so special. It's the secret weapon. Place the pan in your preheated 375°F oven and set a timer for 25 minutes. Check the cake at 25 minutes by looking at the top—it should be crackly and set-looking, and when you gently shake the pan side-to-side, the center should jiggle just slightly, like Jell-O. If the entire cake jiggles like it's liquid inside, bake for another 2-3 minutes and check again. If you smell chocolate burning at any point, reduce your oven temperature to 350°F immediately—your oven runs hot, which is fixable next time. The cake is done when the edges look set and firm, the top is visibly crackled, and the very center has just a slight wobble.
- Remove the cake from the oven and place it on a heat-safe surface or cooling rack. Let it sit in the pan for exactly 10 minutes—no more, no less. During these 10 minutes, the cake continues setting slightly, which makes it easier to turn out. After 10 minutes, run a thin knife around the edges of the cake to loosen it from the pan, then place a plate upside-down over the top of the pan. Holding the plate and pan together firmly, flip the cake onto the plate. You should hear a soft release sound. Carefully remove the pan and peel away the parchment paper. Now place another plate (clean side up) on top of the cake and flip it again so the beautiful crackly top is facing upward. This flip protects the delicate cake from breaking while also creating that stunning crackled presentation. Let the cake cool completely at room temperature for at least 1 hour before slicing. As it cools, you'll notice it deflates slightly and firms up—this is the magic happening. The interior continues setting into that silky, fudgy texture that makes this cake irresistible.
Notes
FAQs
Can I make this cake ahead for a party?
Yes, absolutely! Bake it the day before and store it in an airtight container at room temperature. The flavor actually deepens and the texture becomes more silky overnight. Remove it from the container 30 minutes before serving. If you need to make it further in advance, wrap it well and freeze for up to 3 months. Thaw at room temperature for about 1 hour before serving.
What if I don’t have coconut oil?
In a pinch, melted unsalted butter works, though it’s not dairy-free anymore. Use the same amount (¾ cup melted). The flavor will be slightly richer and more buttery, which isn’t a bad thing—just different. Avoid vegetable oil or canola oil because they don’t provide enough flavor and the cake tastes flat. Coconut oil is really the best option