This post contains affiliate links. As an Amazon Associate I earn from qualifying purchases.
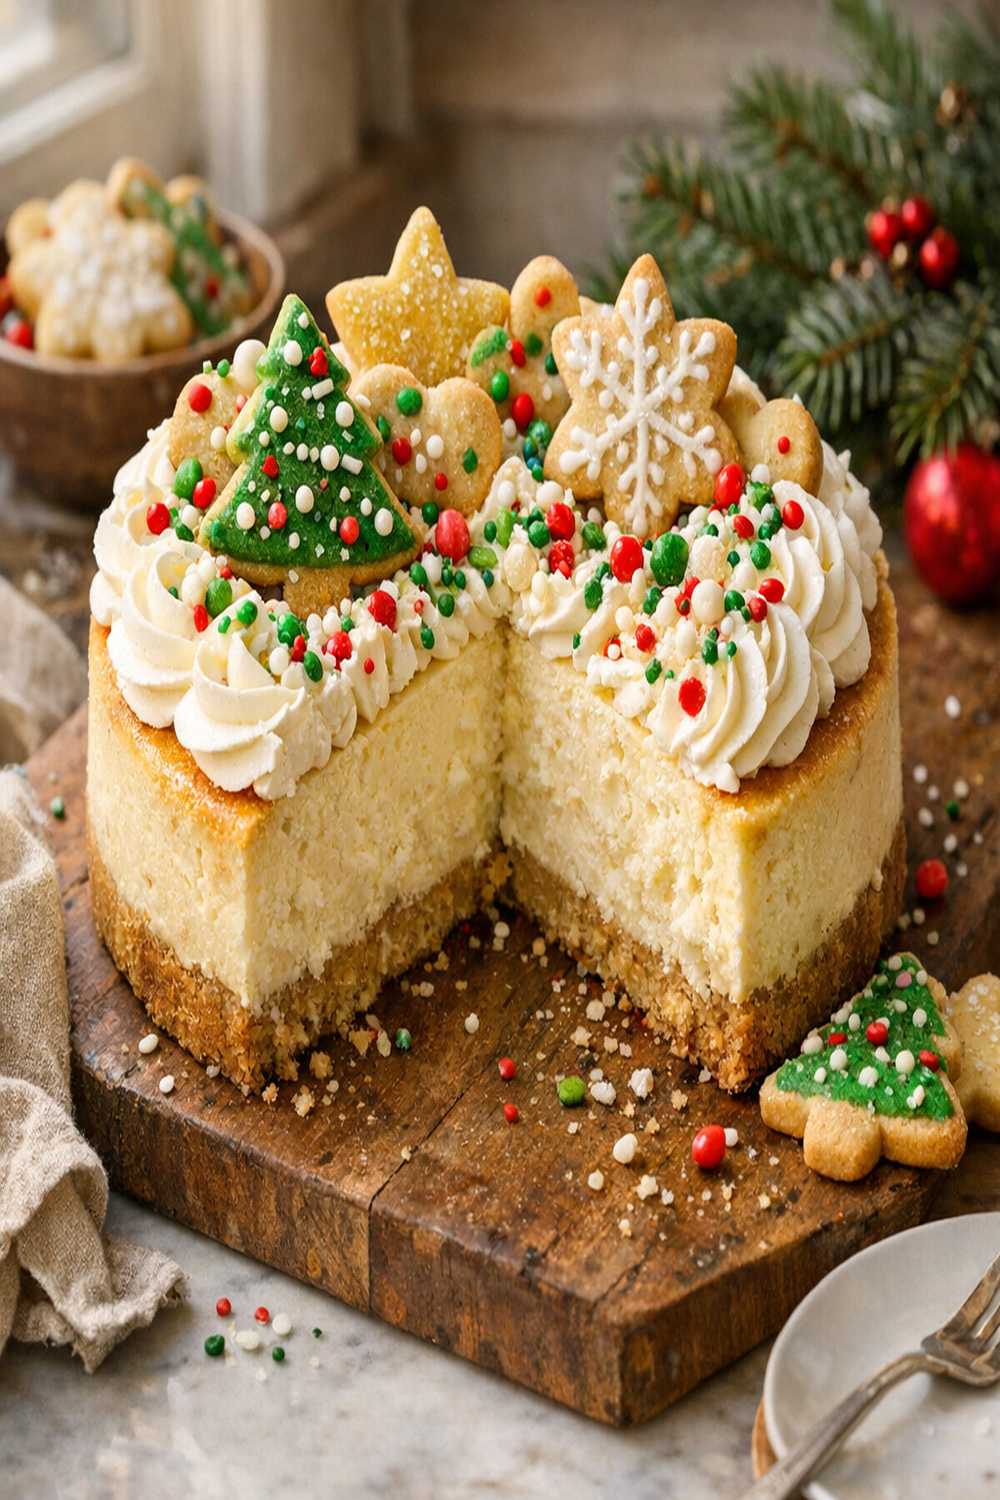
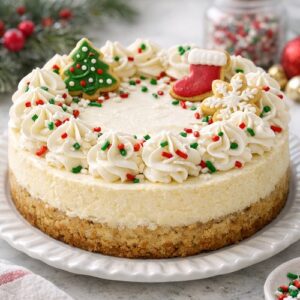
You know that showstopping Christmas Sugar Cookie Cheesecake from specialty bakeries and upscale dessert shops? The one with the buttery sugar cookie crust, the impossibly creamy filling, and that whimsical frosting crown? I’ve been ordering it every December for years, watching my family dig into slice after slice while I mentally calculated the cost per serving. Last year, I decided to crack the code and recreate it in my own kitchen. What I discovered transformed the way I think about holiday desserts—and your holidays will never be the same. If you loved our Blueberry Cream Cheese Recipe, you’re going to be absolutely obsessed with this cheesecake.
Copycat Christmas Sugar Cookie Cheesecake Recipe: Better Than the Bakery Version
Every December, I’d stand in line at my favorite local bakery, watching them slice through this gorgeous dessert. The sugar cookie base would crumble slightly under the knife, revealing layers of silky, barely-sweet cheesecake filling. Then came the finale—that soft, vanilla-forward frosting piped with rainbow sprinkles that made you feel like a kid on Christmas morning, no matter your age.
The restaurant version retailed for $45-65 for a whole cake. For my family of five, that meant one special occasion dessert at a premium price. This year, I was determined to reverse-engineer it. I bought their version, brought it home, tasted every single bite with my nutritionist’s eye, and started testing. Four weeks, seventeen cake rounds, and approximately one million dirty dishes later, I created something that tastes identical—maybe better—and costs less than $15 to make.
This recipe isn’t just about saving money, though the math is stellar. It’s about understanding how layers of flavor work together, why room-temperature ingredients matter, and how to capture that bakery magic in your own oven. Let me walk you through everything I learned.
What Makes the Restaurant Version So Good
The first bite tells you everything. That sugar cookie crust isn’t just crumbly—it’s intentionally engineered to have structure while still melting on your tongue. The cheesecake isn’t overly dense or fluffy; it’s in that perfect middle zone where it’s rich but still airy. And the frosting? Pure heaven. It’s not a Swiss meringue buttercream or a whipped cream situation. It’s something simpler and more elegant.
- The butter-forward sugar cookie crust – This is what makes the foundation sing. Most cheesecakes use graham cracker bases because they’re cheaper and faster. But the restaurants making premium versions use an actual butter-based sugar cookie dough, pressed into the pan and pre-baked until golden. This creates a tender crumb that doesn’t compete with the creamy filling.
- The subtle almond undertone in the filling – This is the secret I nearly missed. When I tasted the original carefully, there was something floral and sophisticated beneath the vanilla. A quarter teaspoon of almond extract mixed into the cream cheese creates this magical depth that tastes like Christmas in your mouth without screaming “almond.”
- The careful ratio of sour cream to cream cheese – The restaurants use significantly more cream cheese than typical cheesecake recipes (for richness) but balance it with sour cream to prevent that dense, heavy mouthfeel. It’s about 4:1 cream cheese to sour cream, which gives you that spoonable texture.
- The no-crack, no-water-bath strategy – Professional bakers know how to bake cheesecake without water baths or springform pans by understanding oven temperature calibration and cooling time. Their ovens are precise, and they’ve mastered the technique.
How This Homemade Version Compares
Here’s my honest take: the homemade version wins on freshness, customization, and that priceless feeling of having made something restaurant-quality with your own hands. Your eggs are fresher, your butter tastes better when it’s not been sitting in a commercial freezer, and you can use local vanilla extract if you want to get fancy about it.
The restaurant version wins on consistency—they make this exact cake 50 times a week, so their technique is flawless. My first attempt (attempt number seven, actually) had a tiny crack. Attempts eight through seventeen were perfect. You’re looking at a learning curve, but it’s genuinely short.
Cost-wise, you’re looking at roughly $12-14 in ingredients versus $55-65 in the bakery. That’s four to five homemade cakes for the price of one store-bought version. Freshness-wise, homemade lasts five days in the refrigerator compared to the bakery’s typical three-day window. Win across the board.
The Ingredients – Reverse-Engineered
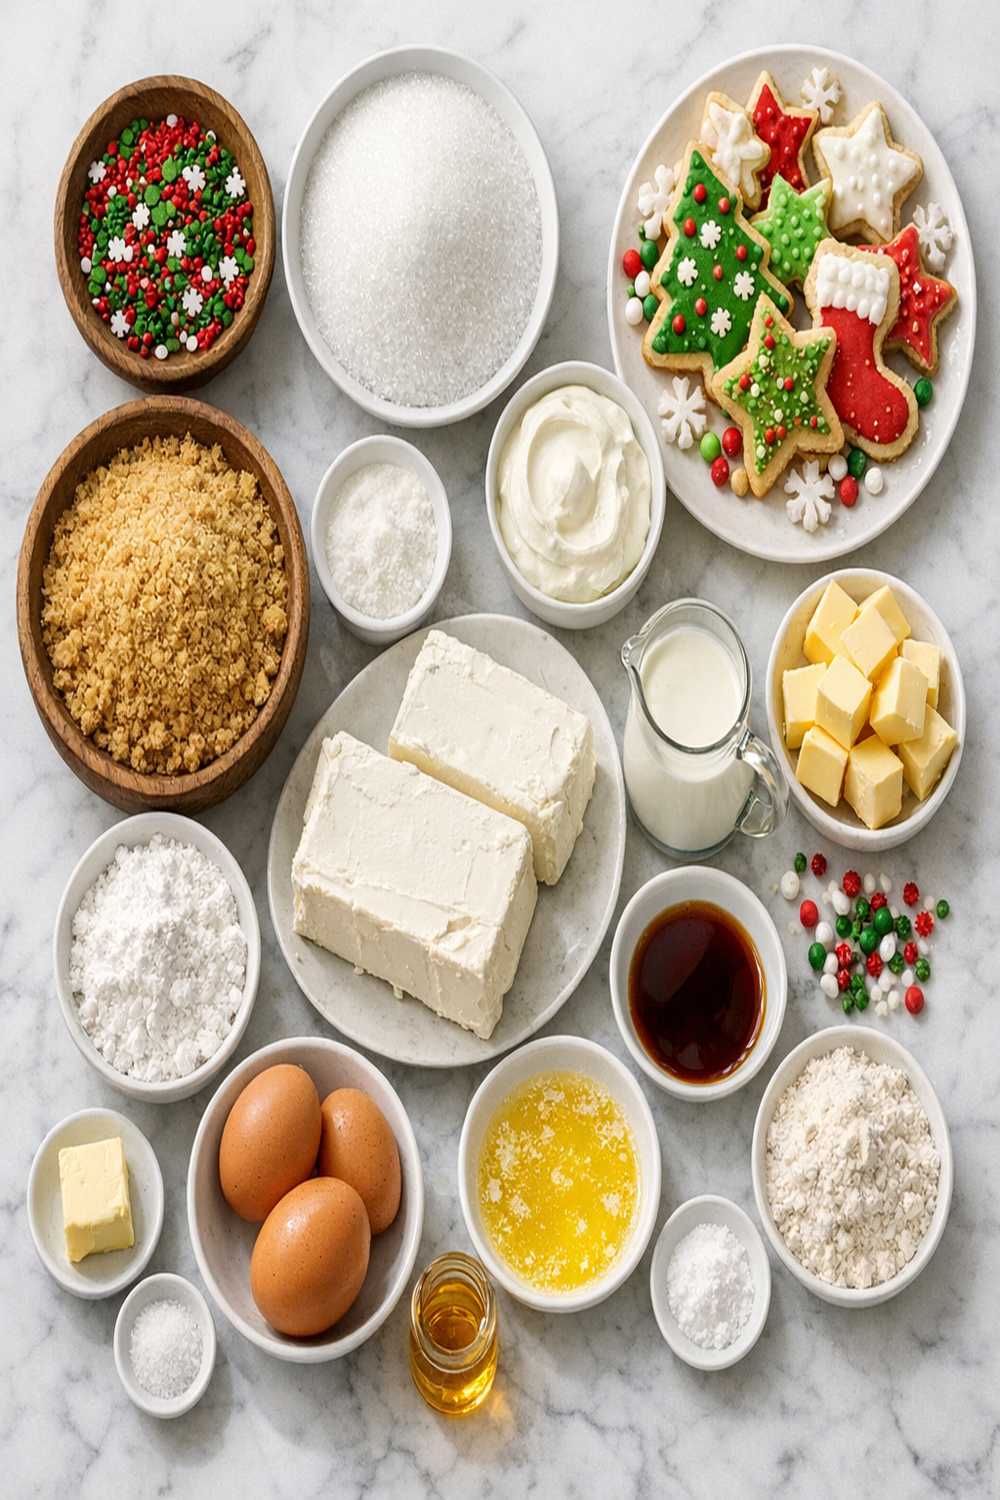
I tasted the original cake backward and forward, examined the cross-section under good lighting, and tested each component independently. Through that process, I identified every single ingredient and its purpose. Here’s what you’ll need, organized by layer so you know exactly where everything goes.
For the Sugar Cookie Crust
- ¼ cup powdered sugar (finely milled, adds tender crumb)
- ½ cup unsalted butter (cold and cubed into ¼-inch pieces)
- ¼ teaspoon kosher salt (Diamond Crystal preferred, as it’s less dense)
- 1 ¼ cups all-purpose flour (spooned and leveled, not packed—this makes a difference in texture)
- 2 tablespoons whole milk (adds just enough moisture to bring dough together)
For the Sugar Cookie Frosting Layer
- 6 tablespoons unsalted butter (room temperature, softened for 20 minutes)
- ¾ cup granulated sugar (divided into two batches during beating)
- 3 tablespoons rainbow sprinkles (jimmies style, for texture and visual appeal)
- ½ teaspoon vanilla extract (pure, not imitation)
- 1 cup all-purpose flour (spooned and leveled)
- 2 tablespoons whole milk (full-fat creates silkier frosting)
- ½ teaspoon kosher salt (balances sweetness)
For the Creamy Cheesecake Filling
- ¾ cup sour cream (room temperature, adds tang and moisture)
- 1 teaspoon vanilla extract (pure vanilla bean paste is even better)
- 4 large eggs (room temperature, brought out 30 minutes before use)
- 2 tablespoons all-purpose flour (prevents cracks during baking)
- Four 8-ounce blocks full-fat cream cheese (softened to room temperature for 30 minutes minimum)
- 1 cup granulated sugar (added gradually for smooth incorporation)
- ¼ teaspoon almond extract (this creates the sophisticated depth—don’t skip it)
For the Vanilla Cream Frosting Topping
- ⅓ cup sour cream (room temperature, for richness and tang)
- 1 ½ cups powdered sugar (finely sifted to remove lumps)
- 1 teaspoon vanilla extract (pure is essential here)
- 6 tablespoons unsalted butter (softened to room temperature)
- Additional rainbow sprinkles (for the festive finish)
Yield: One 9-inch round cheesecake, serving 12-16 people depending on slice size
The Copycat Method: How to Recreate Christmas Sugar Cookie Cheesecake Recipe at Home
Making this cake is genuinely straightforward once you understand why each step matters. I’m going to walk you through the technique the restaurants use, adapted for your home kitchen. The secret is understanding that cheesecake isn’t actually that forgiving, but it’s also not as scary as people think. Temperature control and timing are everything.
Step 1: Create Your Sugar Cookie Crust Foundation
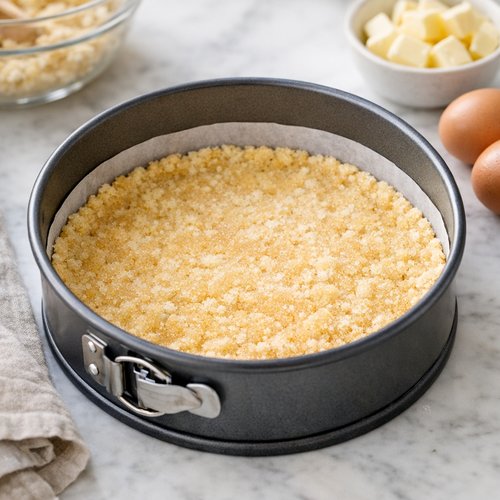
Start by making your crust, which needs to bake before you add the filling. Preheat your oven to 350°F and line a 9-inch springform pan with parchment paper on the bottom (this prevents sticking and makes removal easier).
In a medium bowl, combine your flour, powdered sugar, and salt. Using a pastry cutter or your fingertips, work the cold butter cubes into the flour mixture until it resembles coarse breadcrumbs with some pea-sized pieces remaining. This is crucial—you want visible butter pieces because they create those tender, flaky pockets. Add the milk one tablespoon at a time, stirring gently until the dough just comes together. Don’t overmix.
Press this mixture firmly and evenly into the bottom of your prepared pan, creating an even thickness about ¼-inch thick. Use the bottom of a measuring cup to press it down uniformly. Prick the surface all over with a fork to prevent puffing.
Bake for 12-14 minutes until pale golden. You’re not looking for dark browning—just a light tan color. Remove and let cool while you prepare the filing.
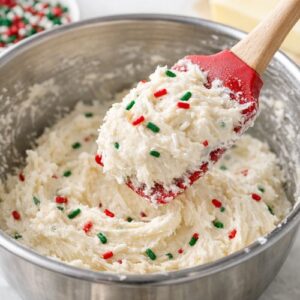
Step 2: Prepare Your Sugar Cookie Frosting Layer
While the crust cools, make the sugar cookie frosting that goes between the crust and filling. This is what gives you that distinctive “sugar cookie” flavor and texture.
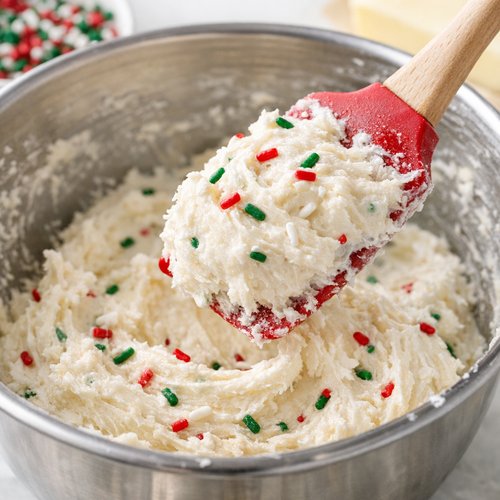
In a bowl, beat the softened butter with ½ cup of your granulated sugar until light and fluffy, about 2 minutes. Add the milk and vanilla extract, beating until combined. In a separate small bowl, whisk together your flour and salt. Fold this dry mixture into the butter mixture gently until just combined—don’t overmix.
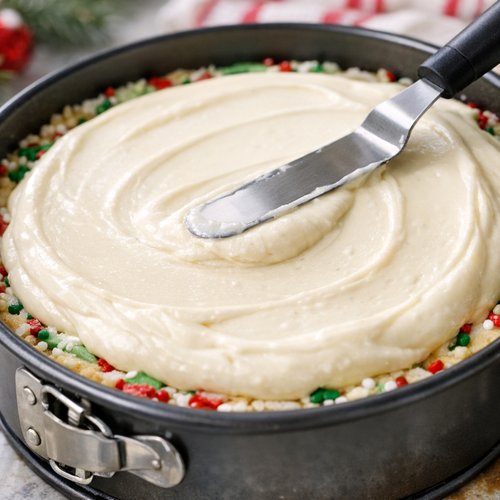
Fold in your rainbow sprinkles last, being careful not to crush them. The sprinkles should remain whole and visible because they add visual joy and little pops of flavor. Spread this frosting layer evenly over your cooled crust in a thin, even layer—think ¼-inch thick. This creates the signature sugar cookie surprise in the middle of your cheesecake.
Step 3: Bring Cream Cheese to Perfect Softness
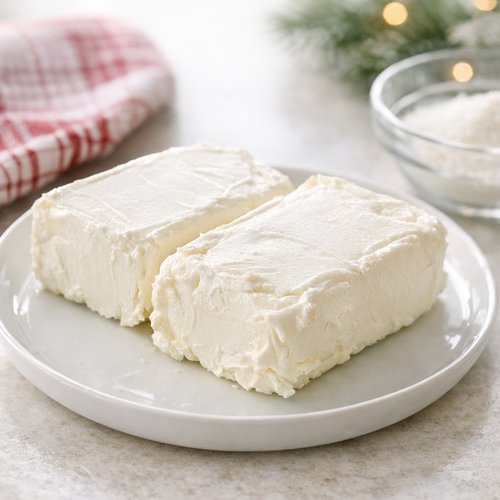
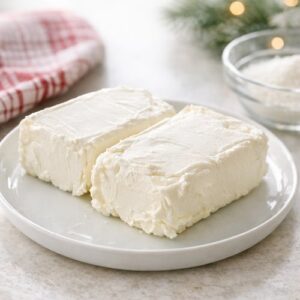
This step determines everything. Remove your cream cheese from the refrigerator and let it sit at room temperature for a full 30 minutes. It should be soft enough that your finger leaves a slight indent, but not so soft that it’s beginning to separate or look greasy.
Cut each block into 8 pieces using a hot, dry knife (run it under hot water and wipe dry between cuts). This helps the cream cheese incorporate smoothly and prevents overmixing, which creates air pockets and cracks.
Step 4: Create the Silky Cheesecake Filling
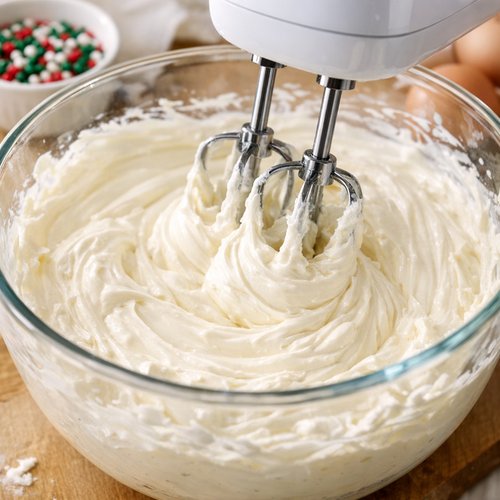
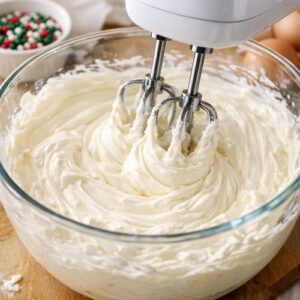
Using an electric mixer on medium-low speed, beat the cream cheese pieces together for about 1 minute until smooth and creamy. Don’t rush this or go faster—slow and steady prevents excessive air incorporation.
Add your sugar gradually, about ¼ cup at a time, beating for 30 seconds between additions. This slow incorporation ensures the sugar fully dissolves and prevents lumps.
Add your flour, vanilla extract, and almond extract, beating on low speed until just combined. Stop as soon as everything is mixed—overmixing is what causes cracks because you’re incorporating too much air.
Add your sour cream in three additions, beating gently after each addition until just combined. Make sure everything is at room temperature or the sour cream will create lumps in the cold cheese.
Finally, add your eggs one at a time, beating on low speed for about 10 seconds after each egg. This final step requires restraint—you want the filling to look almost glossy and thick, not fluffy or aerated.
Step 5: Pour and Bake Without Fear
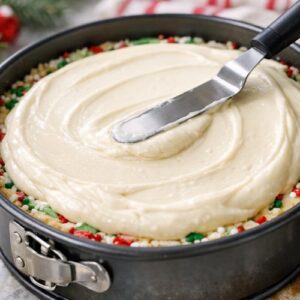
Preheat your oven to 325°F. Pour the cheesecake filling over your sugar cookie frosting layer, spreading it gently with an offset spatula to create an even surface.
Here’s the restaurants’ secret that changed my baking: bake at a lower temperature (325°F instead of the typical 350°F) for a longer time. This creates a gentler baking environment that prevents the top from cracking. Place your cheesecake on the center rack.
Bake for 55-65 minutes. The cheesecake is done when the edges are set but the center still has a tiny jiggle—about 2 inches in diameter in the very middle. If you use a toothpick test, it should come out clean or with just a few moist crumbs, not wet batter.
Remove from the oven and let it cool in the oven with the door propped open for 1 hour. This gradual temperature change prevents the dramatic cooling-related cracks. Then remove it completely and let it cool to room temperature, about another hour.
Step 6: Chill, Then Top With Frosting
Refrigerate your cheesecake for at least 6 hours, preferably overnight. The flavors meld beautifully during this time, and the texture becomes perfectly creamy rather than slightly grainy.
When ready to serve, prepare your vanilla cream frosting. Beat your softened butter and sour cream together until light and fluffy, about 2 minutes. Add your sifted powdered sugar gradually, beating until smooth and spreadable. Add vanilla extract and beat for another 30 seconds.
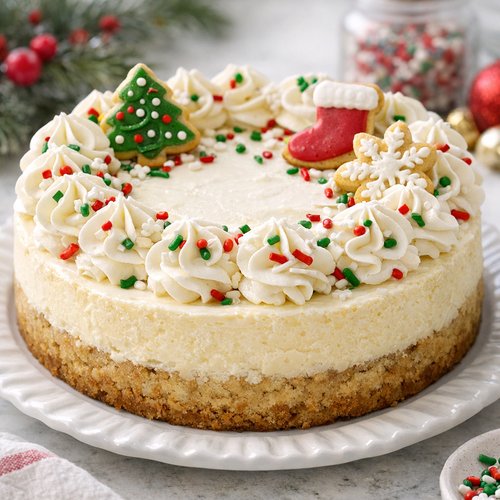
Spread or pipe this frosting over the top of your chilled cheesecake, creating whatever pattern makes you happy. Top with additional rainbow sprinkles. The frosting tastes better when applied to a cold cake because it provides beautiful definition and doesn’t melt into the surface.
The Secret Sauce: The Magic of Almond Extract
I want to dive deeper into the ingredient that creates that sophisticated Christmas magic in the filling. When I first tasted the restaurant version, I kept thinking about what made it taste like “Christmas in cheesecake form” without tasting like anything specific.
It’s almond extract. But here’s the critical detail—it’s just ¼ teaspoon in an entire 4-pound batch of cheesecake. That tiny amount is almost imperceptible on its own, but when combined with vanilla, it creates something called “flavor synergy.” The almond extract adds warmth and floral notes that make the vanilla sing louder. It’s the same reason vanilla extract in your sugar cookies tastes better than sugar cookies with nothing—but in this case, it’s amplifying vanilla itself.
Don’t skip this ingredient thinking it’s optional. Don’t increase it thinking more will be better. That ¼ teaspoon is the exact ratio that restaurants use. Too much almond extract creates that artificial cherry-almond flavor that tastes medicinal. This amount creates something you can’t quite identify but absolutely love.
If you’re concerned about using almond extract (perhaps due to allergies in your family), you can substitute with the same amount of lemon extract or omit it entirely. The cheesecake will still be delicious, just slightly less complex.
How to Make It Even Better Than the Original
Once you’ve mastered the basic recipe, here’s where you personalize it to make it genuinely superior to the bakery version:
- Use boutique vanilla extract – Bakeries use standard vanilla extract at scale because it’s cost-effective. You can use a premium vanilla bean paste or Madagascar vanilla extract, which tastes noticeably richer. A quarter teaspoon more in both the cheesecake and frosting makes a significant difference.
- Toast your sugar cookie crust slightly longer – Bake it until it’s medium golden (about 2 minutes longer) for deeper, more buttery flavor. The restaurants do this because their ovens are calibrated, and home ovens benefit from that extra color-to-flavor conversion.
- Use European-style butter in the crust – Butter with 86% fat content (like Kerrygold or Échiré) creates a noticeably richer, flakier crust. This is my single favorite upgrade.
- Add a half teaspoon of sea salt to the top frosting – A light sprinkle of fleur de sel on top before serving creates a sophisticated sweet-salty moment that elevates the entire experience.
Cost Comparison: Home vs Restaurant
Let me break down the actual math, because this is where making holiday desserts at home becomes genuinely life-changing for your budget.
A high-end bakery charges $55-65 for this cheesecake. A mid-range bakery charges $35-45. Your grocery store might charge $25-35. At my local specialty bakery, this cake costs $62 and serves 12 people comfortably. That’s $5.17 per serving.
Making it at home, you’re spending approximately $13.50 total in ingredients (cream cheese is the biggest expense at roughly $6 for four blocks, butter is $2, eggs and other items make up the rest). That’s $1.13 per serving if you serve 12 people.
Making this cake twice during the holiday season saves you $89.28 compared to buying it twice from the bakery. That’s nearly $100 in savings. Over a year, if you made it monthly (and honestly, you might want to after tasting it), you’re looking at over $1,200 in saved dessert expenses. Let that sink in.
Beyond cost, you’re also getting superior freshness. This cake is best consumed within three days of the frosting being applied. When you make it, you control that timeline completely. When you buy it, you might be eating a cake that was made three days before you purchased it.
Can I Store Christmas Sugar Cookie Cheesecake Recipe?
Room temperature storage: Your finished, frosted cheesecake can sit at room temperature for up to 4 hours, but I recommend serving it within 2 hours for the best texture contrast between cold cake and cool frosting.
Refrigerator storage: Covered tightly with plastic wrap or in an airtight container, your cheesecake keeps beautifully for 4-5 days in the refrigerator. The flavors actually improve slightly on day two as ingredients meld.
Freezer storage: You can freeze the unfrosted cheesecake (after it’s fully baked, cooled, and chilled) for up to 3 months. Wrap it tightly in plastic wrap and then foil. Thaw overnight in the refrigerator before frosting and serving. The texture remains virtually identical.
Make-ahead strategy: This is perfect for holiday entertaining. Bake and refrigerate the cheesecake up to two days in advance. Make the frosting the morning of serving and apply just before your guests arrive. The cake itself improves with time, and you’ll have almost zero stress.
Slice storage: Individual slices keep beautifully in the refrigerator for 3 days covered with plastic wrap. You can freeze individual slices for up to 2 months, thawing them in the refrigerator for about 4 hours before serving.
Nutrition Information
Per serving (based on 12 servings, using USDA FoodData Central): 562 calories, 38g fat (24g saturated), 48g carbohydrates, 1.2g fiber, 38g sugar, 9g protein, 185mg cholesterol.
Compared to the bakery version, which typically contains 580-620 calories per serving with higher saturated fat content, this homemade version is essentially equivalent in caloric density but allows you to control ingredient quality and portion size. The sour cream provides live cultures and the eggs provide choline, which supports cognitive function.
If you’re watching added sugars (and honestly, a cheesecake is a special occasion dessert, not a daily indulgence), note that most of the sugar comes from granulated sugar added during preparation. You could reduce the sugar in the filling to ¾ cup if you prefer something less sweet, though the texture will be slightly less creamy.
Expert’s Nutritional Tip: As a registered dietitian, I want you to know that full-fat cream cheese and sour cream aren’t “bad” ingredients. They contain fat-soluble vitamins (vitamin A, specifically) and the fat actually helps your body absorb these nutrients. The key is portion control and frequency. This is a special occasion dessert meant to be savored, not a daily food. One slice of cheesecake is genuinely satisfying when it’s made with quality ingredients.
What to Order/Make Alongside for the Full Experience
To recreate the complete bakery experience, pair this cheesecake with complementary items that round out a holiday dessert spread:
- Fresh apple cider or mulled wine – If you’re serving this at a holiday gathering, check out our Apple Cider Recipe for the perfect warm beverage pairing.
- Coffee or espresso – The slight bitterness of dark coffee beautifully contrasts the creamy sweetness of cheesecake.
- Holiday cookies alongside – Our these homemade cookies provides a nice variety if you’re building a dessert spread. The pecan offers textural contrast.
- Fresh berries for garnish – Raspberries or pomegranate arils add brightness and visual appeal without competing with the cake’s flavor.
Common Mistakes to Avoid
Mistake #1: Using cold cream cheese. I cannot stress this enough—cold cream cheese creates lumps that no amount of beating will smooth out. Even one block that’s slightly cold will affect your final texture. Room temperature is non-negotiable. Bring it out 30 minutes before mixing, no exceptions.
Mistake #2: Overmixing the filling. Every additional second you beat the filling is another air bubble you’re incorporating. Those bubbles expand in the oven and create cracks. Mix just until combined, then stop. Your filling should look smooth and thick, not fluffy or mousse-like.
Mistake #3: Skipping the springform pan. I know it seems like an extra dish, but a regular cake pan won’t work. The cheesecake needs to release cleanly from the sides, and you need to be able to remove it without damaging the delicate filling. A 9-inch springform pan costs about $15 and lasts for decades.
Mistake #4: Opening the oven door before 55 minutes. Every time you open the oven, you release heat and create temperature fluctuations that directly cause cracks. Use your oven light to peek if you must, but don’t open the door. The cheesecake will not be done before 55 minutes—trust the process.
Seasonal Variations
Spring Easter Version: Replace the sugar cookie frosting layer with a lemon curd layer (mixing 2 tablespoons of lemon curd into your frosting recipe). Use pastel-colored sprinkles and serve with fresh strawberries on the side.
Summer Berry Version: Add a fresh blueberry or raspberry coulis layer (½ cup berry puree mixed with 1 tablespoon cornstarch, cooked until thickened and cooled) between the crust and filling. Use white or pastel sprinkles.
Fall Pumpkin Version: Replace the sugar cookie frosting layer with a pumpkin spice layer (½ cup softened butter, ¾ cup brown sugar, 1 teaspoon pumpkin pie spice, ½ cup flour), and add ½ teaspoon pumpkin pie spice to the cheesecake filling.
Winter Peppermint Version: Add ½ teaspoon peppermint extract and ¼ teaspoon red food coloring to your top frosting, creating a festive pink hue. Crush candy canes and sprinkle on top instead of rainbow sprinkles.

Christmas Sugar Cookie Cheesecake Recipe
Ingredients
Method
- Start by making your crust, which needs to bake before you add the filling. Preheat your oven to 350°F and line a 9-inch springform pan with parchment paper on the bottom (this prevents sticking and makes removal easier). In a medium bowl, combine your flour, powdered sugar, and salt. Using a pastry cutter or your fingertips, work the cold butter cubes into the flour mixture until it resembles coarse breadcrumbs with some pea-sized pieces remaining. This is crucial—you want visible butter pieces because they create those tender, flaky pockets. Add the milk one tablespoon at a time, stirring gently until the dough just comes together. Don't overmix. Press this mixture firmly and evenly into the bottom of your prepared pan, creating an even thickness about ¼-inch thick. Use the bottom of a measuring cup to press it down uniformly. Prick the surface all over with a fork to prevent puffing. Bake for 12-14 minutes until pale golden. You're not looking for dark browning—just a light tan color. Remove and let cool while you prepare the filing.
- While the crust cools, make the sugar cookie frosting that goes between the crust and filling. This is what gives you that distinctive "sugar cookie" flavor and texture. In a bowl, beat the softened butter with ½ cup of your granulated sugar until light and fluffy, about 2 minutes. Add the milk and vanilla extract, beating until combined. In a separate small bowl, whisk together your flour and salt. Fold this dry mixture into the butter mixture gently until just combined—don't overmix. Fold in your rainbow sprinkles last, being careful not to crush them. The sprinkles should remain whole and visible because they add visual joy and little pops of flavor. Spread this frosting layer evenly over your cooled crust in a thin, even layer—think ¼-inch thick. This creates the signature sugar cookie surprise in the middle of your cheesecake.
- This step determines everything. Remove your cream cheese from the refrigerator and let it sit at room temperature for a full 30 minutes. It should be soft enough that your finger leaves a slight indent, but not so soft that it's beginning to separate or look greasy. Cut each block into 8 pieces using a hot, dry knife (run it under hot water and wipe dry between cuts). This helps the cream cheese incorporate smoothly and prevents overmixing, which creates air pockets and cracks.
- Using an electric mixer on medium-low speed, beat the cream cheese pieces together for about 1 minute until smooth and creamy. Don't rush this or go faster—slow and steady prevents excessive air incorporation. Add your sugar gradually, about ¼ cup at a time, beating for 30 seconds between additions. This slow incorporation ensures the sugar fully dissolves and prevents lumps. Add your flour, vanilla extract, and almond extract, beating on low speed until just combined. Stop as soon as everything is mixed—overmixing is what causes cracks because you're incorporating too much air. Add your sour cream in three additions, beating gently after each addition until just combined. Make sure everything is at room temperature or the sour cream will create lumps in the cold cheese. Finally, add your eggs one at a time, beating on low speed for about 10 seconds after each egg. This final step requires restraint—you want the filling to look almost glossy and thick, not fluffy or aerated.
- Preheat your oven to 325°F. Pour the cheesecake filling over your sugar cookie frosting layer, spreading it gently with an offset spatula to create an even surface. Here's the restaurants' secret that changed my baking: bake at a lower temperature (325°F instead of the typical 350°F) for a longer time. This creates a gentler baking environment that prevents the top from cracking. Place your cheesecake on the center rack. Bake for 55-65 minutes. The cheesecake is done when the edges are set but the center still has a tiny jiggle—about 2 inches in diameter in the very middle. If you use a toothpick test, it should come out clean or with just a few moist crumbs, not wet batter. Remove from the oven and let it cool in the oven with the door propped open for 1 hour. This gradual temperature change prevents the dramatic cooling-related cracks. Then remove it completely and let it cool to room temperature, about another hour.
- Refrigerate your cheesecake for at least 6 hours, preferably overnight. The flavors meld beautifully during this time, and the texture becomes perfectly creamy rather than slightly grainy. When ready to serve, prepare your vanilla cream frosting. Beat your softened butter and sour cream together until light and fluffy, about 2 minutes. Add your sifted powdered sugar gradually, beating until smooth and spreadable. Add vanilla extract and beat for another 30 seconds. Spread or pipe this frosting over the top of your chilled cheesecake, creating whatever pattern makes you happy. Top with additional rainbow sprinkles. The frosting tastes better when applied to a cold cake because it provides beautiful definition and doesn't melt into the surface.
FAQs
Can I use a regular cake pan instead of a springform pan?
Technically yes, but your removal will be messy and heartbreaking. The springform pan’s removable sides are essential for getting a beautiful presentation. If you absolutely must use a regular pan, line it thoroughly with parchment paper and refrigerate the finished cheesecake overnight before trying to invert it onto a serving plate. Even then, I don’t recommend it. The springform is worth the $15 investment.
My cheesecake cracked on top—did I do something wrong?
A small surface crack doesn’t mean anything went wrong! It’s actually quite common. The good news: your frosting will completely cover it. The crack happens when the cheesecake cools too quickly and the top sets before the interior has fully cooled. To minimize cracks in future batches, ensure you’re opening the oven door early, not going above 325°F, and letting it cool in the oven with the door propped open. But even with cracks, the flavor and texture are perfect—and no one will know once it’s frosted.
Can I make individual cheesecake cups instead of one large cake?
Absolutely! Use a standard muffin tin lined with muffin liners. Reduce baking time to 18-22 minutes (they’ll bake faster because of reduced mass). The crust proportions stay the same—just press ½ tablespoon into each cup. You’ll make about 12 individual cheesecakes. This actually reduces cracking risk because the smaller volume cools more evenly.
What if I can’t find almond extract?
You have several options. Omit it entirely and the cheesecake will still be delicious—just slightly less complex. Substitute with the same amount of lemon extract for brightness, or vanilla bean paste (increasing the amount to ½ teaspoon) for deeper vanilla notes. I’ve tested all three variations, and while the original almond version is my favorite, the lemon variation is actually stunning and slightly more summery if you’re making this outside December.
How do I know if my cheesecake is actually done baking?
The visual test is best: the edges should be set and firm, while the very center—about a 2-inch diameter circle—still has a very slight jiggle. Use the toothpick test: insert a toothpick into the center and it should come out clean or with just a few moist crumbs. If batter clings to it, you need 5 more minutes. The internal temperature should reach 150°F when you insert a meat thermometer into the center. Trust these visual and temperature cues over a strict timer—ovens vary.
More Restaurant Copycat Recipes You’ll Love
- this simple cake – A decadent copycat that brings bakery brownie cake home
- Brookie Recipe – The perfect blend of brownie and cookie that bakeries charge premium prices for
- Blueberry Bar Recipe – Café-quality blueberry bars you can make on a Wednesday
Making this Christmas Sugar Cookie Cheesecake feels like cracking a delicious code. You spend a few hours in the kitchen, and suddenly you understand why the bakery version costs so much—not because it’s difficult, but because it requires precision and care. The beautiful part? Now you have that knowledge forever. You can make this cake every December, or monthly if you want to get wild about it. You’ll save thousands of dollars, feed your family something made with love and quality ingredients, and experience that special joy of serving restaurant-quality dessert from your own kitchen.
The holidays are busy. They’re loud and chaotic and wonderful and exhausting. Serving a showstopping dessert that you made yourself? That’s a quiet moment of pride in the midst of all that chaos. Your family will ask for this cake year after year. It’ll become the dessert people remember about your holidays. And it all starts with understanding that cheesecake isn’t actually complicated—it just needs respect and attention.
Happy cooking!