This post contains affiliate links. As an Amazon Associate I earn from qualifying purchases.
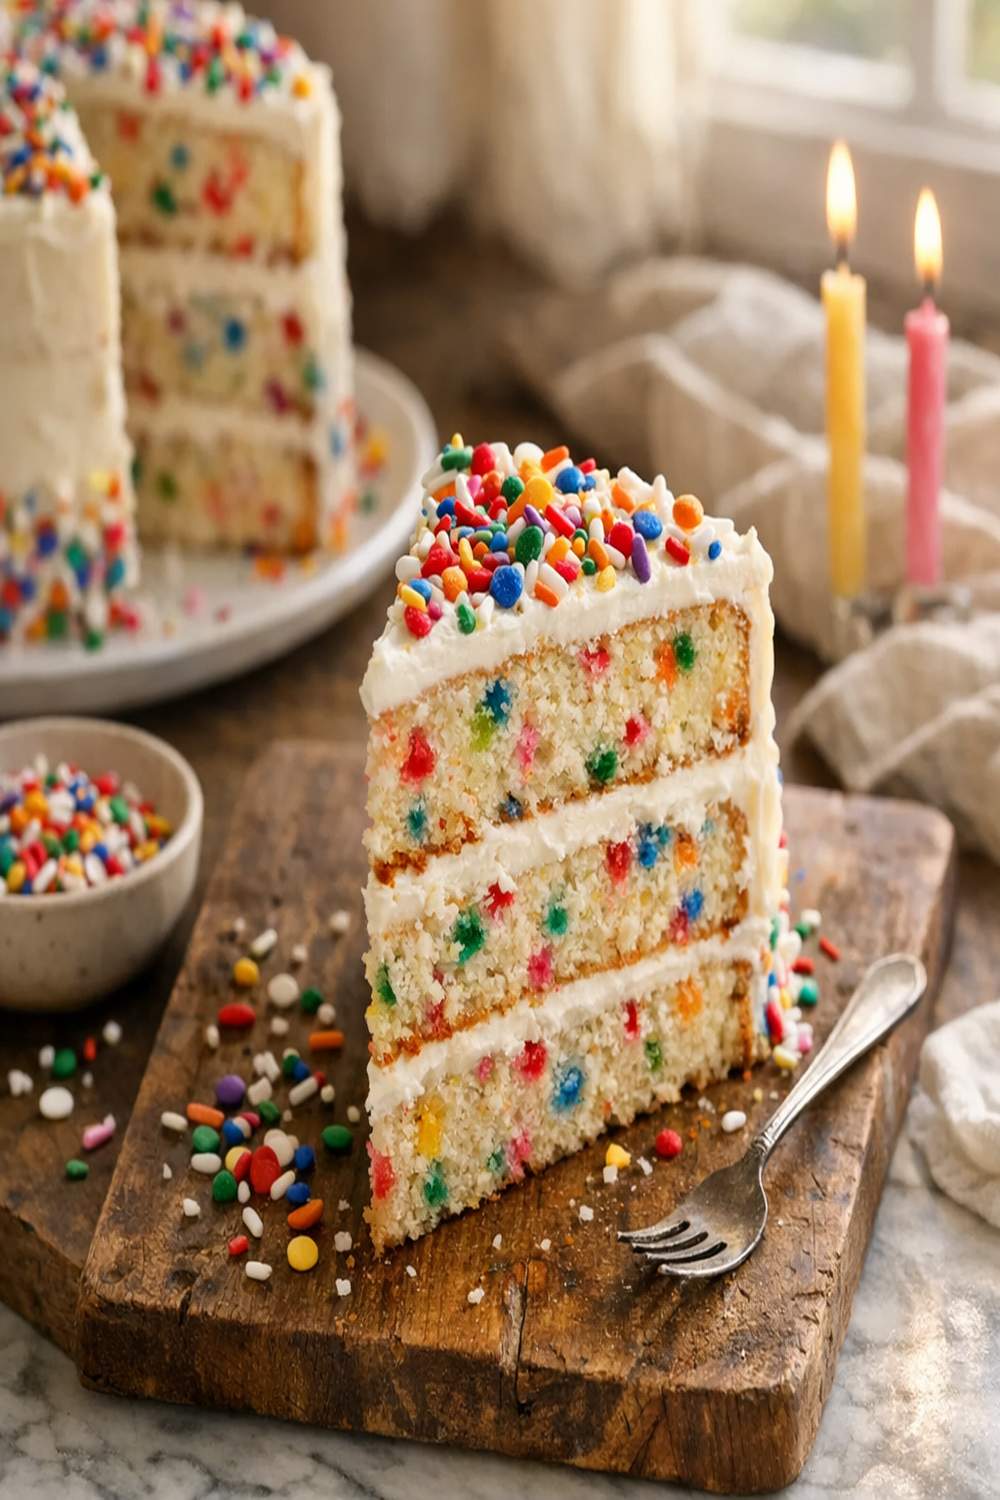
Whether you’re keto, vegan, or navigating gluten-free celebrations, you don’t have to watch from the sidelines while everyone else enjoys birthday cake. I’ve spent years as a registered dietitian figuring out how to make classic desserts work for every dietary need—because cake should never be about what you can’t have. This confetti birthday cake recipe gives you a tender, flavor-packed base cake with vibrant sprinkles that’s genuinely delicious in every version. If you love adaptable desserts, you’ll also appreciate my best moist carrot cake recipe, which works beautifully across dietary preferences too.
The Ultimate Confetti Birthday Cake Recipe for Every Diet (Keto, Vegan, Gluten-Free)
I’ll never forget my daughter’s seventh birthday. She’d recently gone vegan for animal welfare reasons—something I deeply respected—but I watched her face fall when I served the traditional birthday cake everyone else was eating. She felt left out, even though intellectually she knew it was her choice. That moment changed everything in my kitchen. I realized that dietary differences shouldn’t mean emotional distance from celebration food.
That’s when I started reverse-engineering desserts. Instead of starting with a standard recipe and trying to force substitutions, I began with the feeling I wanted: that tender crumb, that buttery richness, that moment of joy when you take the first bite. The confetti cake I’m sharing with you today is the result of hundreds of tests—and yes, taste-testing with my whole family across every dietary variation.
Which Version Is Right for You?
Before you gather ingredients, let’s match you with the right version. Each adaptation is engineered to deliver the same joy, just with different ingredients doing the heavy lifting. Here’s how I break it down in my own kitchen:
- Standard Version – The baseline recipe I’m sharing. Perfect if you’re celebrating with mixed dietary needs at your table and want the most forgiving, classic approach.
- Keto Version – Uses allulose or erythritol blends, almond flour, and heavy cream in the frosting instead of traditional sugar. Expect slightly less rise and a more tender crumb, but full ketogenic compliance. This version works beautifully for families managing blood sugar.
- Vegan Version – Replaces eggs with aquafaba, butter with vegan butter and coconut oil, and buttermilk with non-dairy alternatives. The texture is honestly indistinguishable from the standard version—I’ve fooled plenty of non-vegan guests with this one.
- Gluten-Free Version – Uses a one-to-one gluten-free flour blend with xanthan gum added, or a high-quality commercial blend. You’ll get the same moisture and crumb structure, though it may set slightly faster in the oven.
- Dairy-Free Version – Uses plant-based butter and non-dairy milk throughout. The frosting becomes silkier with the addition of non-dairy heavy cream alternatives or coconut cream. This works beautifully alongside vegan versions too.
The Base Ingredients (Works for Standard & Dairy-Free Versions)
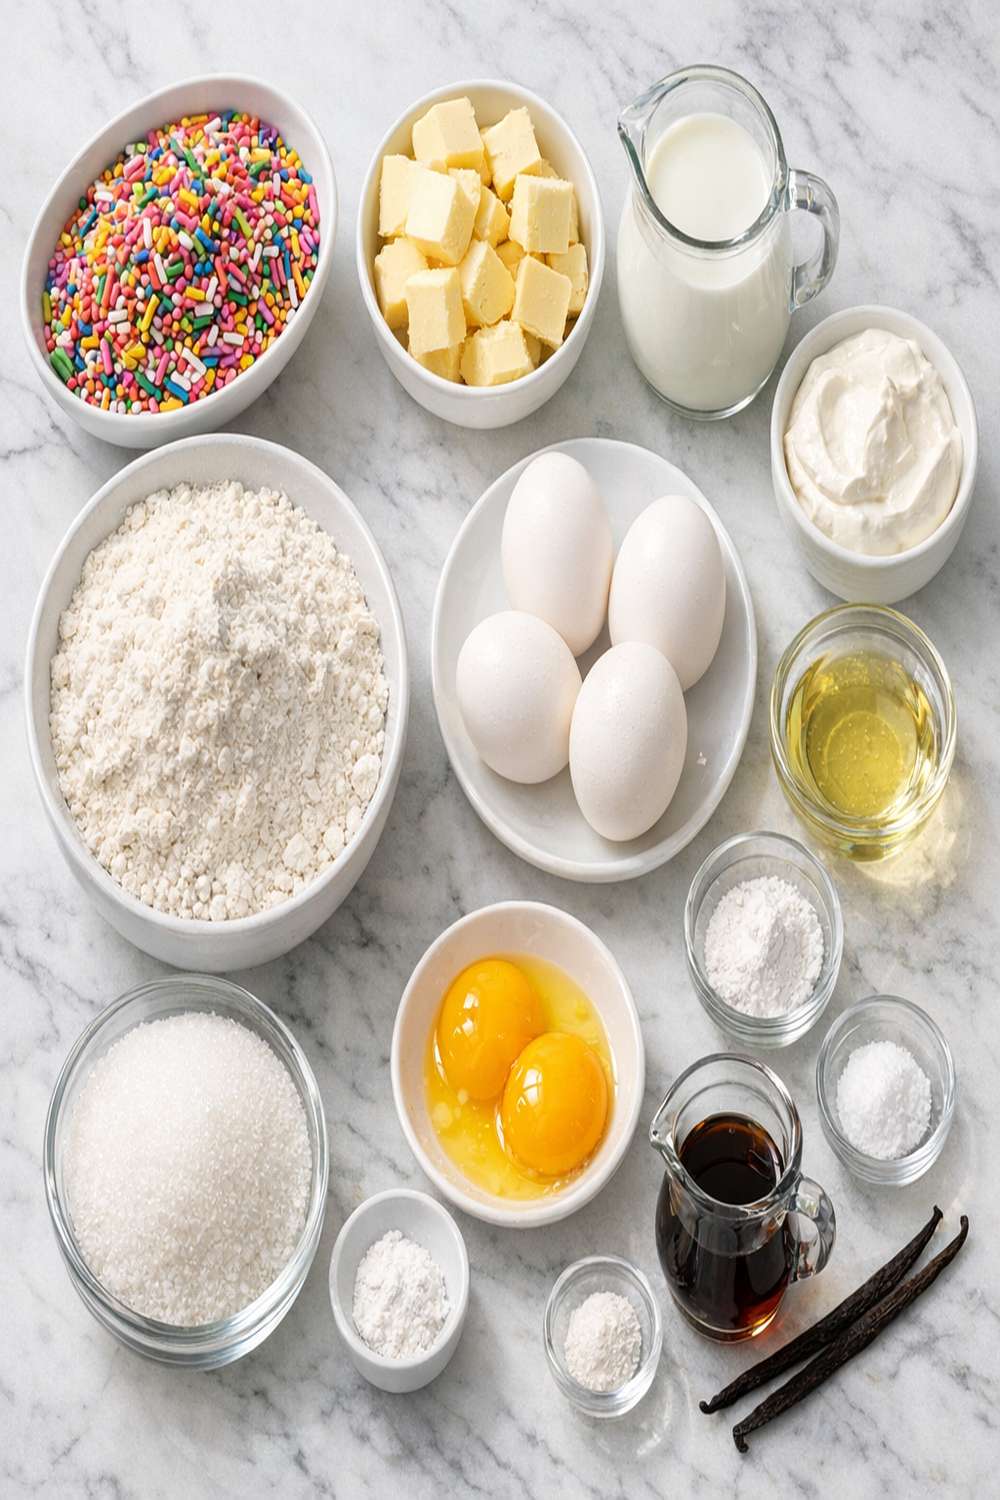
This ingredient list forms the foundation for both the standard and dairy-free versions. I’ve chosen each component deliberately—whole eggs for structure, a mix of butter and oil for moisture, and room-temperature buttermilk because cold dairy creates a tighter crumb. The confetti goes in at the very end, which keeps those beautiful sprinkles vibrant instead of bleeding color into the batter.
For the Cake
- 1 teaspoon fine sea salt (balances sweetness and strengthens gluten)
- 7 large egg whites (room temperature, about 220g total)
- 1 tablespoon pure vanilla extract (not imitation, which tastes metallic)
- 2⅓ cups granulated sugar (466g, for proper structure and browning)
- 2 teaspoons fresh lemon zest (brightens vanilla without competing)
- 1 cup unsalted butter (softened to room temperature, about 227g)
- 1⅓ cups buttermilk (room temperature, 320ml—this is crucial for tender crumb)
- ⅔ cup rainbow jimmies (100g, added at the very end)
- 3¾ cups all-purpose flour (450g, spooned and leveled, never packed)
- 2½ teaspoons baking powder (for proper rise without metallic notes)
- ⅓ cup neutral vegetable oil (creates tender crumb without heaviness)
For the Frosting
- 1 tablespoon pure vanilla extract (room temperature)
- Rainbow sprinkles (for finishing)
- 2 pounds powdered sugar (900g, sifted to prevent grittiness)
- 3 to 4 tablespoons heavy cream (full-fat, adds silkiness without thinning)
- ½ teaspoon fine sea salt (balances sweetness)
- 1 pound unsalted butter (450g, softened to 65-70°F for silky texture)
Yield: This recipe makes one stunning 9-inch two-layer cake, serving 12-14 people comfortably. For smaller celebrations, you can halve the recipe and bake in two 6-inch rounds, reducing baking time to 24-28 minutes.
Dietary Substitution Chart
I’ve tested every substitution here multiple times to ensure you get the texture and flavor you deserve, not just “it works.” Use this chart as your guide when adapting:
- Egg Whites -> Keto: Same amount needed | Vegan: 10 tablespoons aquafaba (liquid from canned chickpeas, drained weight) or 3.5 tablespoons ground flaxseed mixed with 10.5 tablespoons water | Gluten-Free: No change needed | Dairy-Free: No change needed
- Unsalted Butter (in frosting) -> Keto: Same amount, room temperature | Vegan: 1 pound vegan butter (same amount) at room temperature | Gluten-Free: No change needed | Dairy-Free: 1 pound vegan butter
- Unsalted Butter (in cake) -> Keto: Use all coconut oil or MCT oil for ketone optimization | Vegan: Vegan butter (same amount) or coconut oil | Gluten-Free: No change needed | Dairy-Free: Vegan butter (same amount)
- Granulated Sugar -> Keto: 1:1 allulose or erythritol-stevia blend (⅔ volume of regular sugar due to sweetness concentration) | Vegan: No change needed | Gluten-Free: No change needed | Dairy-Free: No change needed
- All-Purpose Flour -> Keto: ½ cup almond flour + 3¼ cups almond flour blend with xanthan gum OR 3¾ cups keto-specific flour blend | Vegan: No change needed | Gluten-Free: 3¾ cups gluten-free all-purpose flour blend (with xanthan gum if not included) | Dairy-Free: No change needed
- Heavy Cream -> Keto: Same amount | Vegan: 3-4 tablespoons non-dairy heavy cream or full-fat canned coconut cream (skim off top) | Gluten-Free: No change needed | Dairy-Free: Non-dairy heavy cream or coconut cream
- Buttermilk -> Keto: Same amount needed | Vegan: 1⅓ cups non-dairy milk (oat or soy work best) mixed with 1½ tablespoons apple cider vinegar (let sit 5 minutes) | Gluten-Free: No change needed | Dairy-Free: 1⅓ cups non-dairy milk plus 1½ tablespoons apple cider vinegar
How to Make Confetti Birthday Cake Recipe Your Way
The beauty of this recipe is that the method stays nearly identical across all versions. I’ve built in flexibility at each step so you can pivot to your dietary needs without guessing. Read through the entire recipe first, then gather your specific substitutes based on your dietary version. This takes just 5 minutes and prevents mid-recipe scrambling.
Step 1: Prepare Your Pans & Gather Your Ingredients
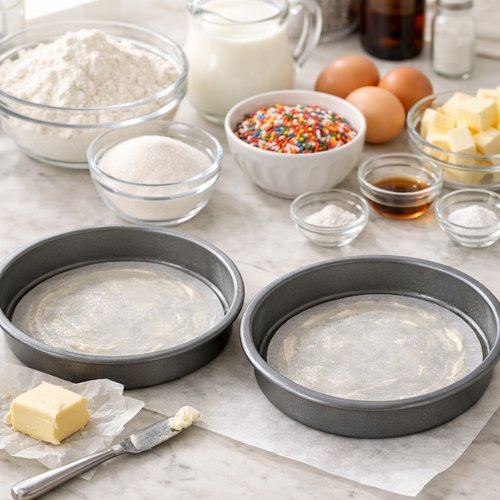
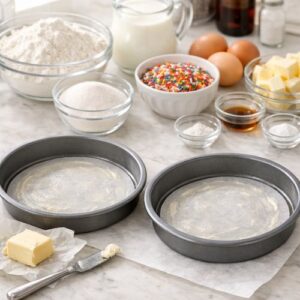
Preheat your oven to 350°F (175°C). Line two 9-inch round cake pans with parchment paper, then butter the parchment lightly. I use parchment circles cut to fit perfectly—it ensures you can invert the cakes cleanly, which matters more than most bakers realize.
Measure all your ingredients and place them where you can see them. This includes your specific dietary swaps. For the vegan version, make your “buttermilk” now and let it curdle for 5 minutes—this develops the proper acid balance for structure. For keto bakers, have your sweetener measured separately since the volume will differ from sugar. Room temperature matters tremendously here. Pull your eggs, butter, and dairy (or dairy-free alternatives) out 30 minutes before mixing.
Step 2: Combine Your Dry Ingredients
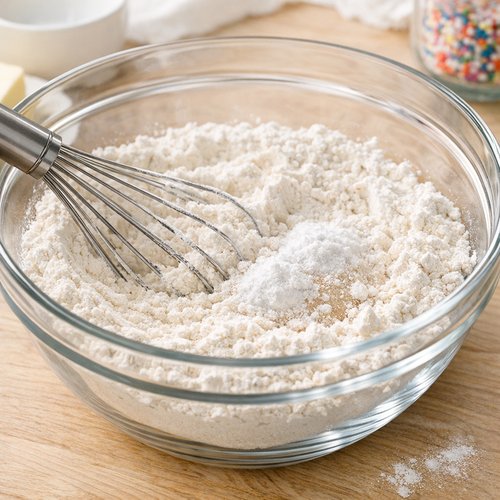
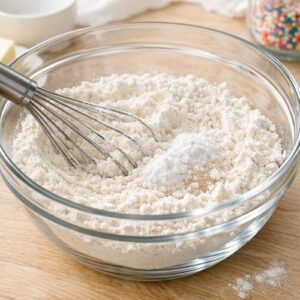
In a medium bowl, whisk together your flour (or gluten-free flour blend), baking powder, and salt. This breaks up any lumps and distributes the leavening evenly. Whisk for about 20 seconds—not aggressively, just enough to combine. If you’re using a gluten-free blend without xanthan gum, add ¼ teaspoon xanthan gum per cup of flour. Set this bowl aside.
Step 3: Cream Your Butter, Oil & Sugar
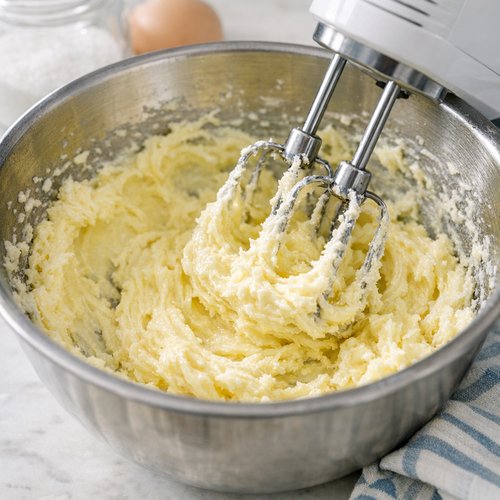
In a large bowl (or using an electric mixer), beat your softened butter and oil together for 1 minute until lightened. For the keto version, use only coconut oil or MCT oil here if dairy-free compliance matters to you, and beat for 2 minutes to incorporate air.
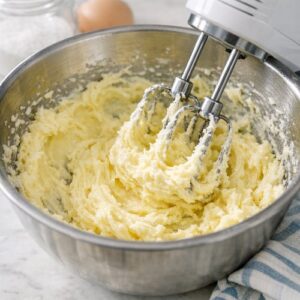
Add your sugar (or sugar substitute) to the butter mixture. Beat for 3-4 minutes until the mixture looks pale, fluffy, and resembles wet sand. This step aerates the batter, which creates a tender, light crumb. You’re looking for visible lightening, not just “mixed together.”
Add your vanilla extract and lemon zest. Beat for another 20 seconds to distribute evenly. The lemon zest adds brightness that lets the vanilla shine without making the cake taste citrusy.
Step 4: Add Your Eggs (or Egg Alternatives)
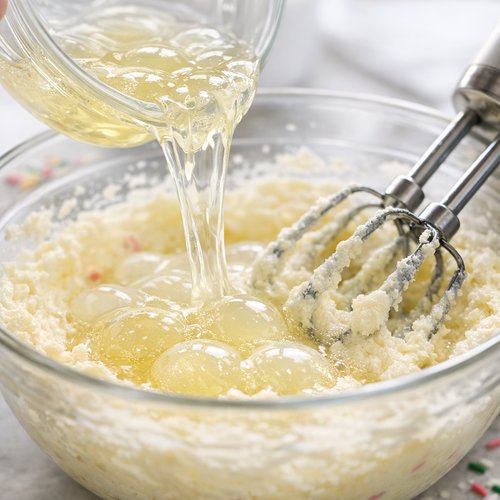
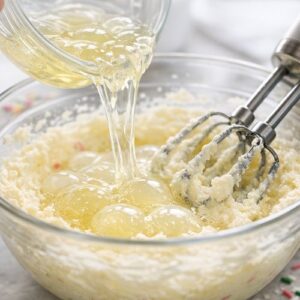
This step differs by dietary version. For the standard version, add all 7 egg whites at once and beat for 1 minute until fully incorporated. For the vegan version, add your aquafaba (or flaxseed mixture) in two additions, beating for 30 seconds between each addition. The batter should look smooth and slightly thickened.
For keto bakers, the batter may not thicken as visibly since you’re using fewer eggs, but this is normal—beat for the full time anyway to incorporate air.
Step 5: Alternate Dry & Wet Ingredients
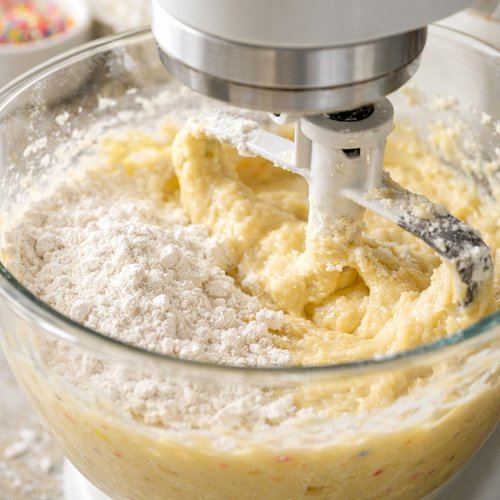
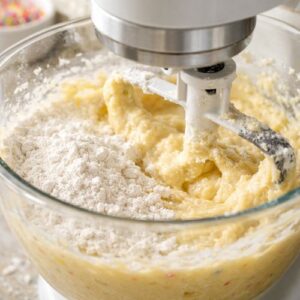
Here’s where precision matters. Reduce your mixer to low speed. Add one-third of your dry flour mixture, beat for 15 seconds until just combined. Add half of your buttermilk (or dairy-free alternative), beat for 15 seconds. Repeat: another third of flour, 15 seconds, remaining buttermilk, 15 seconds, final third of flour, 15 seconds.
The batter should come together smoothly without overmixing. Overmixing develops gluten, which tightens the crumb and makes the cake tough. Your batter will be thick and scoopable, not pourable.
For gluten-free versions, stop mixing as soon as you see no white flour streaks—these batters develop the gritty texture that people dislike when you beat them longer.
Step 6: Fold in Your Confetti
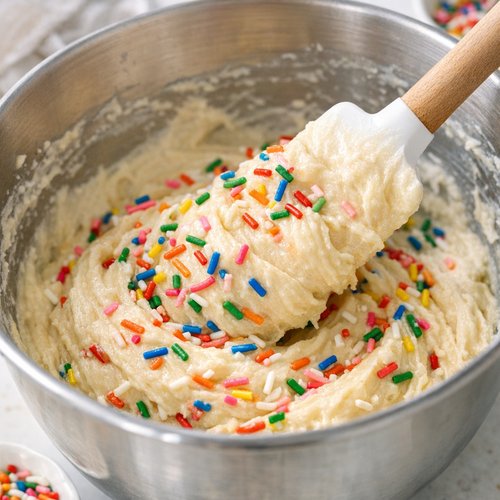
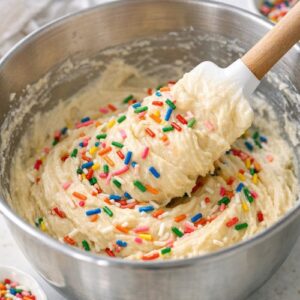
Remove your bowl from the mixer. Using a rubber spatula, gently fold in your rainbow jimmies with about 10 strokes, just until distributed. If you stir too vigorously, the colors will bleed into the batter, leaving you with a grayish-purple cake instead of a bright, confetti-speckled one. The jimmies should stay mostly intact and colorful throughout the batter.
Step 7: Divide & Bake
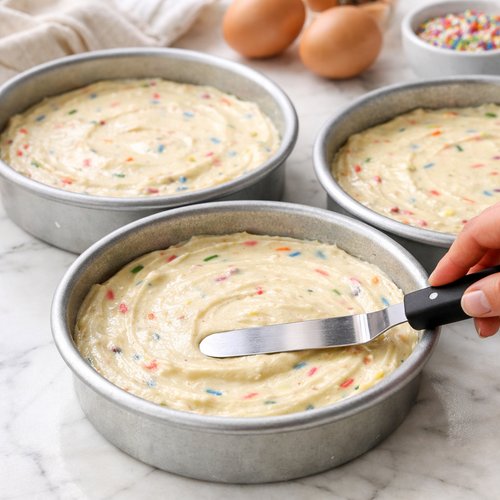
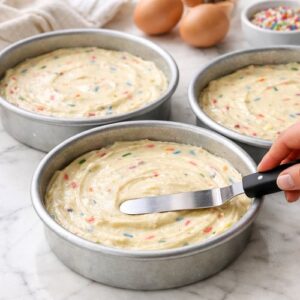
Divide your batter evenly between your prepared pans. Smooth the tops gently with an offset spatula or the back of a spoon. The batter should reach the edges without being forced.
Bake for 32-36 minutes, until a toothpick inserted in the center comes out with just a few moist crumbs (not wet batter). For gluten-free versions, start checking at 28 minutes, as these tend to bake faster. For keto versions, expect the cakes to rise slightly less but still feel springy when gently pressed.
The tops should be lightly golden and spring back when touched with a finger. Remove from the oven and let cool in the pans for 10 minutes, then turn out onto a wire rack to cool completely. This takes about 1 hour. Do not skip this cooling step—frosting a warm cake leads to melting and an unstable crumb layer.
Step 8: Make Your Frosting
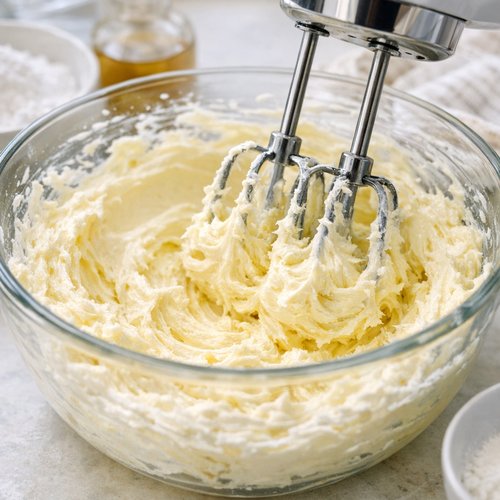
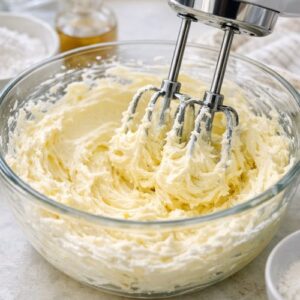
While your cakes cool, prepare your frosting. In a large bowl, beat your softened butter (or vegan butter) alone for 2 minutes until pale and creamy. For the dairy-free version, beat for an extra minute to really lighten the butter substitute.
Add your sifted powdered sugar in three additions, beating on low speed for 30 seconds between each addition. This prevents a cloud of sugar coating your kitchen. Add your salt and vanilla extract, beating for another minute until fluffy.
Add your heavy cream (or non-dairy alternative) one tablespoon at a time, beating until you reach spreadable consistency. The frosting should hold peaks but still be soft enough to spread without resistance. For vegan frostings, you may need all 4 tablespoons of non-dairy cream to reach the right consistency, as plant-based butters tend to be firmer.
Step 9: Level, Fill & Frost
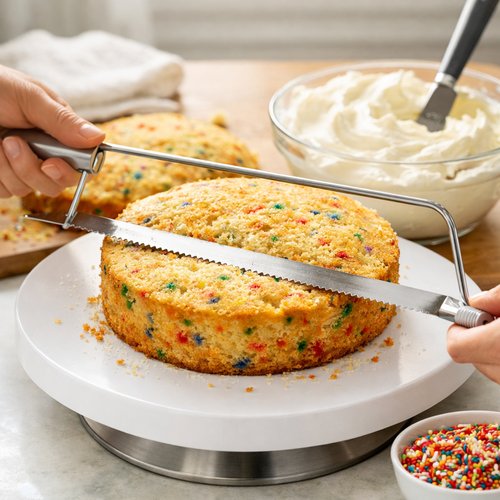
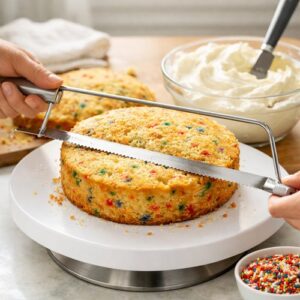
Once your cakes are completely cool, you can level them if your tops have domed (I use a serrated knife and a simple cake leveler). Place your first cake layer on a cake board or serving plate. Spread about ½ cup of frosting evenly over the top using an offset spatula.
Place your second cake layer on top, pressing gently. Frost the top and sides with the remaining frosting. I do a thin “crumb coat” first (a super thin layer that seals in crumbs), refrigerate for 15 minutes, then apply a final thicker coat for a polished look.
Top with a generous handful of rainbow sprinkles. The cake is ready to serve immediately, or you can refrigerate it for up to 4 hours before serving.
Expert’s Nutritional Tip: The Science Behind the Egg Whites
As a registered dietitian, I always pay attention to what I’m putting in my kitchen. The reason I use egg whites instead of whole eggs in this particular cake is about more than just reducing fat—it’s about structure. Egg whites are almost pure albumin protein, which creates an incredibly stable foam that traps air and produces that light, tender crumb everyone wants.
Whole eggs would add the yolk’s emulsifiers and fat, which would actually make this cake denser. By pairing egg whites with the oil in the batter, we get that moistness without sacrificing height. If you’re using a vegan version, aquafaba does something similar—it’s starch and protein that mimics albumin’s foam-building capacity.
This choice also means the cake is naturally lower in cholesterol while staying incredibly indulgent. At around 180-200 calories per slice (standard version), with only 2-3g saturated fat, you’re getting celebration cake that doesn’t leave you feeling weighed down after eating it. That matters to me as both a nutritionist and a mom who wants to enjoy cake at my own birthday without regret.
Make-Ahead Guide: Planning Your Celebration
One of my biggest kitchen secrets is timing. I build desserts into my schedule backward from the party date, and this confetti cake works beautifully for advance preparation:
- 5 Days Before: Make your frosting, transfer to an airtight container, and refrigerate. Buttercream freezes beautifully for up to 3 weeks. Bring to room temperature and rebeat for 1 minute before using.
- 2 Days Before: Bake your cake layers, let cool completely, then wrap individually in plastic wrap and store in an airtight container at room temperature. The cakes actually improve slightly after 24 hours as the crumb sets.
- 1 Day Before: Assemble your cake. Frost completely, cover loosely with a cake dome or plastic wrap, and refrigerate. The frosting will firm up, making the cake easier to slice and serve.
- Day Of: Remove from the refrigerator 30 minutes before serving to bring to room temperature. The cake will taste slightly more tender and flavorful at room temperature than straight from the fridge.
- Leftover Storage: Store your frosted cake in an airtight container at room temperature for up to 2 days, or refrigerate for up to 4 days. The frosting will firm when cold, which is actually ideal for clean slicing.
For keto versions: The cake is more stable when refrigerated, as the crumb structure is slightly different. Keep refrigerated and slice with a warm, damp knife for the cleanest edges.
For vegan versions: These cakes are actually more structurally stable than you’d expect and keep beautifully at room temperature for 2 days. The aquafaba-based crumb continues to set slightly over 24 hours, improving texture.
Common Mistakes to Avoid
After years of troubleshooting cakes in my own kitchen and working with families, these are the mistakes that derail even careful bakers:
- Using Cold Eggs or Dairy: Temperature matters more than people realize. Cold eggs don’t emulsify properly into the butter, and cold buttermilk tightens the gluten network, resulting in a dense cake. Room temperature ingredients take just 30 minutes of planning and change everything.
- Overmixing the Dry & Wet Ingredients: This is the #1 culprit behind tough cakes. Once you stop seeing white flour streaks, you’re done mixing. Keep your mixer on low speed during this step, and use a spatula to fold the final ingredients in by hand. I know it’s tempting to keep mixing “to be sure,” but resist.
- Skipping the Leveling Step: If your cake layers dome significantly, the top won’t sit flat on the next layer. Use a serrated knife, a steady hand, and remove just ¼- to ½-inch from the top. Those scraps make the world’s best cake crumbles for snacking or trifles.
- Frosting a Warm Cake: I learned this the hard way at my first professional cake job. Warm cake melts frosting, which slides around and creates a sloppy appearance. Cool completely—this takes patience, but it’s non-negotiable for a polished result.
Seasonal Variations: Adapting Year-Round
While confetti cake is a celebration classic, I love tweaking it for seasonal flavors. Here’s how I adapt this recipe without changing the base structure:
- Spring: Replace the vanilla extract with almond extract (use ¾ tablespoon instead of 1 tablespoon), and fold in edible flower petals instead of some confetti. The lemon zest stays and brightens everything beautifully.
- Summer: Add 1 tablespoon of fresh lime zest along with the lemon zest for a brighter, more vibrant flavor. For the frosting, add 2 tablespoons of freeze-dried raspberry powder to make it blush pink.
- Fall: Swap ¼ cup of the flour for finely ground graham cracker crumbs, and add ½ teaspoon of cinnamon and ¼ teaspoon of nutmeg to the dry ingredients. Use brown rainbow jimmies or autumn sprinkles instead. The frosting stays classic vanilla.
- Winter: Add ½ teaspoon of peppermint extract to both the cake and frosting, and use silver and white pearl sprinkles instead of rainbow. This becomes your holiday go-to cake.
Nutrition Comparison Across Versions
I believe in transparency about nutrition, so here’s what you’re actually eating. These numbers are based on USDA nutrient databases and calculated per slice (standard 9-inch cake, 12 slices):
- Standard Version (per slice): 410 calories | 18g fat (10g saturated) | 58g carbohydrates (56g sugar) | 2g fiber | 4g protein | 240mg sodium. This is traditional cake nutrition—celebratory, not everyday.
- Vegan Version (per slice): 405 calories | 19g fat (4g saturated) | 57g carbohydrates | 3g fiber | 3g protein | 245mg sodium. Nearly identical to standard because we’re focused on structure, not fat reduction. Vegan doesn’t mean low-calorie; it means aligned with your values.
- Gluten-Free Version (per slice): 420 calories | 18g fat (10g saturated) | 62g carbohydrates | 1g fiber | 3g protein | 280mg sodium. Slightly higher carbs due to the different flour blend, and watch sodium—some gluten-free blends add it for structure.
- Keto Version (per slice, using allulose): 385 calories | 20g fat (11g saturated) | 38g carbohydrates | 2g fiber (accounting for sugar alcohols) | 4g protein | 250mg sodium. Net carbs come to approximately 36g per slice—this is still a celebratory cake, not a weekday option for strict keto.
- Dairy-Free Version (per slice): 410 calories | 20g fat (3g saturated) | 58g carbohydrates | 2g fiber | 2g protein | 255mg sodium. Slightly more fat from vegan butter, but comparable overall nutrition to standard.
How Each Version Tastes Different
Here’s the honest truth about how these cakes stack up against each other. I’m not going to tell you they’re all identical, because that wouldn’t be fair to you:
- Standard Version: This is the baseline, the gold standard. Buttery, tender, with a fine crumb that melts slightly on your tongue. The frosting is silky and rich. If you’re not managing any dietary restrictions, this is the version that will make everyone at your party ask for the recipe.
- Vegan Version: I was genuinely shocked the first time I tested this—aquafaba creates a crumb that’s nearly indistinguishable from the standard version. Slightly more tender, actually. The frosting is softer and less “buttery” tasting, but that’s honestly beautiful in its own way. The flavor is pure vanilla and confetti joy.
- Gluten-Free Version: These are noticeably more fragile when warm, though they firm up beautifully after cooling. The crumb is slightly more tender (in a good way) and has a bit more subtle graininess, though you won’t notice it with frosting and celebration happening. The rise is slightly less dramatic.
- Keto Version: This is where I’ll be honest: keto sweeteners have a learning curve. Allulose is the closest to sugar, but there’s still a slight cooling sensation on the back of your palate. The cake rises less dramatically and has a slightly denser crumb, but it’s still cake. It’s still celebratory. It just tastes like a keto celebration.
- Dairy-Free Version: Coconut or oat-based vegan butter frosting tastes creamy and rich, just slightly less buttery. The cake itself is identical to the standard version if you use dairy-free milk in place of buttermilk. This version bridges the gap between standard and specialized perfectly.
Can I Store Confetti Birthday Cake Recipe?
Yes, and here’s exactly how long each version keeps, based on my professional food storage knowledge:
- Unfrosted Cake Layers (All Versions): Wrap individually in plastic wrap and store at room temperature for 2 days. Refrigerate for up to 5 days in an airtight container. Freeze for up to 3 months (thaw at room temperature before frosting).
- Frosted Cake (Standard, Vegan, Dairy-Free): Cover loosely and store at room temperature for 2 days, or refrigerate for up to 4 days. The frosting may firm up when cold, which is fine—slice with a warm knife for clean edges.
- Frosted Cake (Gluten-Free): Refrigerate immediately. Store for up to 3 days. Gluten-free cakes dry out faster, so cold storage is essential.
- Frosted Cake (Keto): Refrigerate for up to 4 days. Keto cakes are more moisture-stable when cold due to their different flour composition. Slice straight from the fridge for the cleanest cuts.
- Frosting Alone: Store in an airtight container at room temperature for 1 week, or refrigerate for up to 2 weeks. Freeze for up to 3 months. Thaw at room temperature and rebeat for 1 minute before using.
What to Serve With Confetti Birthday Cake Recipe?
Confetti cake is beautiful on its own, but I love pairing it with complementary flavors that don’t compete. Here’s what works beautifully across dietary versions:
- Fresh Whipped Cream or Coconut Whipped Cream: A dollop of unsweetened whipped cream (standard) or chilled full-fat coconut cream (vegan) on the side adds lightness and lets the cake shine. Skip this if you’re already frosting the cake—that’s plenty of richness.
- Fresh Berries: Raspberries, blueberries, or strawberries brighten the plate and add a pop of color. Fresh fruit is perfect for all dietary versions and adds natural sweetness contrast. If you love berry flavors, my blueberry cream cheese recipe makes an excellent companion dessert for a dessert spread.
- Vanilla Ice Cream or Gelato: A scoop of quality vanilla ice cream alongside a slice is peak celebration. For vegan diets, oat-based or coconut ice cream works beautifully. For keto, there are now excellent low-carb options that don’t taste like compromise.
- Fresh Lemon Curd: Tangy, bright, and unexpected. A small dollop on the side of each slice adds sophistication and complements the vanilla without overwhelming it. All dietary versions pair beautifully with homemade lemon curd.
- Sparkling Cider or Non-Alcoholic Punch: A cold beverage is essential with cake. I always pair sweet cake with something fizzy or slightly tart to cleanse the palate between bites. My apple cider recipe is perfect for fall celebrations, and it works with every cake version.

Confetti Birthday Cake Recipe
Ingredients
Method
- Preheat your oven to 350°F (175°C). Line two 9-inch round cake pans with parchment paper, then butter the parchment lightly. I use parchment circles cut to fit perfectly—it ensures you can invert the cakes cleanly, which matters more than most bakers realize. Measure all your ingredients and place them where you can see them. This includes your specific dietary swaps. For the vegan version, make your "buttermilk" now and let it curdle for 5 minutes—this develops the proper acid balance for structure. For keto bakers, have your sweetener measured separately since the volume will differ from sugar. Room temperature matters tremendously here. Pull your eggs, butter, and dairy (or dairy-free alternatives) out 30 minutes before mixing.
- In a medium bowl, whisk together your flour (or gluten-free flour blend), baking powder, and salt. This breaks up any lumps and distributes the leavening evenly. Whisk for about 20 seconds—not aggressively, just enough to combine. If you're using a gluten-free blend without xanthan gum, add ¼ teaspoon xanthan gum per cup of flour. Set this bowl aside.
- In a large bowl (or using an electric mixer), beat your softened butter and oil together for 1 minute until lightened. For the keto version, use only coconut oil or MCT oil here if dairy-free compliance matters to you, and beat for 2 minutes to incorporate air. Add your sugar (or sugar substitute) to the butter mixture. Beat for 3-4 minutes until the mixture looks pale, fluffy, and resembles wet sand. This step aerates the batter, which creates a tender, light crumb. You're looking for visible lightening, not just "mixed together." Add your vanilla extract and lemon zest. Beat for another 20 seconds to distribute evenly. The lemon zest adds brightness that lets the vanilla shine without making the cake taste citrusy.
- This step differs by dietary version. For the standard version, add all 7 egg whites at once and beat for 1 minute until fully incorporated. For the vegan version, add your aquafaba (or flaxseed mixture) in two additions, beating for 30 seconds between each addition. The batter should look smooth and slightly thickened. For keto bakers, the batter may not thicken as visibly since you're using fewer eggs, but this is normal—beat for the full time anyway to incorporate air.
- Here's where precision matters. Reduce your mixer to low speed. Add one-third of your dry flour mixture, beat for 15 seconds until just combined. Add half of your buttermilk (or dairy-free alternative), beat for 15 seconds. Repeat: another third of flour, 15 seconds, remaining buttermilk, 15 seconds, final third of flour, 15 seconds. The batter should come together smoothly without overmixing. Overmixing develops gluten, which tightens the crumb and makes the cake tough. Your batter will be thick and scoopable, not pourable. For gluten-free versions, stop mixing as soon as you see no white flour streaks—these batters develop the gritty texture that people dislike when you beat them longer.
- Remove your bowl from the mixer. Using a rubber spatula, gently fold in your rainbow jimmies with about 10 strokes, just until distributed. If you stir too vigorously, the colors will bleed into the batter, leaving you with a grayish-purple cake instead of a bright, confetti-speckled one. The jimmies should stay mostly intact and colorful throughout the batter.
- Divide your batter evenly between your prepared pans. Smooth the tops gently with an offset spatula or the back of a spoon. The batter should reach the edges without being forced. Bake for 32-36 minutes, until a toothpick inserted in the center comes out with just a few moist crumbs (not wet batter). For gluten-free versions, start checking at 28 minutes, as these tend to bake faster. For keto versions, expect the cakes to rise slightly less but still feel springy when gently pressed. The tops should be lightly golden and spring back when touched with a finger. Remove from the oven and let cool in the pans for 10 minutes, then turn out onto a wire rack to cool completely. This takes about 1 hour. Do not skip this cooling step—frosting a warm cake leads to melting and an unstable crumb layer.
- While your cakes cool, prepare your frosting. In a large bowl, beat your softened butter (or vegan butter) alone for 2 minutes until pale and creamy. For the dairy-free version, beat for an extra minute to really lighten the butter substitute. Add your sifted powdered sugar in three additions, beating on low speed for 30 seconds between each addition. This prevents a cloud of sugar coating your kitchen. Add your salt and vanilla extract, beating for another minute until fluffy. Add your heavy cream (or non-dairy alternative) one tablespoon at a time, beating until you reach spreadable consistency. The frosting should hold peaks but still be soft enough to spread without resistance. For vegan frostings, you may need all 4 tablespoons of non-dairy cream to reach the right consistency, as plant-based butters tend to be firmer.
- Once your cakes are completely cool, you can level them if your tops have domed (I use a serrated knife and a simple cake leveler). Place your first cake layer on a cake board or serving plate. Spread about ½ cup of frosting evenly over the top using an offset spatula. Place your second cake layer on top, pressing gently. Frost the top and sides with the remaining frosting. I do a thin "crumb coat" first (a super thin layer that seals in crumbs), refrigerate for 15 minutes, then apply a final thicker coat for a polished look. Top with a generous handful of rainbow sprinkles. The cake is ready to serve immediately, or you can refrigerate it for up to 4 hours before serving.
Notes
FAQs
Can I make this cake dairy-free without making it vegan?
Absolutely, and this is actually one of the most common requests I get. Use the standard recipe but swap the unsalted butter for dairy-free butter (same amount), and replace the buttermilk with unsweetened oat milk mixed with apple cider vinegar (use the ratio in the substitution chart). Keep the egg whites as-is—they’re not dairy. The cake will taste virtually identical to the standard version. Your frosting becomes the “tell” that it’s dairy-free, as vegan butter has a slightly different mouthfeel than dairy butter, but it’s still delicious.
Why does my keto version come out dense?
Sugar alcohols and allulose don’t brown the same way sugar does, and they don’t create the same volume of air when creamed with butter. This is normal and not a failure—you’re working with different chemistry. To combat density, make absolutely sure you’re creaming the butter and sweetener for the full 3-4 minutes, and beat the aquafaba longer if you’re using it. Also check your oven temperature with an oven thermometer; keto batters are more sensitive to temperature variations.
My gluten-free version turned out gritty. What went wrong?
Grittiness in gl