
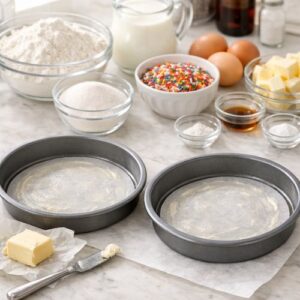
Ingredients
Method
Step 1: Prepare Your Pans & Gather Your Ingredients
- Preheat your oven to 350°F (175°C). Line two 9-inch round cake pans with parchment paper, then butter the parchment lightly. I use parchment circles cut to fit perfectly—it ensures you can invert the cakes cleanly, which matters more than most bakers realize. Measure all your ingredients and place them where you can see them. This includes your specific dietary swaps. For the vegan version, make your "buttermilk" now and let it curdle for 5 minutes—this develops the proper acid balance for structure. For keto bakers, have your sweetener measured separately since the volume will differ from sugar. Room temperature matters tremendously here. Pull your eggs, butter, and dairy (or dairy-free alternatives) out 30 minutes before mixing.
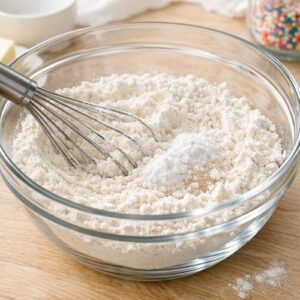
Step 2: Combine Your Dry Ingredients
- In a medium bowl, whisk together your flour (or gluten-free flour blend), baking powder, and salt. This breaks up any lumps and distributes the leavening evenly. Whisk for about 20 seconds—not aggressively, just enough to combine. If you're using a gluten-free blend without xanthan gum, add ¼ teaspoon xanthan gum per cup of flour. Set this bowl aside.
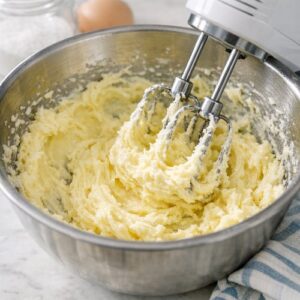
Step 3: Cream Your Butter, Oil & Sugar
- In a large bowl (or using an electric mixer), beat your softened butter and oil together for 1 minute until lightened. For the keto version, use only coconut oil or MCT oil here if dairy-free compliance matters to you, and beat for 2 minutes to incorporate air. Add your sugar (or sugar substitute) to the butter mixture. Beat for 3-4 minutes until the mixture looks pale, fluffy, and resembles wet sand. This step aerates the batter, which creates a tender, light crumb. You're looking for visible lightening, not just "mixed together." Add your vanilla extract and lemon zest. Beat for another 20 seconds to distribute evenly. The lemon zest adds brightness that lets the vanilla shine without making the cake taste citrusy.
Step 4: Add Your Eggs (or Egg Alternatives)
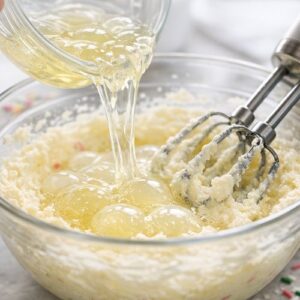
- This step differs by dietary version. For the standard version, add all 7 egg whites at once and beat for 1 minute until fully incorporated. For the vegan version, add your aquafaba (or flaxseed mixture) in two additions, beating for 30 seconds between each addition. The batter should look smooth and slightly thickened. For keto bakers, the batter may not thicken as visibly since you're using fewer eggs, but this is normal—beat for the full time anyway to incorporate air.
Step 5: Alternate Dry & Wet Ingredients
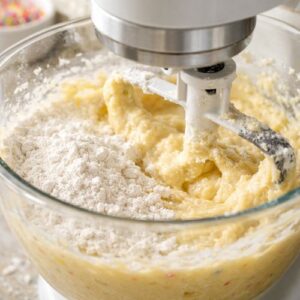
- Here's where precision matters. Reduce your mixer to low speed. Add one-third of your dry flour mixture, beat for 15 seconds until just combined. Add half of your buttermilk (or dairy-free alternative), beat for 15 seconds. Repeat: another third of flour, 15 seconds, remaining buttermilk, 15 seconds, final third of flour, 15 seconds. The batter should come together smoothly without overmixing. Overmixing develops gluten, which tightens the crumb and makes the cake tough. Your batter will be thick and scoopable, not pourable. For gluten-free versions, stop mixing as soon as you see no white flour streaks—these batters develop the gritty texture that people dislike when you beat them longer.
Step 6: Fold in Your Confetti
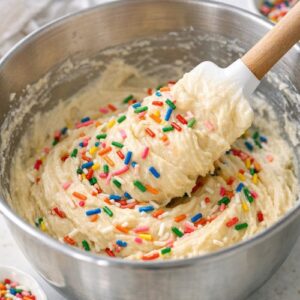
- Remove your bowl from the mixer. Using a rubber spatula, gently fold in your rainbow jimmies with about 10 strokes, just until distributed. If you stir too vigorously, the colors will bleed into the batter, leaving you with a grayish-purple cake instead of a bright, confetti-speckled one. The jimmies should stay mostly intact and colorful throughout the batter.
Step 7: Divide & Bake
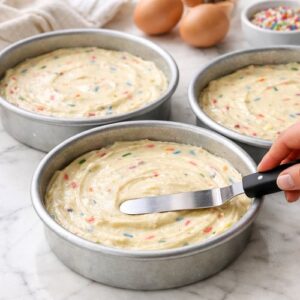
- Divide your batter evenly between your prepared pans. Smooth the tops gently with an offset spatula or the back of a spoon. The batter should reach the edges without being forced. Bake for 32-36 minutes, until a toothpick inserted in the center comes out with just a few moist crumbs (not wet batter). For gluten-free versions, start checking at 28 minutes, as these tend to bake faster. For keto versions, expect the cakes to rise slightly less but still feel springy when gently pressed. The tops should be lightly golden and spring back when touched with a finger. Remove from the oven and let cool in the pans for 10 minutes, then turn out onto a wire rack to cool completely. This takes about 1 hour. Do not skip this cooling step—frosting a warm cake leads to melting and an unstable crumb layer.
Step 8: Make Your Frosting
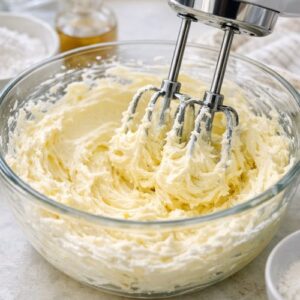
- While your cakes cool, prepare your frosting. In a large bowl, beat your softened butter (or vegan butter) alone for 2 minutes until pale and creamy. For the dairy-free version, beat for an extra minute to really lighten the butter substitute. Add your sifted powdered sugar in three additions, beating on low speed for 30 seconds between each addition. This prevents a cloud of sugar coating your kitchen. Add your salt and vanilla extract, beating for another minute until fluffy. Add your heavy cream (or non-dairy alternative) one tablespoon at a time, beating until you reach spreadable consistency. The frosting should hold peaks but still be soft enough to spread without resistance. For vegan frostings, you may need all 4 tablespoons of non-dairy cream to reach the right consistency, as plant-based butters tend to be firmer.
Step 9: Level, Fill & Frost
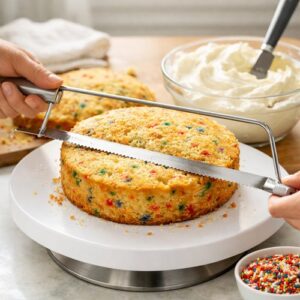
- Once your cakes are completely cool, you can level them if your tops have domed (I use a serrated knife and a simple cake leveler). Place your first cake layer on a cake board or serving plate. Spread about ½ cup of frosting evenly over the top using an offset spatula. Place your second cake layer on top, pressing gently. Frost the top and sides with the remaining frosting. I do a thin "crumb coat" first (a super thin layer that seals in crumbs), refrigerate for 15 minutes, then apply a final thicker coat for a polished look. Top with a generous handful of rainbow sprinkles. The cake is ready to serve immediately, or you can refrigerate it for up to 4 hours before serving.
Notes
- Using Cold Eggs or Dairy: Temperature matters more than people realize. Cold eggs don't emulsify properly into the butter, and cold buttermilk tightens the gluten network, resulting in a dense cake. Room temperature ingredients take just 30 minutes of planning and change everything.
- Overmixing the Dry & Wet Ingredients: This is the #1 culprit behind tough cakes. Once you stop seeing white flour streaks, you're done mixing. Keep your mixer on low speed during this step, and use a spatula to fold the final ingredients in by hand. I know it's tempting to keep mixing "to be sure," but resist.
- Skipping the Leveling Step: If your cake layers dome significantly, the top won't sit flat on the next layer. Use a serrated knife, a steady hand, and remove just ¼- to ½-inch from the top. Those scraps make the world's best cake crumbles for snacking or trifles.
- Frosting a Warm Cake: I learned this the hard way at my first professional cake job. Warm cake melts frosting, which slides around and creates a sloppy appearance. Cool completely—this takes patience, but it's non-negotiable for a polished result.