This post contains affiliate links. As an Amazon Associate I earn from qualifying purchases.
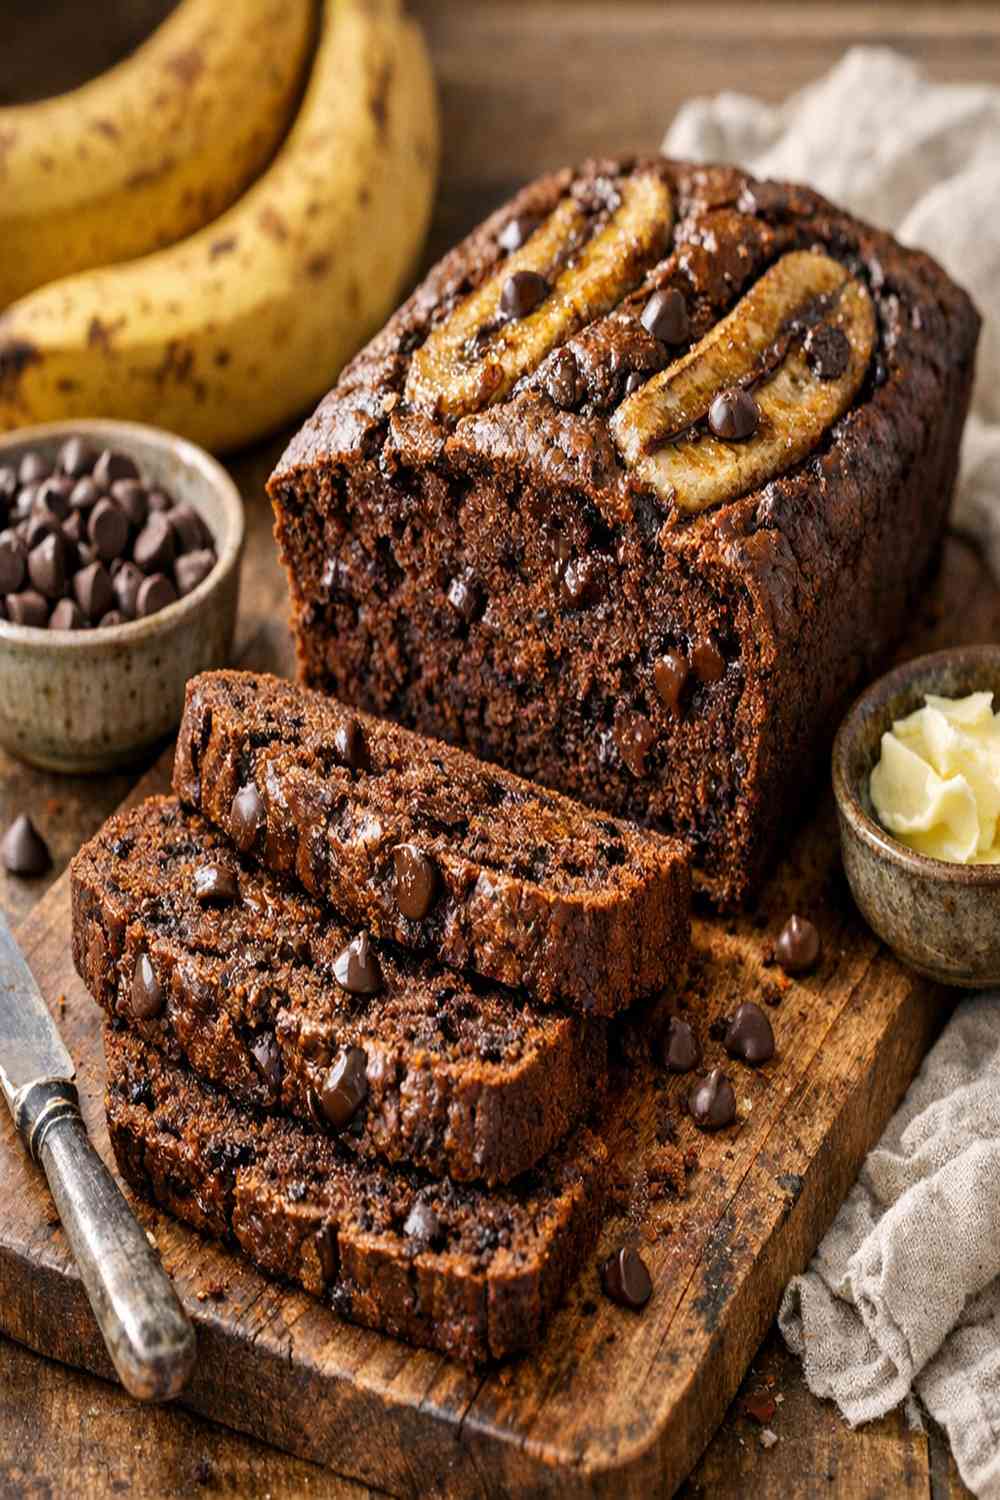
I’ll never forget the Tuesday afternoon my youngest came home from school absolutely defeated about a math test, and the first thing she asked for wasn’t comfort—it was chocolate. I didn’t have fancy ingredients that day, just three overripe bananas sitting on my counter and cocoa powder in the pantry. Thirty minutes later, we were pulling a warm, fudgy loaf from the oven, and somewhere between the second and third slice, the math test didn’t matter anymore. That’s when I realized this chocolate banana bread isn’t just a recipe—it’s a moment wrapped in warmth. If you’re looking for something that feels indulgent but won’t derail your nutrition goals, this is it. I’ve baked this hundreds of times as a busy mom and registered dietitian, and I’m thrilled to share exactly how to make it sing in your kitchen. You might also love our Best Lunch Lady Brownies Recipe for another chocolate fix, or if you want to go all-in, check out the this simple cake for celebrations.
Authentic Chocolate Banana Bread Recipe: The Story Behind the Loaf
Banana bread became the ultimate comfort food in American kitchens during the Great Depression, when home cooks stretched their budgets by baking with humble pantry staples. Adding chocolate to banana bread is a more modern American twist—a delicious rebellion against plain versions. What makes this version authentic to my kitchen philosophy is that it honors the simplicity of the original concept while elevating it with real cocoa and quality chocolate, never sacrificing flavor or nutrition.
Growing up in California with a mother who cooked intuitively, I learned that the best recipes are the ones that work with what you have on hand. Overripe bananas were never waste in our house—they were an invitation to bake. Now, as a registered dietitian, I understand why: those dark-spotted bananas contain resistant starch and higher pectin levels, which actually create a more tender crumb and provide better satiety. This recipe bridges that home-kitchen wisdom with nutritional intelligence.
The History and Cultural Significance of Chocolate Banana Bread
Banana bread itself has fascinating roots. While bananas arrived in America in the late 1800s as an exotic luxury fruit, they became affordable for average families by the early 20th century. The first printed banana bread recipes appeared in the 1930s, often featured in ladies’ magazines and government nutrition pamphlets as a way to use aging fruit before it spoiled.
The introduction of cocoa powder to banana bread is quintessentially American—a playful mashup of two beloved flavors that wasn’t necessarily traditional anywhere else. Dutch process cocoa (the darkened, alkaline version) became accessible to home bakers in the mid-20th century, making chocolate banana bread a natural progression. Today, this loaf represents comfort, resourcefulness, and the joy of turning imperfect ingredients into something memorable.
In American food culture, banana bread holds a special place as both a sophisticated enough dessert to serve at book clubs and casual enough to pack in a lunchbox. It’s democratic—it doesn’t require special equipment or rare ingredients, yet it tastes like someone took time to care. That accessibility is precisely why I love teaching people how to make it beautifully.
What Makes an Authentic Chocolate Banana Bread Recipe
Authenticity in banana bread isn’t about following a rigid formula passed down through generations—it’s about understanding the principles that make the texture tender, the flavor balanced, and the experience satisfying. Over my years as a dietitian and home baker, I’ve identified the key elements that distinguish a truly excellent chocolate banana bread from one that’s merely adequate.
- Properly ripened bananas (nearly black skin) – The starches have converted to sugars, and the pectin has broken down enough to create moisture and tenderness naturally. This is why I always recommend waiting until your bananas look almost too dark to eat raw. The flavor is also more concentrated and complex, not bland.
- Dutch process cocoa over natural cocoa – The alkalization process darkens the cocoa, intensifies the chocolate flavor, and creates a deeper color in your finished loaf. Natural cocoa is more acidic and pairs differently with leavening agents. For this recipe’s structure, Dutch process is traditionally the better choice.
- A combination of butter and oil – This creates tender, moist crumb while keeping the loaf from becoming too dense. Pure butter alone can make banana bread too heavy; pure oil can make it greasy. The combination gives you the best of both worlds—richness without density.
- Brown sugar rather than white sugar – The molasses content adds depth, moisture, and a subtle complexity that white sugar simply can’t provide. It’s the difference between a one-note sweet loaf and one with actual personality.
- Chocolate chips folded throughout and scattered on top – This isn’t just about indulgence; it’s about distribution. By dividing the chips and adding some before baking and some after, you ensure pockets of chocolate throughout rather than one clumpy layer.
The Ingredients – Sourcing the Real Thing
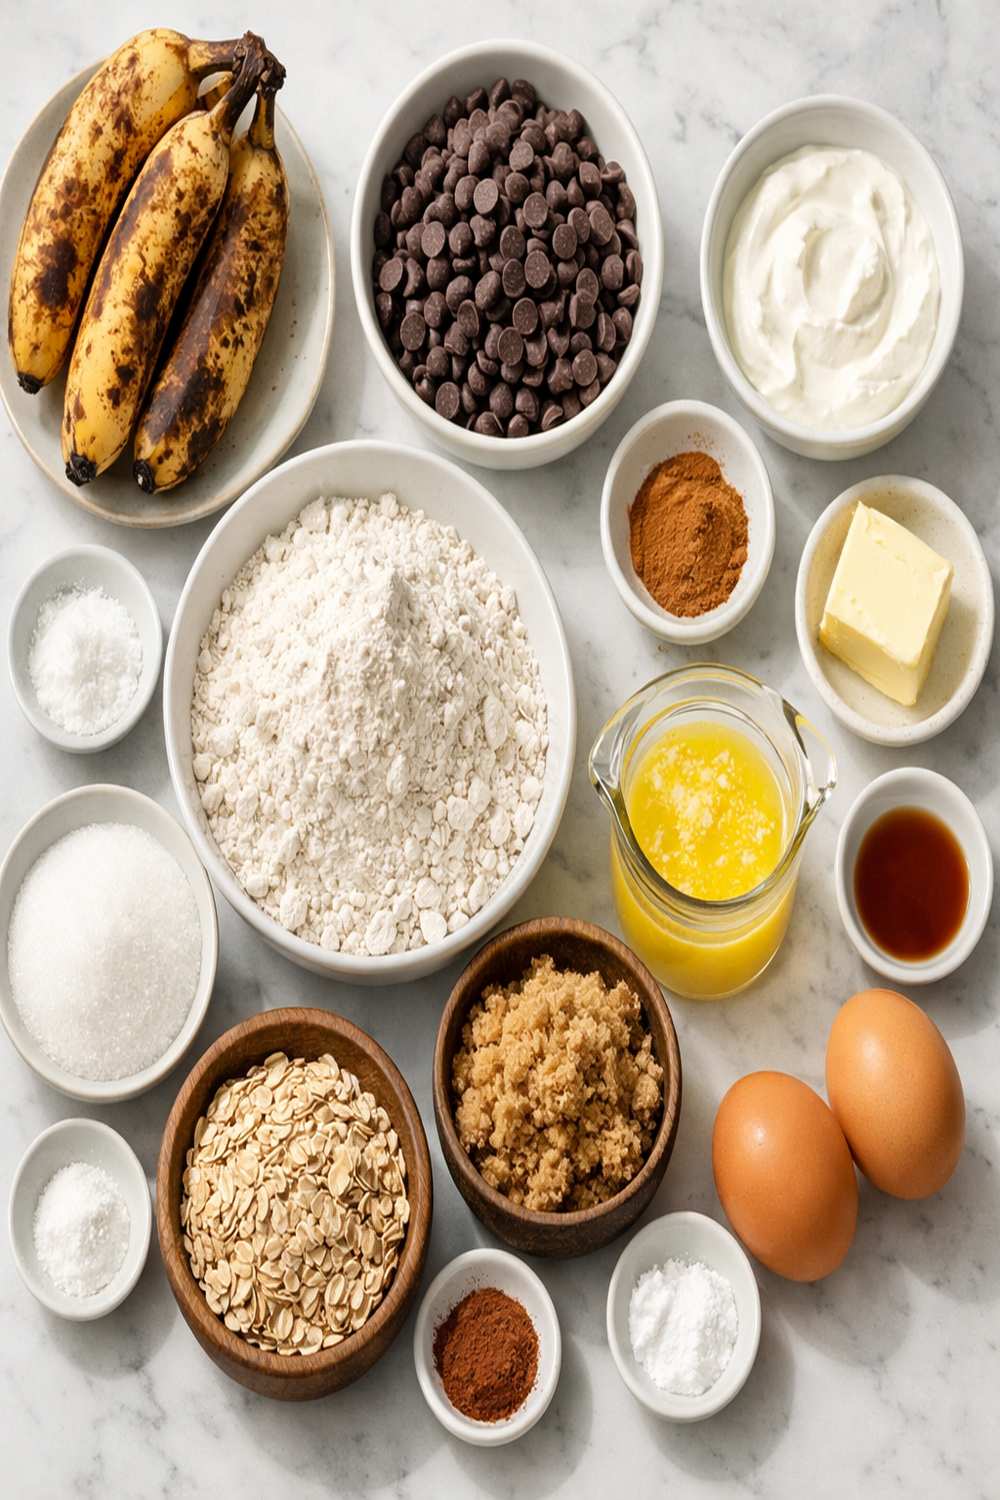
When I’m building this recipe with families in my nutrition practice, I always emphasize that ingredient quality matters more with simple recipes. There’s nowhere to hide! You need bananas that are truly ripe, cocoa that’s actually good, and chocolate that you’d be happy to eat on its own. Here’s my sourcing guide for each component.
For the Cake
- 1 cup all-purpose flour (spooned and leveled, never packed—I use unbleached for slightly better nutrition)
- 1 teaspoon baking soda (this is your leavening agent; baking powder won’t work here)
- ½ cup Dutch process cocoa powder (unsweetened; King Arthur Baking Company and Ghirardelli are my go-to brands for consistent results)
- 1 cup semisweet chocolate chips (divided: ¾ cup mixed into batter, ¼ cup sprinkled on top for visual appeal and pockets of chocolate)
- ¾ cup packed light brown sugar (the molasses adds moisture and depth of flavor)
- 2 tablespoons unsweetened applesauce (adds moisture and allows you to reduce oil slightly without sacrificing texture)
- 1 large egg (room temperature—this creates better emulsification and a finer crumb)
- ½ teaspoon sea salt (enhances the chocolate flavor and balances sweetness)
- 3 large brown bananas (approximately 1½ cups when mashed; look for deep brown or nearly black skin with no green whatsoever)
- 1 teaspoon pure vanilla extract (never imitation; the flavor difference is significant in simple recipes)
- ¼ cup unsalted butter (melted and slightly cooled, which prevents the egg from cooking when added)
- ¼ cup canola oil or melted coconut oil (I prefer canola for neutral flavor, but coconut oil adds subtle richness)
Where to source each ingredient: Your bananas should come from the produce section—aim for ones that look almost too dark. Cocoa powder is in the baking aisle; don’t grab the sweetened hot cocoa mix by mistake. For chocolate chips, I buy Ghirardelli or Guittard from the baking section rather than bargain brands, because better chocolate melts more smoothly and tastes infinitely better in a simple loaf like this. The difference between a $2 bag and a $4 bag is noticeable in the final product.
If you can’t find Dutch process cocoa, you can substitute natural cocoa, but reduce the baking soda by ¼ teaspoon and add ¼ teaspoon of baking powder instead, since natural cocoa is more acidic and requires different leavening balance.
The Traditional Method: How to Make Authentic Chocolate Banana Bread
Making chocolate banana bread is more about understanding the principles than following rigid steps. I’m going to walk you through not just what to do, but why each step matters and how it honors the tradition of simple, excellent baking. This loaf makes one standard loaf, roughly 12 slices.
Step 1: Prepare Your Pan and Preheat Your Oven
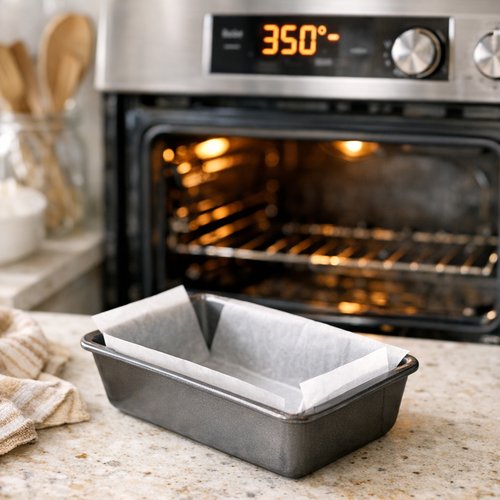
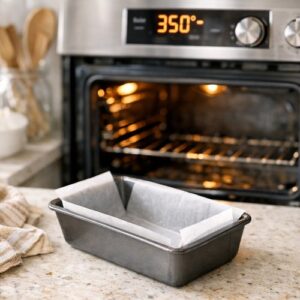
Start by heating your oven to 350°F (175°C). This temperature is crucial—too hot and your loaf will brown too quickly on the outside before the inside bakes through; too cool and you’ll get a dense, gummy center. While your oven heats, generously coat a 9-by-5-inch loaf pan with nonstick cooking spray or line it with parchment paper. I prefer parchment because it makes removing the loaf cleaner and less stressful. Set it aside on your counter.
Step 2: Combine All Dry Ingredients
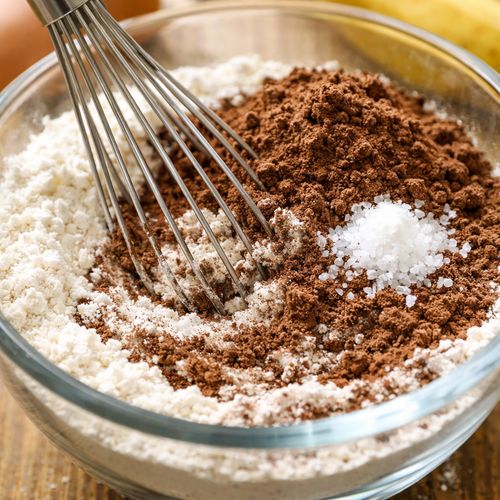
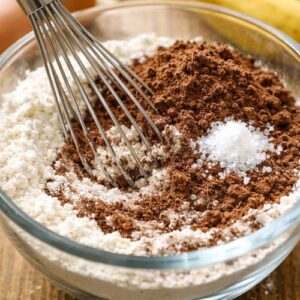
In a medium mixing bowl, whisk together your flour, Dutch process cocoa powder, baking soda, and sea salt. Whisking is essential here—it breaks up cocoa clumps and distributes the leavening evenly throughout the flour. If you simply stir, you’ll end up with dense pockets in your finished loaf. Whisk for about 30 seconds until everything looks evenly combined and you don’t see any cocoa streaks. Set this bowl aside; you’ll use it in just a moment.
Step 3: Mash Your Bananas and Create Your Wet Base
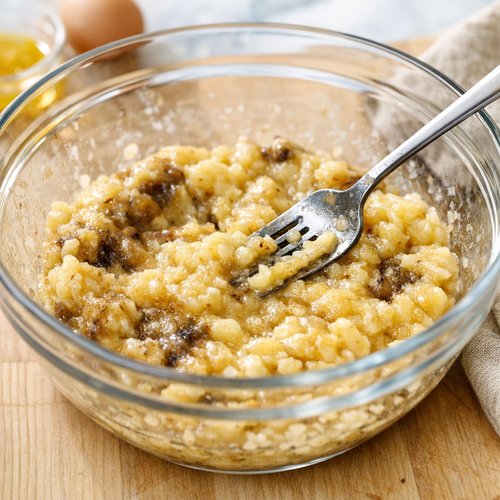
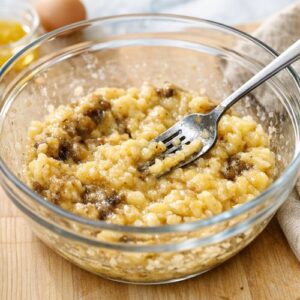
In a large bowl, add your three dark brown bananas. Using a fork, mash them until mostly smooth—you want a few tiny chunks remaining for texture, not completely pureed banana paste. Overripe bananas actually mash more easily and create better moisture, which is why I always recommend waiting until they’re very dark.
Once mashed, add your melted and slightly cooled butter and canola oil to the bananas and stir well to combine. The oil and butter should thoroughly incorporate with the banana. This creates an emulsion that will distribute evenly through your batter. Stir until you have a smooth, slightly glossy mixture.
Step 4: Add Sugar, Egg, and Vanilla
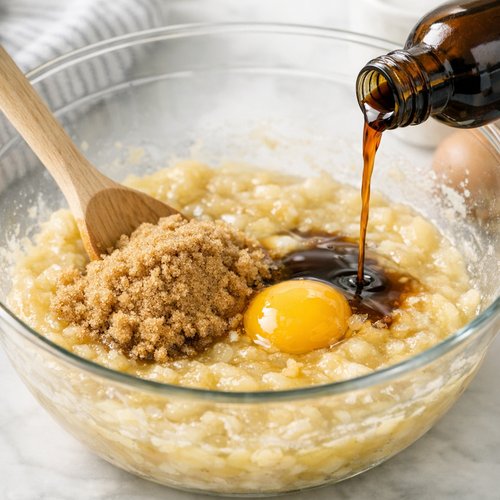
To your banana mixture, add the packed light brown sugar, your room-temperature egg, and the pure vanilla extract. Stir until the mixture is completely smooth and well combined. This is where the sweetness, structure (from the egg), and vanilla flavor integrate. You should see no streaks of sugar remaining. If your mixture looks a little separated or broken, don’t worry—that’s normal with the fat content. Just keep stirring until it comes together.
Step 5: Combine Wet and Dry—The Gentle Fold
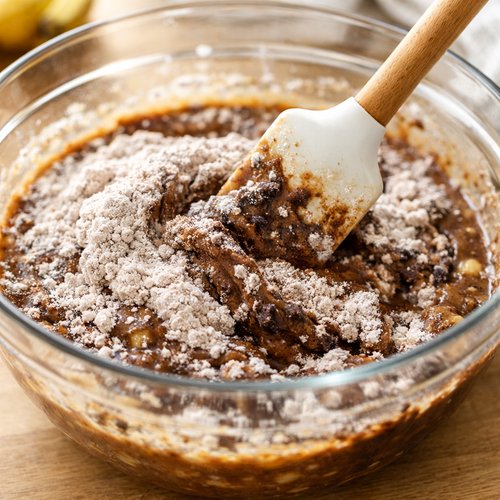
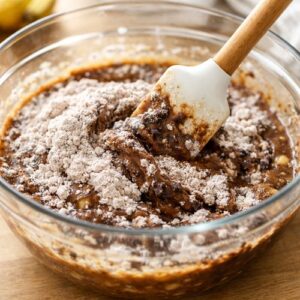
This is the most critical step for texture. Pour your dry ingredients into your wet ingredients. Using a rubber spatula or wooden spoon, fold them together with as few strokes as possible. Do not overmix. Overmixing develops gluten, which creates a tough, dense loaf instead of the tender crumb you’re after. You want to see just a few streaks of flour remaining—stop there. It should take about 8-10 folds maximum.
As soon as the flour is mostly incorporated, fold in ¾ cup of your semisweet chocolate chips. These will distribute throughout the batter and create pockets of chocolate in every slice.
Step 6: Transfer to Pan and Top with Chocolate
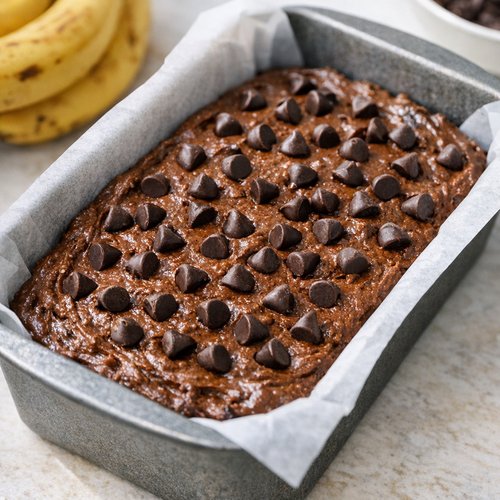
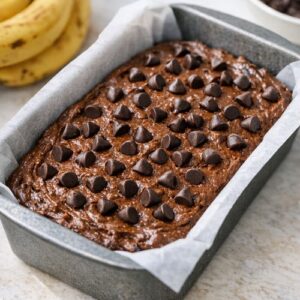
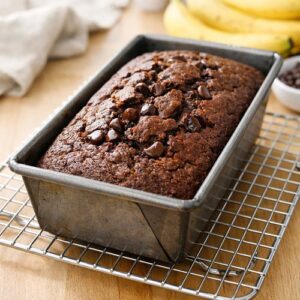
Pour your batter into your prepared loaf pan, spreading it evenly with a spatula. Scatter the remaining ¼ cup of chocolate chips over the top. These will create a beautiful, rustic appearance and add extra chocolate moments in each bite. They’ll partially melt into the top and partially stay intact, which is exactly what you want.
Step 7: Bake Until Set but Not Overdone
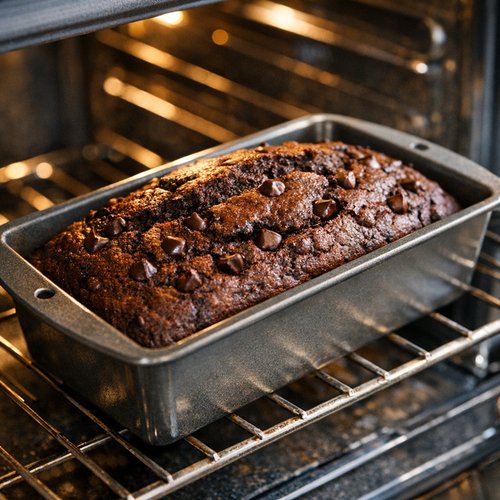
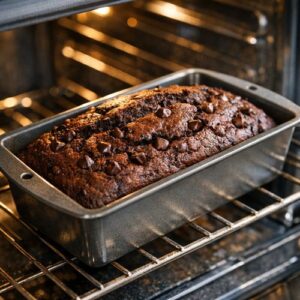
Place your loaf pan in the preheated oven. Bake for 50 to 65 minutes, depending on your specific oven. Every oven has personality—mine runs about 5 degrees hot, so I check at 50 minutes and pull it out by 55 minutes. Your loaf is done when a toothpick inserted into the center comes out mostly clean. If you get some melted chocolate on the toothpick, that’s perfect. You’re looking for no wet batter, but you don’t want it bone-dry either.
Step 8: Cool Properly for Perfect Texture
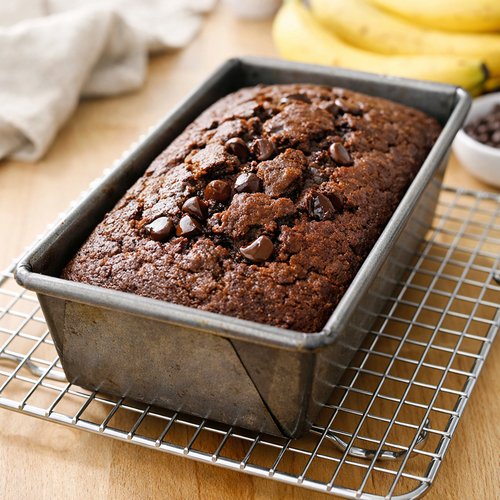
Remove your pan from the oven and set it on a wire cooling rack. This is important—if you leave it sitting on a hot surface, the residual heat will continue cooking the bottom, potentially making it dry. Let the loaf cool in the pan for 15 minutes. This allows it to set enough to be handled without falling apart, but it’s still warm enough to release from the pan easily.
After 15 minutes, run a thin knife around the edges of the bread to loosen it, then carefully turn it out onto your cooling rack. Let it cool until it’s just slightly warm before slicing. If you slice it while it’s piping hot, it will crumble. If you wait until it’s completely cool, you lose that wonderful warm-bread experience. Aim for that sweet middle ground—warm enough to enjoy the chocolate melting slightly, cool enough to slice cleanly.
Regional Variations Around the World
While chocolate banana bread is decidedly American in origin, creative bakers around the world have added their own cultural touches. Understanding these variations helps you appreciate the core recipe and gives you ideas for how to adapt it to your own preferences.
- Caribbean Variations – Bakers in banana-growing regions like Jamaica and Trinidad often add warming spices like cinnamon, nutmeg, and sometimes a touch of rum. The island influence brings coconut milk or coconut oil into the mix, creating a bread that’s slightly more tropical. Some versions include macadamia nuts or dark rum in the batter.
- British Tea-Time Interpretations – UK bakers tend to make chocolate banana bread less sweet than American versions, sometimes adding a dark ganache glaze on top. They might include sultanas (golden raisins) or candied citrus peel for complexity. The bread is often served with afternoon tea, sliced thin, and the texture tends to be denser and more cake-like.
- Latin American Approaches – In Mexico and Central America, versions often feature dark chocolate with a hint of chili or cayenne pepper, honoring traditional mole-spice traditions. Some bakers add sweetened condensed milk for extra richness and moisture, creating a bread that’s more decadent and fudgy.
- Australian and New Zealand Styles – Bakers in these regions often go heavier on the chocolate and sometimes add a date or fig component. They’re known for creating a more indulgent, almost cake-like texture, sometimes serving it warm with ice cream as a dessert course.
Traditional Serving Customs
In American tradition, banana bread occupies a unique space—it’s breakfast-appropriate yet rich enough for dessert. The chocolate version leans more toward indulgence, so I typically serve it as a special breakfast treat or a gracious addition to an afternoon tea or coffee gathering.
Traditionally, slices are served warm with butter, which melts into the warm crumb. You can also serve it with a dusting of powdered sugar, a dollop of Greek yogurt (my nutritionist’s touch for added protein and a cooling contrast), or alongside a simple cup of coffee or tea. In my family, we love it slightly warmed with a small scoop of vanilla ice cream for a simple dessert. The presentation is usually straightforward—sliced loaf on a cutting board or plated individually, never requiring fancy plating or garnishes.
When sharing as a gift, wrap the entire loaf in parchment paper and then in kitchen twine with a handwritten note. There’s something genuinely warm about receiving homemade banana bread, and the wrapping honors that sentiment without being overdone.
Can I Store Chocolate Banana Bread Recipe?
One of the greatest gifts of this recipe is its incredible shelf life. I regularly make it on Sunday to have throughout the week, and it genuinely improves slightly on day two as the flavors meld.
Counter Storage: Wrapped well in plastic wrap or stored in an airtight container, this bread keeps beautifully on your counter for up to 4 days. The bananas’ natural moisture keeps it tender the entire time. If it’s uncovered, it will dry out, so wrapping is essential.
Refrigerator Storage: While you can refrigerate it for up to 1 week, I don’t recommend this because cold temperatures dry it out slightly. Counter storage is superior unless your kitchen is very warm or humid.
Freezing Instructions: This is where chocolate banana bread truly shines. Cool the loaf completely, then wrap it tightly in plastic wrap, followed by a layer of aluminum foil to prevent freezer burn. Frozen this way, it keeps beautifully for up to 1 month. Defrost at room temperature (roughly 2-3 hours for a whole loaf, or 30 minutes for individual slices) before slicing. You can also slice it before freezing and defrost individual slices in the toaster oven at 300°F for about 8 minutes.
As a registered dietitian, I love recommending this strategy to busy families. Make one batch on Sunday, freeze half, and enjoy fresh-tasting chocolate banana bread throughout your month. It beats any store-bought version and means you always have a wholesome, homemade option on hand.
Expert’s Nutritional Tip: Why This Recipe Works for Your Family
Here’s what I always tell families in my practice: this chocolate banana bread contains real, whole-food ingredients you can pronounce, and the bananas provide natural sweetness plus resistant starch and potassium. The combination of butter and oil creates a satisfying fat that helps with nutrient absorption and keeps you feeling full longer—no empty calories here.
The cocoa powder isn’t just flavor; it’s packed with polyphenols and antioxidants. Studies consistently show that dark chocolate and cocoa have cardiovascular benefits. One slice of this bread gives you a meaningful amount of chocolate’s benefits without the sugar overload of a candy bar. The whole egg provides choline (crucial for brain development) and lutein (for eye health). Even the applesauce I added is doing work—it’s pectin and fiber that supports digestive health.
What makes me most proud of this recipe is that it feels indulgent while actually delivering nutrition. When my kids ask for chocolate, I’m genuinely happy to give them a slice of this rather than reaching for processed options. That’s the magic of thoughtful home baking combined with nutritional knowledge.
Make-Ahead Guide: Your Busy-Mom Strategy
I built this recipe with real life in mind. Here are my professional time-saving strategies:
- Batter Assembly: You can prepare the dry ingredients (flour, cocoa, baking soda, salt) in a small container or bag up to 3 days ahead. Keep them in an airtight container or sealed freezer bag. When you’re ready to bake, they’re ready to go.
- Banana Prep: Mash your bananas and immediately toss with a tiny squeeze of lemon juice (prevents browning) up to 4 hours before baking. Store in an airtight container. This is huge on busy days—mash your bananas in the morning, bake in the evening.
- Full Batter Preparation: You can actually prepare the complete mixed batter up to 2 hours before baking. Cover it with plastic wrap and store at room temperature. Don’t refrigerate because cold batter takes longer to bake and creates denser texture. Bake straight from this state—no adjustments needed.
- Freeze the Entire Loaf: My favorite strategy is doubling this recipe (make two loaves), baking both, cooling completely, then freezing one wrapped tightly. You’ve invested the time and oven space once but have fresh-tasting bread for an entire month. Slice before freezing for grab-and-go portions.
- Mini Loaves: If you have mini loaf pans, you can divide this batter between four mini pans. They bake in about 30-35 minutes and freeze individually in smaller portions—perfect for lunch boxes or single servings.
Common Mistakes to Avoid
After teaching hundreds of people to make this bread, I’ve identified patterns. Let me save you the learning curve:
- Using Bananas That Aren’t Ripe Enough – This is the number one mistake. Green or yellow bananas are starchy and mealy, not sweet. You need those nearly-black bananas with a few brown spots. If you’re worried they’ll go bad, peel them and freeze them whole—they defrost beautifully for banana bread.
- Overmixing the Batter – The moment you see a few streaks of flour remaining, stop. Keep mixing and you’ll develop gluten, creating a dense, tough loaf that tastes like dense cake rather than tender bread. Less mixing equals better texture, every single time.
- Opening the Oven Too Early – I know it’s tempting to peek, but opening the oven before 45 minutes causes the loaf to fall and become gummy inside. Trust the recipe and the timing. Check only after 50 minutes, and then be gentle with the door.
- Skipping the Cooling Time in the Pan – If you turn it out immediately, it will fall apart. If you wait until completely cool, you miss the warm experience. That 15-minute pan cooling period is the sweet spot that lets you handle it while still enjoying warmth.
Seasonal Variations: Adapt This Recipe Year-Round
One of the joys of simple recipes is how easily they adapt. Here are my favorite seasonal twists that keep this bread fresh in rotation:
- Spring Lightness (March-May): Add the zest of one lemon to the wet ingredients for bright, citrus notes that cut through the richness. Replace ¼ cup of chocolate chips with white chocolate chips for a lighter feel. Everything else stays the same.
- Summer Tropical Twist (June-August): Use coconut oil instead of canola, add ½ teaspoon of coconut extract, and top the batter with toasted coconut flakes in addition to chocolate chips. It becomes almost a tropical banana bread with chocolate moments instead of all-chocolate.
- Fall Spice Edition (September-November): Add 1 teaspoon of cinnamon and ¼ teaspoon each of nutmeg and allspice to your dry ingredients. Use dark chocolate chips instead of semisweet for deeper flavor. This tastes like fall in loaf form.
- Winter Decadence (December-February): Add 1 tablespoon of instant espresso powder to your cocoa mixture—it amplifies the chocolate flavor without making it taste like coffee. Add ¼ teaspoon of sea salt to the chocolate chips you’re sprinkling on top for sweet-salty contrast.
What Can I Serve With Chocolate Banana Bread?
While this loaf is genuinely complete on its own, the right pairing elevates it from snack to experience. Here’s what I serve alongside it:
- Vanilla Greek Yogurt – A dollop of thick Greek yogurt (especially Fage or Straus) provides cooling contrast, adds protein and probiotics, and isn’t overly sweet. This is my go-to pairing for breakfast or afternoon snack.
- Espresso or Strong Coffee – The bitterness of coffee amplifies the chocolate notes beautifully. This is traditional tea-time pairing that works wonderfully at breakfast too.
- Chamomile or Herbal Tea – For a gentler pairing, chamomile or mint tea complements chocolate banana bread beautifully without competing for attention.
- Almond or Cashew Butter – A thin spread of creamy nut butter adds healthy fat and protein, making the slice more satisfying as a complete snack or light breakfast.
- Fresh Strawberries – Bright, tart berries cut through richness and add freshness. This is particularly nice in spring and summer.
- Vanilla Ice Cream – When you want to go full indulgence, a small scoop of quality vanilla ice cream on warm banana bread is simple elegance. I often serve this for dessert with my family.
I also love serving this bread at gatherings with a simple, well-made butter (like Kerrygold) and fine sea salt on the side, letting people apply exactly what they want. It honors the simplicity of the bread while offering customization.

Chocolate Banana Bread Recipe
Ingredients
Method
- Start by heating your oven to 350°F (175°C). This temperature is crucial—too hot and your loaf will brown too quickly on the outside before the inside bakes through; too cool and you'll get a dense, gummy center. While your oven heats, generously coat a 9-by-5-inch loaf pan with nonstick cooking spray or line it with parchment paper. I prefer parchment because it makes removing the loaf cleaner and less stressful. Set it aside on your counter.
- In a medium mixing bowl, whisk together your flour, Dutch process cocoa powder, baking soda, and sea salt. Whisking is essential here—it breaks up cocoa clumps and distributes the leavening evenly throughout the flour. If you simply stir, you'll end up with dense pockets in your finished loaf. Whisk for about 30 seconds until everything looks evenly combined and you don't see any cocoa streaks. Set this bowl aside; you'll use it in just a moment.
- In a large bowl, add your three dark brown bananas. Using a fork, mash them until mostly smooth—you want a few tiny chunks remaining for texture, not completely pureed banana paste. Overripe bananas actually mash more easily and create better moisture, which is why I always recommend waiting until they're very dark. Once mashed, add your melted and slightly cooled butter and canola oil to the bananas and stir well to combine. The oil and butter should thoroughly incorporate with the banana. This creates an emulsion that will distribute evenly through your batter. Stir until you have a smooth, slightly glossy mixture.
- To your banana mixture, add the packed light brown sugar, your room-temperature egg, and the pure vanilla extract. Stir until the mixture is completely smooth and well combined. This is where the sweetness, structure (from the egg), and vanilla flavor integrate. You should see no streaks of sugar remaining. If your mixture looks a little separated or broken, don't worry—that's normal with the fat content. Just keep stirring until it comes together.
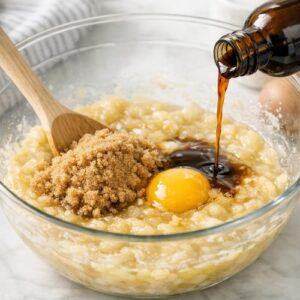
- This is the most critical step for texture. Pour your dry ingredients into your wet ingredients. Using a rubber spatula or wooden spoon, fold them together with as few strokes as possible. Do not overmix. Overmixing develops gluten, which creates a tough, dense loaf instead of the tender crumb you're after. You want to see just a few streaks of flour remaining—stop there. It should take about 8-10 folds maximum. As soon as the flour is mostly incorporated, fold in ¾ cup of your semisweet chocolate chips. These will distribute throughout the batter and create pockets of chocolate in every slice.
- Pour your batter into your prepared loaf pan, spreading it evenly with a spatula. Scatter the remaining ¼ cup of chocolate chips over the top. These will create a beautiful, rustic appearance and add extra chocolate moments in each bite. They'll partially melt into the top and partially stay intact, which is exactly what you want.
- Place your loaf pan in the preheated oven. Bake for 50 to 65 minutes, depending on your specific oven. Every oven has personality—mine runs about 5 degrees hot, so I check at 50 minutes and pull it out by 55 minutes. Your loaf is done when a toothpick inserted into the center comes out mostly clean. If you get some melted chocolate on the toothpick, that's perfect. You're looking for no wet batter, but you don't want it bone-dry either.
- Remove your pan from the oven and set it on a wire cooling rack. This is important—if you leave it sitting on a hot surface, the residual heat will continue cooking the bottom, potentially making it dry. Let the loaf cool in the pan for 15 minutes. This allows it to set enough to be handled without falling apart, but it's still warm enough to release from the pan easily. After 15 minutes, run a thin knife around the edges of the bread to loosen it, then carefully turn it out onto your cooling rack. Let it cool until it's just slightly warm before slicing. If you slice it while it's piping hot, it will crumble. If you wait until it's completely cool, you lose that wonderful warm-bread experience. Aim for that sweet middle ground—warm enough to enjoy the chocolate melting slightly, cool enough to slice cleanly.
Notes
FAQs
Can I substitute all-purpose flour with whole wheat or gluten-free flour?
All-purpose flour is really the best choice for this specific recipe because of how it interacts with the leavening and creates the tender crumb. That said, I’ve experimented with substitutions. If you want to use whole wheat flour, use only ¾ cup whole wheat flour plus ¼ cup all-purpose flour (replace 25% maximum). Whole wheat has more bran, which can make the loaf denser. Add 1 additional tablespoon of liquid (milk or water) because whole wheat absorbs more moisture. For gluten-free baking, this requires a 1:1 gluten-free flour blend specifically formulated for baking, plus adding a binder like xanthan gum. It’s more complex than I can detail here, but it’s possible—I’d recommend testing first with a dedicated gluten-free recipe designed for banana bread rather than converting this one.
What if my bananas aren’t quite ripe enough yet?
Don’t bake. This is one recipe where ingredient timing matters. If your bananas are only moderately spotted, place them in a paper bag with an apple at room temperature. The apple releases ethylene gas which speeds ripening. Check daily. They’ll darken within 1-3 days depending on your kitchen temperature. Alternatively, you can peel dark bananas, freeze them whole in a freezer bag, then thaw them in the refrigerator overnight before baking. Frozen-then-thawed bananas actually mash more easily and create better moisture because the freezing breaks down cell walls. Planning ahead isn’t defeat—it’s strategy.
Why does my loaf come out gummy in the center?
This usually indicates either underbaking or an oven that runs cool. Start checking at 50 minutes rather than waiting the full 65. A gummy center means internal temperature hasn’t reached the point where the structure sets. Insert a toothpick in multiple spots—if it comes out clean in most places but wet in one area, the oven is baking unevenly. Try rotating the pan halfway through baking. If your oven runs cool (you can test this with an oven thermometer), you may need to increase temperature to 355°F or bake an additional 5-10 minutes.
Can I make this recipe with egg-free or dairy-free modifications?
The egg provides structure and helps bind the batter, so substitution matters. For egg-free baking, use one of these options: 1 applesauce packet (unsweetened), or ¼ cup aquafaba (liquid from canned chickpeas), or 1 ground flax egg (1 tablespoon ground flax mixed with 3 tablespoons water, let sit 5 minutes). For dairy-free, the butter is the only dairy component. Use additional coconut oil or vegan butter (like Earth Balance). The recipe adjusts beautifully for both modifications, though I’d recommend testing one loaf before making multiple batches to ensure you’re happy with the texture and flavor.
Is this recipe suitable for freezing in batter form versus just the finished loaf?
Yes, though with one important caveat. You can freeze prepared batter for up to 3 months in a disposable loaf pan (wrapped tightly in plastic wrap and foil). Thaw at room temperature for about 4 hours, then bake as directed. However, the chocolate chips may have absorbed moisture during freezing, making them less distinct pockets in the final loaf. If you want to freeze batter, I’d recommend adding the chocolate chips after thawing, right before baking. The finished loaf frozen after baking maintains texture and flavor better than frozen batter, so that’s my preferred method for make-ahead baking.
More Recipes From This Tradition
If you’ve loved this chocolate banana bread, you’ll adore these other chocolate-forward treats from my kitchen:
- Best Lunch Lady Brownies Recipe – The ultimate fudgy brownie with that perfect crackle top and chewy center
- Brownie Birthday Cake Recipe – A celebration dessert that combines brownie texture with cake structure, ready for candles and joy
- Brookie Recipe – The perfect marriage of brownie and chocolate chip cookie in one decadent dessert
Nutrition Information
Per slice (12 slices total): approximately 285 calories, 12g fat, 40g carbohydrates, 3g fiber, 25g sugar, 4g protein. Data based on USDA FoodData Central values for standard ingredients. The banana provides potassium (about 7% daily value per slice), fiber, and vitamin B6. The cocoa powder delivers approximately 450mg of flavonoids per serving—these are the antioxidants I mentioned earlier that support cardiovascular health.
From a nutritional perspective, this bread delivers better satiety than most dessert breads because of the combination of fiber (from bananas and cocoa), protein (from the egg), and healthy fats (from butter and oil). You’re genuinely satisfied after one or two slices rather than reaching for more immediately. This is fundamentally different from highly processed banana breads laden with refined sugar and low-nutrient flours.
If you’re tracking macros, one slice provides roughly 15% of daily carbohydrates, 18% of daily fat, and 8% of daily protein based on a 2000-calorie diet. The chocolate content provides polyphenols associated with reduced inflammation—exactly why I feel genuinely good about serving this to my family.
Conclusion: Baking as an Act of Love
This chocolate banana bread has become something sacred in my kitchen. It’s what I make when someone needs comfort. It’s what I bake on lazy Sunday mornings. It’s what appears in lunchboxes on hard days. It’s the recipe I’ve taught to countless families, and every single time,