This post contains affiliate links. As an Amazon Associate I earn from qualifying purchases.
I still remember the afternoon my daughter came home from her friend’s birthday party talking about something called a “brookie.” I’d been a registered dietitian for over a decade, worked in hospital nutrition programs, and thought I’d seen every dessert combination under the sun. But a brownie-cookie hybrid? I was skeptical—until I tasted one.
That night, I did what I always do when I’m curious about food: I tested three different methods to make them. The classic brownie layer on the classic cookie layer approach. The mixed-together version. And the method I’m about to share with you, which transforms these two beloved desserts into something genuinely better than either one alone.
You’ve probably tried baking brownies and cookies side-by-side on the same day, or maybe layered them haphazardly in a pan. Here’s why this method wins: it creates a cohesive texture that feels intentional, the chocolate flows throughout both layers instead of sitting in distinct zones, and the baking time actually works for both components instead of fighting each other.
Brookie Recipe: Why This Two-Layer Approach Creates Magic
When I first made brookies the “easy way”—just mixing everything together—I ended up with something that felt confused. Was it a brownie with cookies in it? A cookie with brownie? Neither layer developed properly because they have completely different hydration levels and baking requirements.
The method I’m sharing here respects the science behind both desserts. I bake a proper fudgy brownie base first, then top it with a proper chocolate chip cookie dough that bakes perfectly on top. The result is distinct layers that taste intentional, with a texture contrast that keeps every bite interesting.
I’ve made these for school fundraisers, family gatherings, and just because it’s Wednesday and I deserve chocolate. Every single time, someone asks for the recipe. Every. Single. Time.
The Methods Compared: A Honest Breakdown
Let me be totally transparent about what I’ve tested. As a busy mom and a registered dietitian, I’m always looking for shortcuts that don’t compromise quality. I’ve tried making brookies three different ways, and I want to break down exactly what happens with each method so you can choose what works for your life.
- The Mixed-Together Method – Combine all ingredients in one bowl, bake once. Pros: fastest, one-bowl cleanup. Cons: neither layer develops properly, texture is muddy and confused, chocolate distribution is uneven, baking time works for neither component. Best for: literally nobody. This method frustrates me every time I see it recommended.
- The Separate Baking Method – Bake brownies completely, cool them, then bake cookies on top in a fresh batch. Pros: each component is technically perfect. Cons: takes twice as long, requires cooling time between batches, the brownie layer can get tough from the second bake, cleanup is doubled, and the layers don’t integrate well. Best for: when you have unlimited time and patience (so, never in my house).
- The Smart Two-Layer Method (My Way) – Bake the brownie layer until just set, then top with cookie dough and continue baking in one session. Pros: both layers bake to perfect texture, chocolate integrates beautifully, takes 40 minutes total start to finish, one pan, the brownie stays fudgy while the cookie gets crispy-edged. Best for: real life, weeknight desserts, and anyone who actually wants to enjoy the process. This is the winner.
Why This Version Beats the Rest
Here’s what happens when you layer smart: the brownie base bakes for about 15 minutes until it’s just set on top but still jiggles slightly when you gently shake the pan. At that exact moment, you top it with cookie dough. The residual heat from the brownie layer begins cooking the bottom of the cookie dough immediately, creating a seamless transition between the two layers.
By the time you pull the pan from the oven 25 minutes later, the cookie layer is golden and just barely set, the brownie underneath has firmed up slightly but retained that fudgy moisture, and when you cut into it, you get brownie, then a gorgeous chocolate-studded cookie layer, then back to brownie at the bottom. The texture contrast is genuinely surprising and delicious.
The flavor is where this really shines. Instead of two competing desserts in one pan, you get a unified experience. The cocoa-forward brownie complements the vanilla-sweet cookie, the chocolate chips add pockets of richness, and somehow the whole thing tastes more sophisticated than either component alone.
And here’s the professional insight: this method actually uses less total fat and sugar than baking a full batch of brownies AND a full batch of cookies separately. You’re getting indulgence with better portion control built right in.
The Ingredients
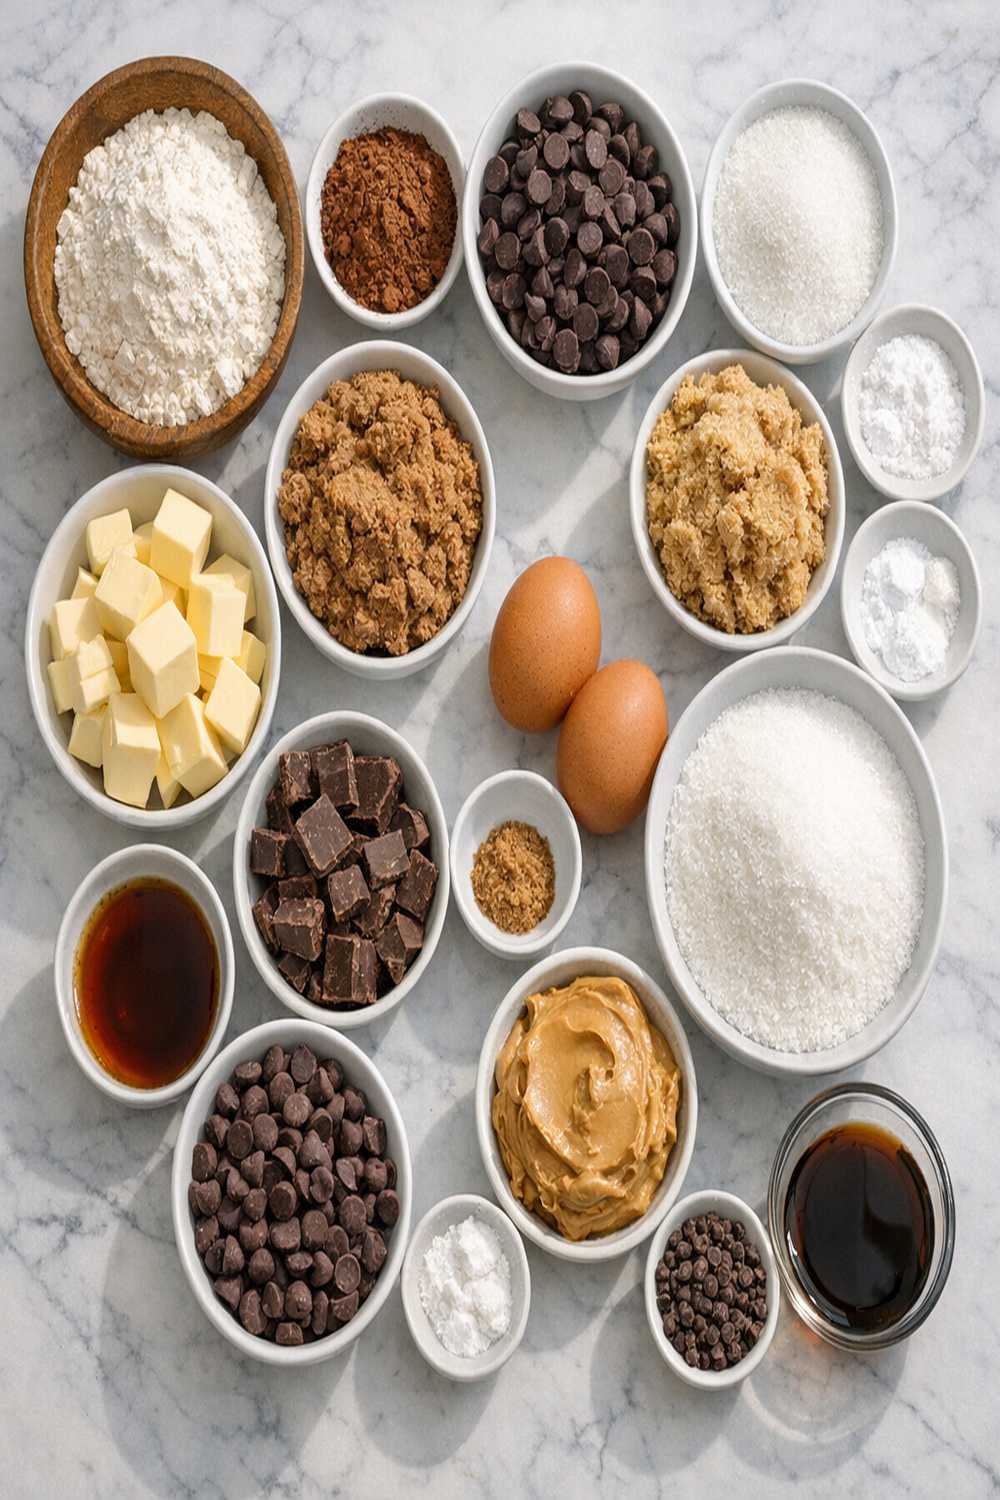
I’ve tested these ingredient ratios probably fifteen times at this point. The brownie layer needs more cocoa powder and less flour than you’d use in a standard brownie cake—we want fudgy intensity. The cookie dough needs enough butter to stay tender but not so much that it spreads aggressively under the broiler-like heat of the oven.
The chocolate chips in the cookie layer are essential; they do double duty as flavor and as visual texture that makes people excited when they bite into these. I use semisweet specifically because dark chocolate can taste bitter against the brownie’s cocoa, and white chocolate disappears against the brown colors.
For the Brownie Base Layer
- ¾ cup semisweet chocolate chips or roughly chopped chocolate (about 135 grams, for pockets of richness)
- ½ cup all-purpose flour (spooned and leveled, about 60 grams)
- 2 large eggs (room temperature—they incorporate better and create better texture)
- 1 teaspoon pure vanilla extract (not imitation, the flavor difference matters here)
- ½ cup unsalted butter (melted and cooled slightly, about 113 grams)
- ½ teaspoon fine sea salt (or Diamond Crystal kosher salt for better integration)
- ½ cup packed light brown sugar (measuring the full cup then packing gently, about 110 grams)
- ½ cup granulated sugar (spooned and leveled, about 100 grams)
- ⅓ cup unsweetened cocoa powder (sifted if clumpy, about 35 grams)
For the Cookie Dough Top Layer
- ¼ cup packed light brown sugar (adds moisture and chewiness, about 55 grams)
- ½ teaspoon baking powder (creates lift and structure)
- ½ teaspoon fine sea salt
- ½ cup unsalted butter (at room temperature for proper creaming, about 113 grams)
- ¼ teaspoon baking soda (reacts with the brown sugar for rise and browning)
- 1 teaspoon pure vanilla extract (same vanilla as the brownie layer)
- ½ cup granulated sugar (spooned and leveled, about 100 grams)
- 1⅓ cups all-purpose flour (spooned and leveled, about 160 grams)
- 1 large egg (room temperature)
- 1 cup semisweet chocolate chips (these create pockets of chocolate throughout)
Yield: Makes one 9×13-inch pan, about 24 generous pieces or 36 smaller squares depending on how you cut them.
How to Make the Best Version of Brookie Recipe
I’m going to walk you through this step-by-step, and I want to emphasize the timing and temperature checks that make this method work. This isn’t a dump-and-forget recipe—but it’s only 40 minutes of actual oven time, and most of that is hands-off.
Step 1: Prepare Your Pan and Preheat
Start by preheating your oven to 350°F. This is lower than some brownie recipes call for, but the longer, gentler bake helps both layers cook evenly without the edges browning too fast.
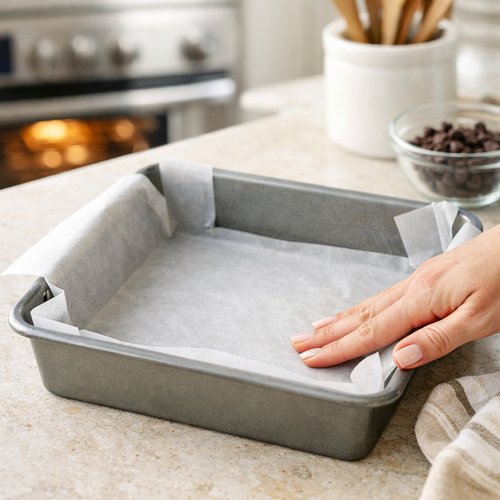
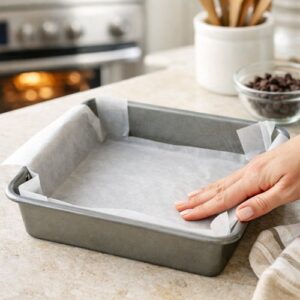
Line a 9×13-inch baking pan with parchment paper or aluminum foil, leaving an overhang on two sides. This overhang is your friend—it makes removing the whole batch easy and keeps cleanup to literally nothing. Press the parchment into the corners gently so it stays in place.
Step 2: Make the Brownie Base—It Starts With Melted Butter
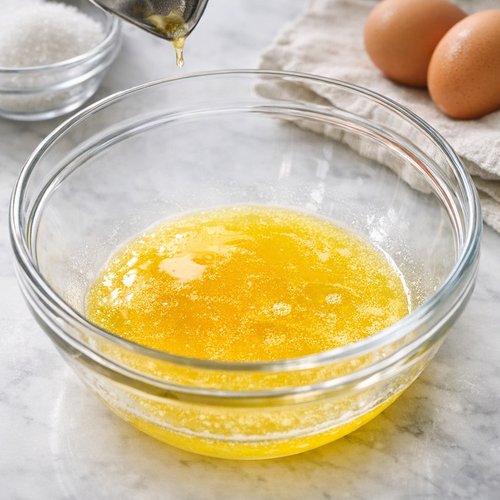
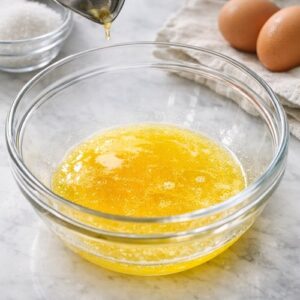
Pour your melted butter into a medium mixing bowl and let it cool for about 2 minutes. You want it warm but not hot—hot butter will scramble your eggs when they go in.
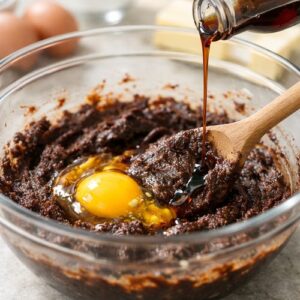
Whisk in the cocoa powder until completely smooth. This step matters more than you’d think. If you just dump cocoa into the wet ingredients and stir, you’ll get little cocoa pockets. Whisking it creates an emulsion that distributes the cocoa flavor evenly.
Add both sugars and salt. Stir until you get a slightly grainy, thick paste. This is where the brownie base starts developing its signature texture.
Step 3: Incorporate the Eggs and Vanilla
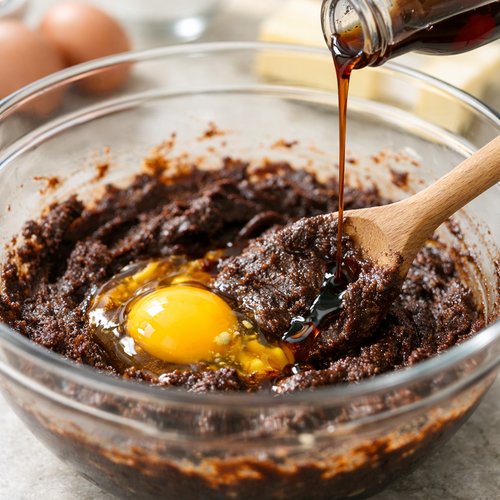
Add one egg at a time, stirring vigorously for about 30 seconds after each addition. You want each egg fully integrated before adding the next one. This creates better emulsification and a silkier final texture.
Stir in the vanilla extract. Notice how the mixture looks slightly thicker now? That’s the egg doing its job—binding everything together.
Step 4: Fold in the Flour and Chocolate
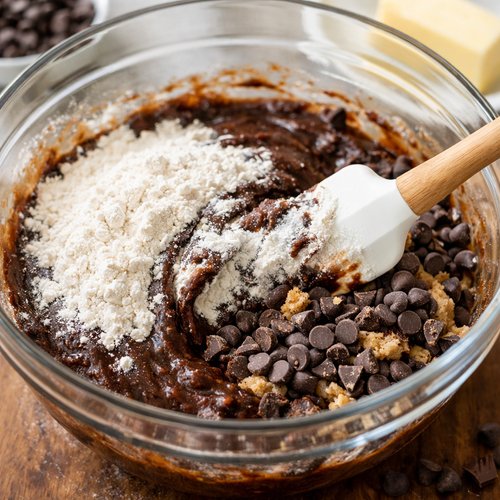
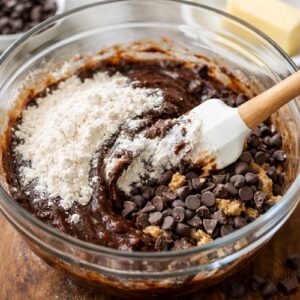
Sprinkle the flour over the top of your mixture and fold gently with a spatula until just combined. Do not overmix—overmixing develops gluten, which makes the brownie layer tough instead of fudgy.
Fold in the chocolate chips gently. They’ll sink slightly as the brownie bakes, so distribute them evenly.
Pour the brownie batter into your prepared pan and spread it into an even layer. This doesn’t need to be perfect—it’ll be covered by cookie dough anyway.
Step 5: Bake the Brownie Base Layer (First 15 Minutes)
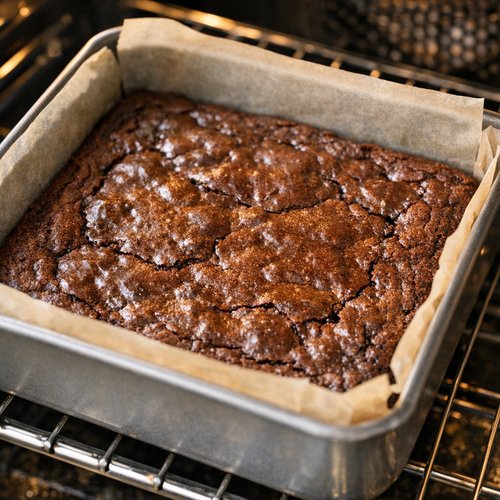
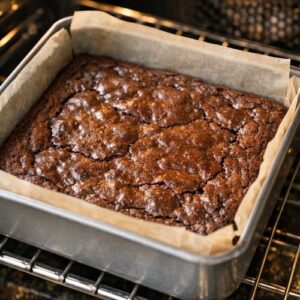
Place the pan in your preheated oven and set a timer for exactly 15 minutes. Don’t skip this timing. At 15 minutes, the brownie surface should look mostly set but still have a slight jiggle in the center when you gently shake the pan.
While the brownie bakes, you’re going to prepare the cookie dough so it’s ready to go immediately when the timer dings.
Step 6: Prepare the Cookie Dough While Brownie Bakes
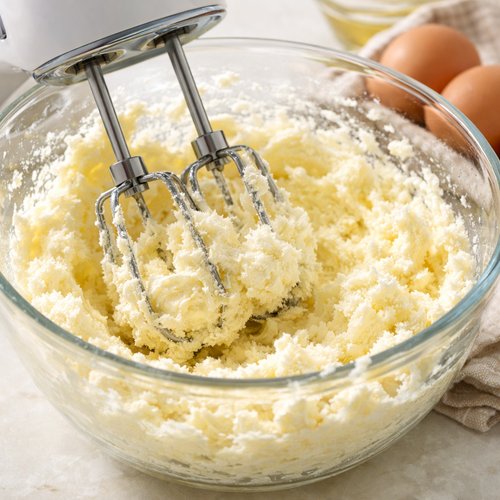
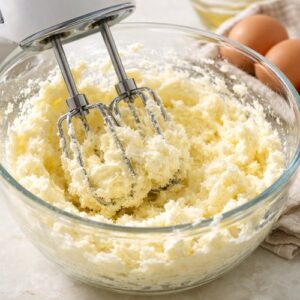
In a separate bowl, cream together the room-temperature butter and granulated sugar. Beat for about 2 minutes until the mixture looks pale and fluffy. This creaming step is crucial—it incorporates air that helps the cookie layer rise and get crispy edges while staying tender inside.
Add the brown sugar and beat for another minute. Then add the egg and vanilla extract, beating until fully combined.
In a small bowl, whisk together the flour, baking powder, baking soda, and salt. This pre-mixing prevents pockets of baking soda in your finished cookies.
Fold the dry ingredients into the wet ingredients until just combined. Fold in the chocolate chips gently.
Step 7: Top the Brownie with Cookie Dough
The moment your brownie base timer dings, pull the pan from the oven. The brownie layer should look set on top but still have a very slight jiggle in the center when you move the pan. This is the exact right moment—not more set, not less set.
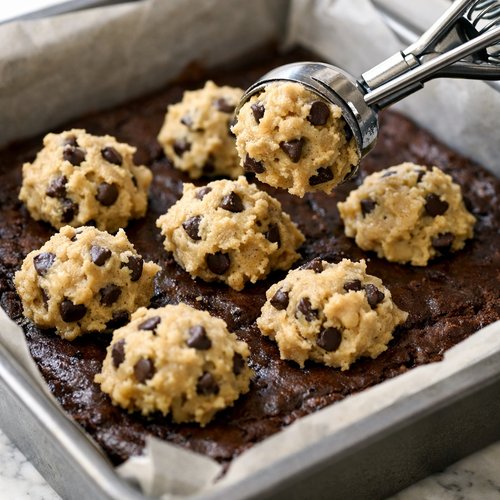
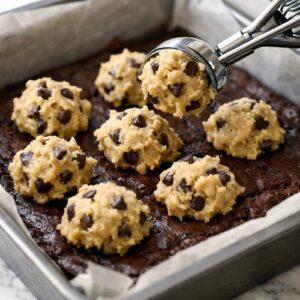
Dollop spoonfuls of cookie dough evenly over the brownie surface. Don’t spread it perfectly smooth—those slight gaps let heat reach the brownie layer, creating better texture integration. Think rustic, not polished.
Use a spatula to gently press the cookie dough so it covers most of the brownie surface, leaving tiny gaps. The cookie dough will spread slightly as it bakes.
Step 8: Bake Both Layers Together (25 More Minutes)
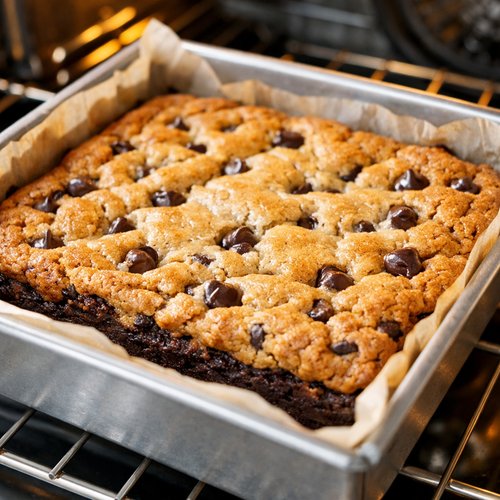
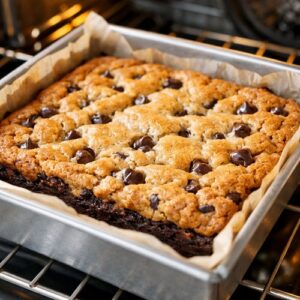
Return the pan to the oven and bake for 25 more minutes. You’re looking for the cookie layer to turn light golden brown on top, and when you tap the surface gently, it should feel set but still have very slight give.
Don’t overbake this. The cookie layer continues cooking slightly after you remove it from the oven thanks to carryover heat. If it looks fully crispy, you’ve gone a minute or two too far.
At 25 minutes, insert a toothpick into the cookie layer—it should come out with just a few moist crumbs clinging to it, not wet batter.
Step 9: Cool Before Cutting
Remove the pan from the oven and let it cool in the pan for 10 minutes. This allows the layers to set slightly without getting cold and brittle.
Use the parchment overhang to lift the entire slab onto a wire cooling rack. Cool completely before cutting—this takes about 1 hour at room temperature, or you can speed it up by putting the pan in the refrigerator for 30 minutes.
Once cooled completely, use a sharp knife dipped in hot water (and wiped clean between cuts) to cut into squares. The hot knife prevents the chocolate from dragging and tearing.
Side-by-Side Results: What to Expect
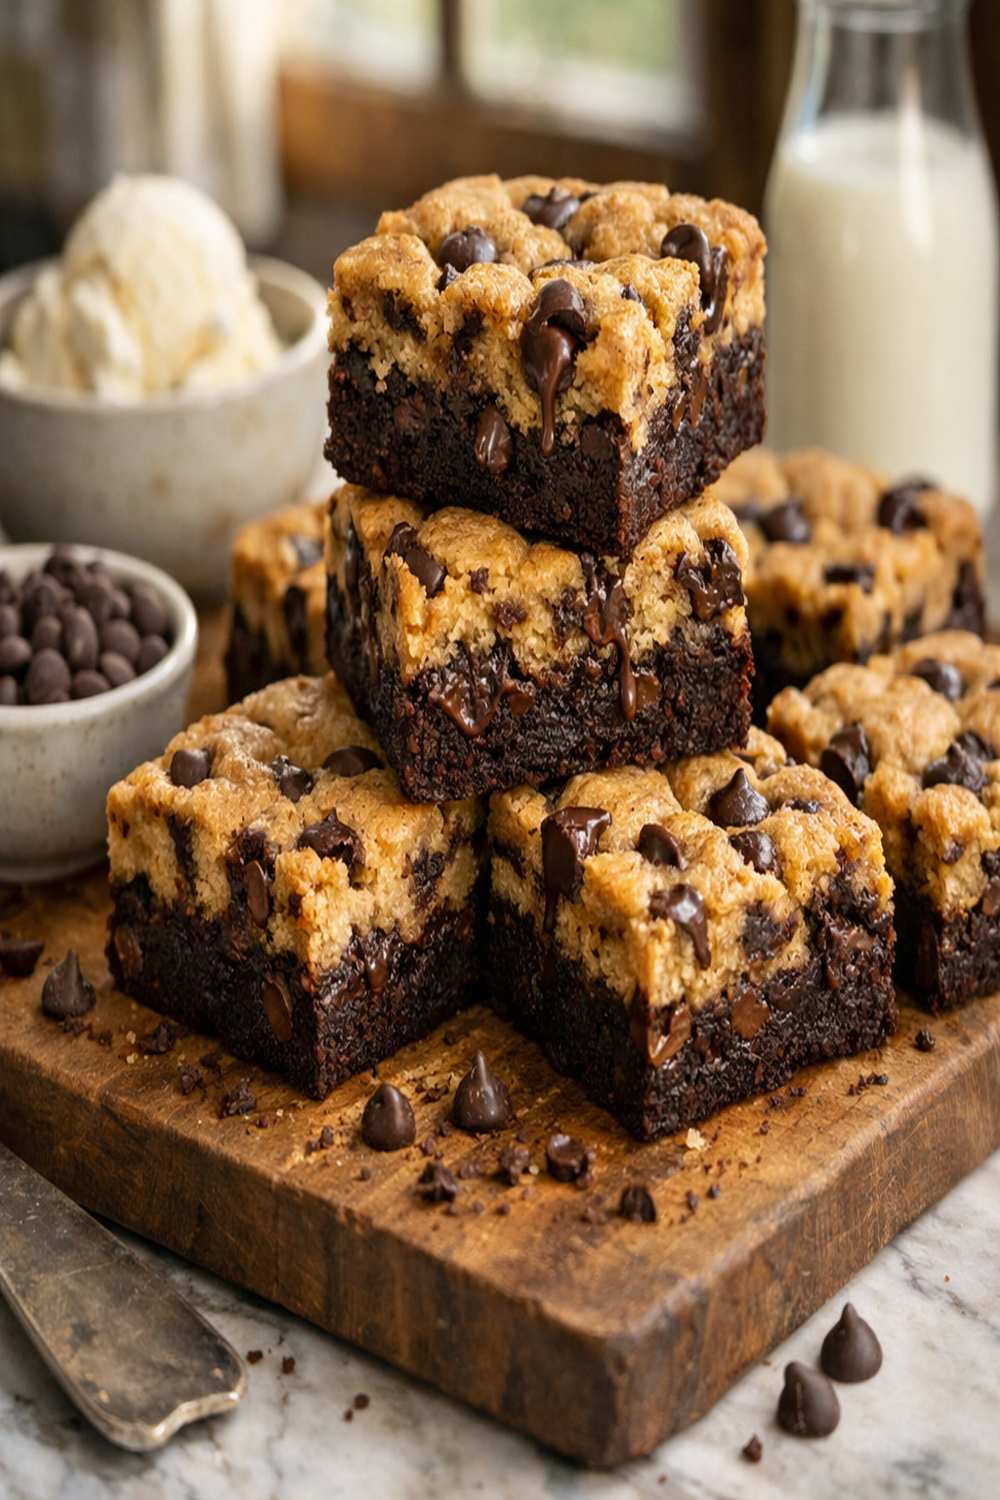
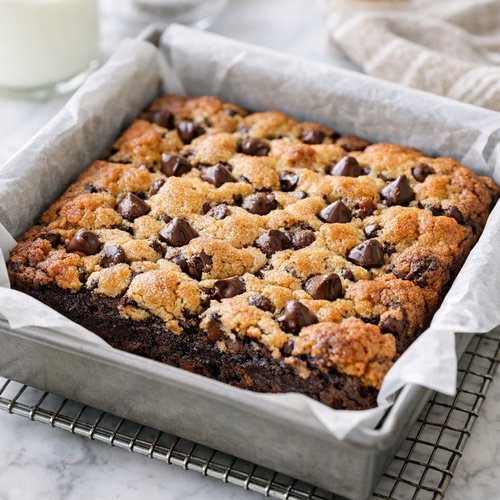
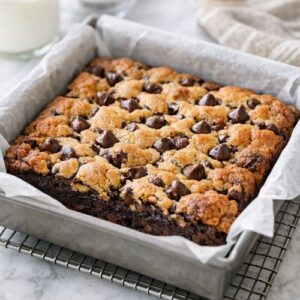
When you cut into a brookie made this way, you should see clear, distinct layers. The bottom brownie layer is dark, fudgy, and slightly glossy-looking. The middle cookie layer is golden with visible chocolate chips, slightly more cake-like than a standard cookie but still tender. The very bottom of the cookie layer will have melded slightly with the brownie, creating a beautiful gradient effect.
The brownie layer tastes intensely chocolate-forward but not bitter. The cookie layer tastes like a good chocolate chip cookie—vanilla-sweet with pockets of chocolate. Together, they create something that tastes more elegant and intentional than either component alone.
The texture should be: brownie layer fudgy and moist (but not wet), cookie layer tender with crispy edges, and where they meet, a gorgeous integration that doesn’t feel like two separate things forced together.
Compare this to the mixed-together method: that version creates a muddy, uniform texture where you can’t distinguish layers, and it’s either too cakey or too fudgy depending on baking time. Compare this to the separate-baking method: that version has layers that feel forced and distinct, sometimes with a tough brownie layer from the second bake.
This method splits the difference perfectly.
When to Use Each Method
- When You Have 40 Minutes and Want Perfection – Use the two-layer method I’ve described. This is the clear winner for weeknight desserts, when you want to impress someone, or when you’re making these for a group and quality matters.
- When You’re Making These for a Crowd and Want to Scale Up – This method scales beautifully. Make three pans at once using the same oven by staggering them: pull pan 1 at 15 minutes, add it back with pan 2, then both come out together after 25 more minutes, then add pan 3 alone. You can have three batches done in about 65 minutes.
- When You Have Leftover Brownie Batter or Cookie Dough – If you somehow end up with extra of one component, bake the brownie layer solo or the cookie dough solo. They’re both delicious on their own. (Though between you and me, I always make exactly enough of each. Waste is not in my vocabulary.)
Can I Store Brookie Recipe?
Brookies actually keep beautifully, which makes them perfect for meal prep or baking ahead for events. Store them in an airtight container at room temperature for up to 5 days. The brownie layer stays fudgy, the cookie layer stays tender, and they actually taste better on day 2 or 3 as the flavors settle and integrate.
For longer storage, wrap individual brookies tightly in plastic wrap and freeze for up to 3 months. Thaw at room temperature for about 30 minutes before eating, or eat them straight from the freezer if you like the fudgy texture extra-intense.
I don’t recommend refrigerating them unless your kitchen is extremely warm. Cold temperatures make the chocolate firms up too much and the cookie layer gets tough.
Make-Ahead Guide: You can prepare both the brownie batter and cookie dough up to 24 hours ahead. Store them separately in airtight containers (brownie batter in one, cookie dough in another) in the refrigerator. When you’re ready to bake, just remove from the fridge 10 minutes before starting, then follow the recipe as written. The brownie batter might be slightly thicker from cold, so let it come to room temperature for smoother spreading.
Expert’s Nutritional Tip
As a registered dietitian, I want to talk about the chocolate in these brookies. Semisweet chocolate chips contain quercetin and other polyphenols that function as antioxidants in the body. I’m not saying these are health food—they’re definitely indulgent desserts—but the chocolate component does bring some micronutrient value. I use quality chocolate chips where I can (look for ones that list cocoa butter, not palm oil, as the main fat), because they contain more actual cocoa solids and fewer fillers. You’ll need fewer chips for the same satisfaction, which means better flavor per calorie.
Nutrition Information
According to USDA data for combination brownie-cookie products, one 2-inch square serving of brookies (assuming 24 pieces per pan) contains approximately:
Calories: 285 | Total Fat: 14g | Saturated Fat: 8g | Carbohydrates: 38g | Fiber: 1g | Protein: 3g | Sugar: 28g | Sodium: 180mg
These numbers assume standard ingredient usage without modifications. Compared to eating a brownie and a cookie separately (which would typically total around 350+ calories), these brookies are actually portion-controlled because the layering creates natural serving sizes that feel satisfying with less total volume.
What Can I Serve With Brookie Recipe?
These are excellent on their own, but here’s how I serve them at my house:
- With Cold Milk – The classic pairing. Whole milk or even a mug of hot coffee creates beautiful flavor contrast. I always tell guests: milk with brookies, not water.
- With Vanilla Ice Cream – Serve a warm brookie (warm them gently in the oven at 300°F for 5 minutes if they’re at room temperature) with a scoop of quality vanilla ice cream. The contrast between warm fudgy brownie and cold creamy ice cream is genuinely special.
- At the End of a Dinner Party – Cut these into smaller pieces (36 instead of 24) and serve them as a plated dessert with a Blueberry Cream Cheese side. The tartness of berries against the richness of chocolate is absolutely beautiful.
- In a Dessert Spread – These pair well with simpler desserts like cookies or bars, never as a solo offering on a dessert board. I like to serve brookies alongside Blueberry Bars for color contrast and flavor balance.
- As a Special Breakfast Treat – I’m not saying I cut a brookie in half and eat it with my coffee before the kids wake up. But I’m also not NOT saying that.
Common Mistakes to Avoid
Mistake 1: Baking the Brownie Layer Too Long – If you bake the brownie base for more than 15 minutes before adding the cookie dough, it sets too much. When the second layer bakes, the brownie continues cooking underneath and becomes cakey instead of fudgy. Set a timer. Don’t wing it.
Mistake 2: Using Cold Cookie Dough – If your cookie dough comes straight from the fridge and hasn’t warmed up a bit, it won’t spread properly on the warm brownie layer and you’ll end up with thick, doughy pockets instead of an even layer. Let it sit at room temperature for 10 minutes before topping.
Mistake 3: Overbaking the Whole Pan – The total oven time is 40 minutes, not 45 or 50. I know it’s tempting to let them bake a little longer to make sure they’re “done,” but that turns the brownie layer into a normal brownie cake and the cookie layer into crumbly cookies. Use a timer. Check at exactly 40 minutes. Trust the process.
Mistake 4: Not Using Room-Temperature Eggs – Room-temperature eggs incorporate better into both batters, creating silkier texture. Cold eggs fight the emulsification process. This sounds like a small detail, but it actually affects the final texture noticeably. Leave eggs on the counter for 15 minutes before using them.
Seasonal Variations
Spring: Add ½ teaspoon of fresh lemon zest to the brownie base for a subtle citrus note that brightens the chocolate. It sounds odd, but it works beautifully.
Summer: Use white chocolate chips in the cookie layer instead of semisweet, and add ½ teaspoon of almond extract to the cookie dough. Makes them taste like an indoor treat for warm days.
Fall: Add 1 teaspoon of cinnamon and ¼ teaspoon of cayenne pepper to the brownie base. It sounds adventurous, but it creates a subtle spice note that makes chocolate taste more complex. Plus, the cayenne is barely detectable but somehow makes people say “these taste amazing, what’s different?”
Winter: Stir ½ teaspoon of peppermint extract into the brownie base and use red and green sprinkles on top of the cookie layer before baking for a festive look. Or add 1 tablespoon of eggnog to the cookie dough instead of the egg—reduces the egg slightly and adds holiday flavor.

Brookie Recipe
Ingredients
Method
- Start by preheating your oven to 350°F. This is lower than some brownie recipes call for, but the longer, gentler bake helps both layers cook evenly without the edges browning too fast. Line a 9x13-inch baking pan with parchment paper or aluminum foil, leaving an overhang on two sides. This overhang is your friend—it makes removing the whole batch easy and keeps cleanup to literally nothing. Press the parchment into the corners gently so it stays in place.
- Pour your melted butter into a medium mixing bowl and let it cool for about 2 minutes. You want it warm but not hot—hot butter will scramble your eggs when they go in. Whisk in the cocoa powder until completely smooth. This step matters more than you'd think. If you just dump cocoa into the wet ingredients and stir, you'll get little cocoa pockets. Whisking it creates an emulsion that distributes the cocoa flavor evenly. Add both sugars and salt. Stir until you get a slightly grainy, thick paste. This is where the brownie base starts developing its signature texture.
- Add one egg at a time, stirring vigorously for about 30 seconds after each addition. You want each egg fully integrated before adding the next one. This creates better emulsification and a silkier final texture. Stir in the vanilla extract. Notice how the mixture looks slightly thicker now? That's the egg doing its job—binding everything together.
- Sprinkle the flour over the top of your mixture and fold gently with a spatula until just combined. Do not overmix—overmixing develops gluten, which makes the brownie layer tough instead of fudgy. Fold in the chocolate chips gently. They'll sink slightly as the brownie bakes, so distribute them evenly. Pour the brownie batter into your prepared pan and spread it into an even layer. This doesn't need to be perfect—it'll be covered by cookie dough anyway.
- Place the pan in your preheated oven and set a timer for exactly 15 minutes. Don't skip this timing. At 15 minutes, the brownie surface should look mostly set but still have a slight jiggle in the center when you gently shake the pan. While the brownie bakes, you're going to prepare the cookie dough so it's ready to go immediately when the timer dings.
- In a separate bowl, cream together the room-temperature butter and granulated sugar. Beat for about 2 minutes until the mixture looks pale and fluffy. This creaming step is crucial—it incorporates air that helps the cookie layer rise and get crispy edges while staying tender inside. Add the brown sugar and beat for another minute. Then add the egg and vanilla extract, beating until fully combined. In a small bowl, whisk together the flour, baking powder, baking soda, and salt. This pre-mixing prevents pockets of baking soda in your finished cookies. Fold the dry ingredients into the wet ingredients until just combined. Fold in the chocolate chips gently.
- The moment your brownie base timer dings, pull the pan from the oven. The brownie layer should look set on top but still have a very slight jiggle in the center when you move the pan. This is the exact right moment—not more set, not less set. Dollop spoonfuls of cookie dough evenly over the brownie surface. Don't spread it perfectly smooth—those slight gaps let heat reach the brownie layer, creating better texture integration. Think rustic, not polished. Use a spatula to gently press the cookie dough so it covers most of the brownie surface, leaving tiny gaps. The cookie dough will spread slightly as it bakes.
- Return the pan to the oven and bake for 25 more minutes. You're looking for the cookie layer to turn light golden brown on top, and when you tap the surface gently, it should feel set but still have very slight give. Don't overbake this. The cookie layer continues cooking slightly after you remove it from the oven thanks to carryover heat. If it looks fully crispy, you've gone a minute or two too far. At 25 minutes, insert a toothpick into the cookie layer—it should come out with just a few moist crumbs clinging to it, not wet batter.
- Remove the pan from the oven and let it cool in the pan for 10 minutes. This allows the layers to set slightly without getting cold and brittle. Use the parchment overhang to lift the entire slab onto a wire cooling rack. Cool completely before cutting—this takes about 1 hour at room temperature, or you can speed it up by putting the pan in the refrigerator for 30 minutes. Once cooled completely, use a sharp knife dipped in hot water (and wiped clean between cuts) to cut into squares. The hot knife prevents the chocolate from dragging and tearing.
FAQs
Can I Make These Gluten-Free?
Yes, and I’ve done this successfully multiple times. Substitute the all-purpose flour with an equal weight of a 1:1 baking flour blend (like Bob’s Red Mill). The ratio matters because gluten-free flours absorb more water. You might need to reduce the liquid slightly—start with the recipe as written, and if the dough looks too wet, reduce the eggs by a tablespoon. The brownie layer actually works better gluten-free than the cookie layer does (less mixing required for fudgy texture anyway), so expect the cookie layer to be slightly more cakey. Still delicious, just slightly denser.
What If I Don’t Have a 9×13 Pan?
You can use a 10×10-inch square pan (they’ll be slightly thicker) or two 8-inch square pans (reduce the baking time for each to 35 minutes total—15 for brownie base, then 20 for the combined bake). A round 10-inch cake pan works too, though the pieces will be circular instead of square. As long as your pan can hold the batter without overflowing, the method stays the same.
How Do I Know If the Brownie Base Is Ready for the Cookie Dough?
At 15 minutes, the brownie surface should look set and dry on top, but when you gently shake the pan side-to-side, you should see a very slight jiggle in the center. If you tap the surface with your finger (gently!), it should feel slightly tacky but not wet. If it’s jiggly everywhere or wet-looking, give it 2 more minutes. If it looks fully set and firm everywhere, you’ve waited slightly too long, but it’ll still work—just know the brownie layer will be slightly cakier. The visual cue is more reliable than time with ovens that run hotter or cooler than 350°F.
Can I Double This Recipe?
Absolutely. Double all ingredients and use a 9×13 pan plus another 9×13 pan (or one 11×15 baking sheet if you have one). Bake both pans simultaneously on the same oven rack, or stack them using oven-safe spacers if your oven is small. The timing stays the same: 15 minutes for brownie bases, then 25 more minutes with cookie dough on top. If your oven runs slightly cool, you might need an extra 2-3 minutes.
How Is This Different From Layering Brownies and Cookies in the Same Pan?
The key difference is the baking sequence. If you just spread brownie batter in a pan, then plop cookie dough on top, and bake once, you get texture problems: the brownie stays too moist (almost gooey) and the cookie doesn’t crisp up. By pre-baking the brownie layer slightly, you create a barrier that sets the brownie texture while still keeping it fudgy. The cookie dough then bakes on top with the residual heat from the brownie below, creating the perfect balance. It’s the difference between layers that feel forced together and layers that feel intentionally designed.
More Recipes You’ll Love
- this simple cake – When you want to turn brownies into an actual celebration dessert with frosting and layers
- these homemade cookies – If you love the cookie component of these brookies, this is your next adventure
The Bottom Line
I’ve tested, baked, adjusted, and refined this brookie recipe over countless afternoons in my California kitchen, usually with my kids hovering nearby asking when they can eat one. The two-layer, sequential-baking method isn’t just my preference—it’s the method that actually respects the science of both brownies and cookies, creating something genuinely better than either component alone.
These aren’t difficult to make. They don’t require special ingredients or complicated techniques. They just require the right timing and the willingness to check on them at exactly the right moment. That’s it.
Make a batch this week. Serve them warm with cold milk. Watch someone’s face light up when they bite through that perfect brownie-cookie integration. That’s why I make these over and over again.
Happy cooking!