

Ingredients
Method
Step 1: Combine Your Dry Ingredients and Activate the Yeast
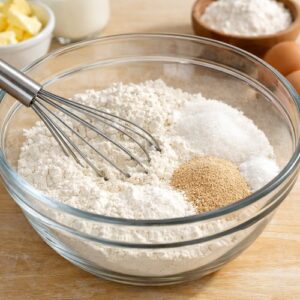
- In a large bowl or the bowl of a stand mixer, whisk together your flour, sugar, yeast, and salt. This is critical: mixing the yeast with the flour and sugar (not with water alone) prevents clumping and ensures even distribution throughout the dough. If you dump yeast directly into water, you're likely getting uneven activation, which means some parts of your dough will rise faster than others. In a separate bowl, combine your lukewarm water with the melted butter and egg. The water temperature here is non-negotiable—measure it with a thermometer if you have one (110-115°F is perfect). If your kitchen is cold, use slightly warmer water. If it's summer and your kitchen is hot, use cooler water. Too hot and you kill the yeast. Too cold and you get sluggish rising.
Step 2: Mix the Dough Until Shaggy, Then Knead
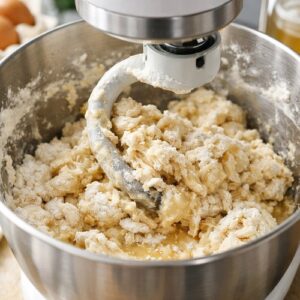
- Pour your wet ingredients into your dry mixture. Using a stand mixer with a dough hook (or mixing by hand), combine everything until you have a shaggy, rough dough with no dry flour visible. This takes about 1-2 minutes. Then, increase your mixer speed to medium and knead for 5-7 minutes. Your dough should be smooth, elastic, and slightly tacky but not sticky. If it's sticking to the sides of the bowl, add a tablespoon of flour at a time. If it's too dry and crumbly, add water one tablespoon at a time. By hand, this would take about 10 minutes of solid kneading. You'll know you're done when you can stretch a small piece of dough between your fingers without it immediately snapping back—that's the gluten network fully developed.
Step 3: First Rise (Bulk Fermentation)
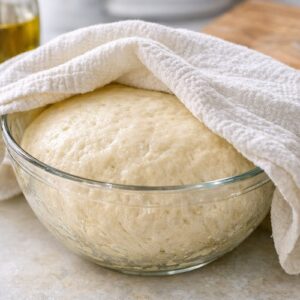
- Place your dough in a lightly oiled bowl, cover it with a damp kitchen towel (not plastic wrap—you want some air circulation), and let it rise in a warm spot for 45-60 minutes. The dough is ready when it's about doubled in size and you can poke it gently with your finger—if the indentation springs back slowly (not immediately, but not too slowly), you're good to go. Here's my pro tip: if your kitchen is cool, turn your oven on for 2 minutes, then turn it off. Place your dough inside. The residual warmth creates the perfect environment for rising without overheating. This prevents the dough from over-fermenting, which creates a gummy interior.
Step 4: Shape Your Rolls
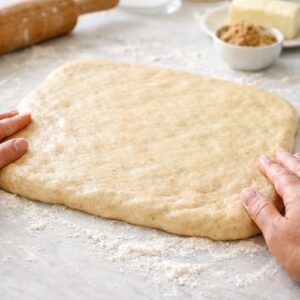
- This is where people get nervous, but it's actually the easiest part. Turn your dough out onto a lightly floured surface. Gently press it into a rectangle about 16 inches wide by 12 inches tall. Don't stretch it aggressively—let gravity and gentle hands do the work. If it keeps shrinking back, let it rest for 5 minutes and try again. Now, spread your room-temperature butter (1/4 cup) evenly over the dough, leaving about a 1/2-inch border on all sides. Mix your brown sugar and cinnamon together and sprinkle it generously and evenly over the butter. This is not the time to be stingy. Starting from the long side closest to you, roll the dough tightly toward the opposite edge, creating a log. Cut into 12 equal pieces (about 1.5 inches each).
Step 5: Arrange in Your Baking Pan and Second Rise
- Arrange your rolls cut-side up in a lightly buttered 9x13-inch baking pan. They should be close together but not touching (they'll expand into each other as they rise, which is exactly what you want). Cover loosely with that damp towel again and let rise for 30-45 minutes. They're ready to bake when they look puffy and spring back slowly when you poke them. Here's what separates home bakers from bakery bakers: they don't over-proof. Your rolls should look pillowy, not like they're about to explode. If they rise too long, the gluten network gets exhausted, and you end up with dense, gummy rolls instead of fluffy ones.

Step 6: Bake Until Golden
- Preheat your oven to 375°F. Bake your rolls for 20-25 minutes, until the tops are golden-brown and the edges are slightly darker. They should smell absolutely incredible at this point—that's your signal you're close. Insert a toothpick into the center of one roll; if it comes out clean or with just a few moist crumbs, they're done. Let them cool in the pan for 5 minutes (this prevents them from drying out), then transfer them to a wire rack or serving platter.

Step 7: Make Your Cream Cheese Glaze
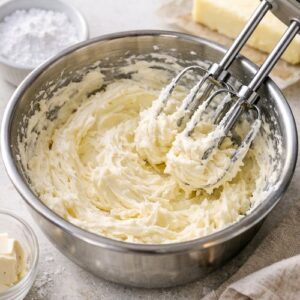
- While the rolls cool slightly, beat together your room-temperature cream cheese and butter until fluffy (about 2 minutes with a mixer). Add your sifted powdered sugar, vanilla extract, and salt. Beat until smooth and spreadable—not too thick, but not runny either. It should be pourable but still hold its shape on the roll. Spread or drizzle generously over the warm rolls. The warmth of the rolls will soften the glaze slightly, creating that bakery-style finish.
Notes
- Water Temperature Mistake: Using water that's too hot kills the yeast (over 120°F), and water that's too cold means your dough rises at a snail's pace. Always measure—buy a cheap instant-read thermometer if you don't have one. It's the single best investment for yeast baking.
- Over-Proofing: Your second rise should be 30-45 minutes, not 90 minutes. I see so many home bakers leave their rolls to rise until they look enormous, then they bake up dense and gummy because the gluten network is exhausted. Trust the timing, not the appearance. Puffy is good. Explosive is bad.
- Skimping on Filling: The filling-to-dough ratio matters. If you use less than the 1/4 cup butter and 1/2 cup brown sugar, your rolls taste bland. These proportions exist for a reason.
- Using Cold Cream Cheese for the Glaze: Cold cream cheese won't incorporate smoothly, and you'll end up with a lumpy glaze. Room temperature is non-negotiable here.