This post contains affiliate links. As an Amazon Associate I earn from qualifying purchases.
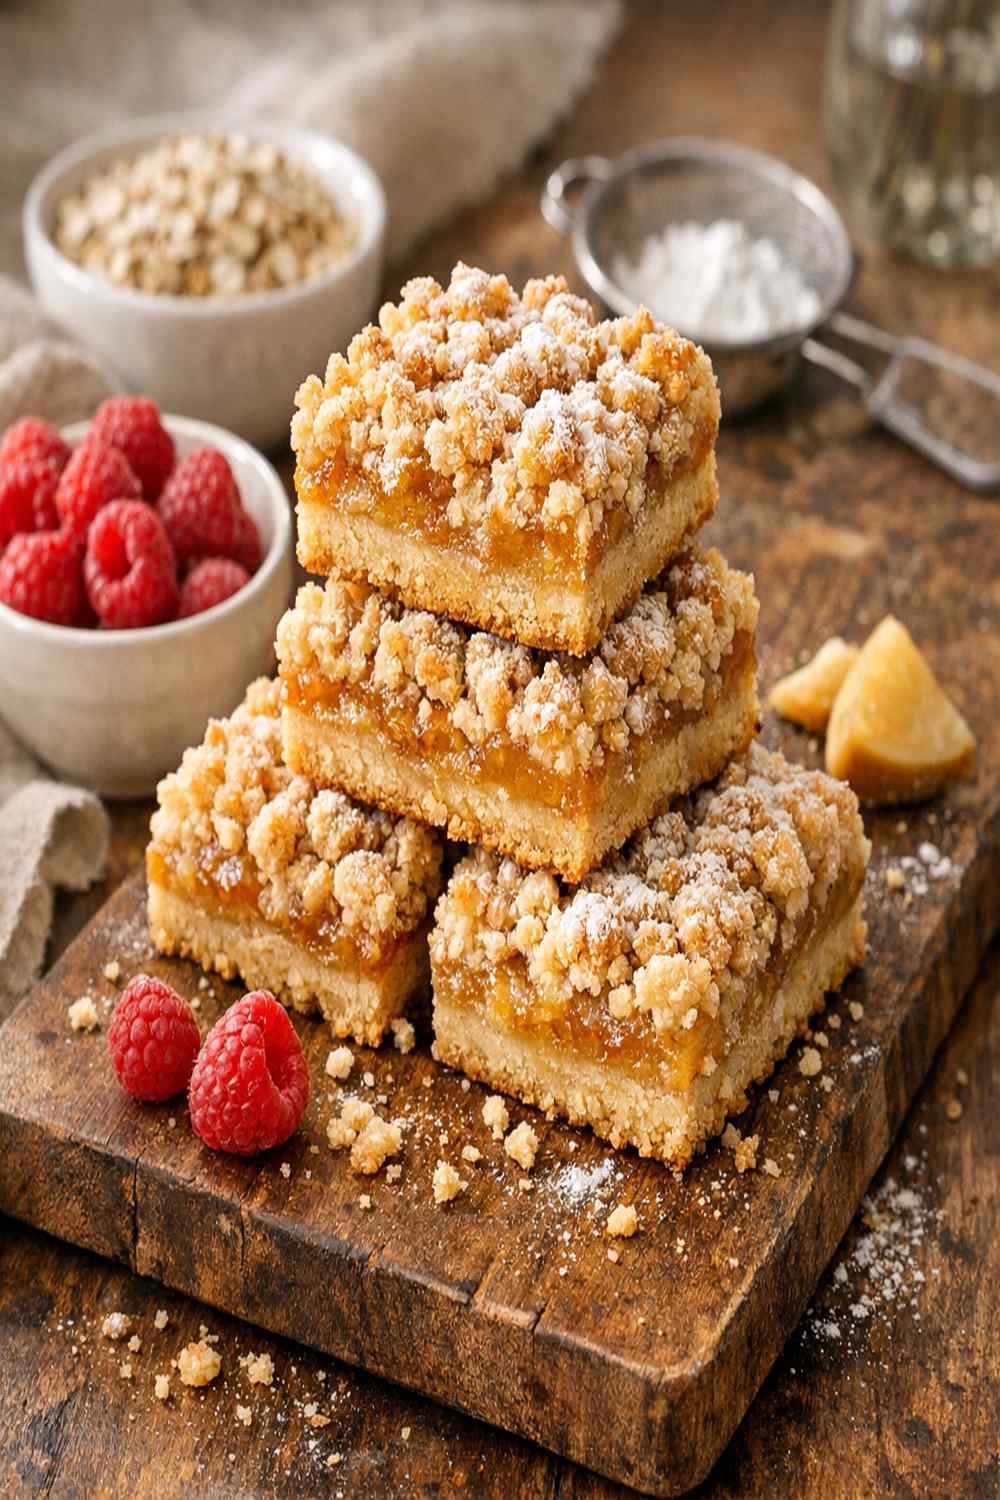
I still remember the Saturday morning my seven-year-old pulled a tray of crumb bars out of the oven, and they completely fell apart the moment she tried to cut them. Her little face dropped. We’d spent the afternoon baking together, and I’d promised her something “easy enough for us to make together.” That’s when I realized most crumb bar recipes skip the one critical step that holds everything together—and it’s not complicated at all.
The bars we make now? They slice cleanly, hold their shape on a plate, and taste like you’ve been baking all morning. Even better, my kids can help without creating a kitchen disaster. Whether you’re feeding a family of four or bringing something homemade to a school potluck, this recipe delivers every single time. And I’m sharing exactly what I learned from years of feeding my own family and my nutrition clients who wanted something indulgent but not apologetic.
Why Your Crumb Bars Fall Apart (And How to Fix It)
Here’s what most recipes don’t tell you: a crumb bar needs a solid foundation and the right ratio of filling to topping. Too much apple filling, and the whole thing gets soggy and shifts when you cut. Too little binder in the crumb topping, and it just slides off the bar like sand.
As a registered dietitian who’s made hundreds of these bars for family gatherings and potlucks, I’ve learned that the magic isn’t in any fancy ingredient—it’s in understanding how moisture moves through the bar while it bakes. A pre-baked base creates a moisture barrier. A properly spiced apple filling (not too wet, not too dry) stays put. And the crumb topping? It needs just enough structure to stay attached without tasting heavy.
This recipe solves all three problems with techniques that are genuinely simple, but make a visible difference the moment you pull them from the oven.
What Makes This Crumb Bar Recipe Different?
The secret is a two-stage base. Instead of baking the bars all at once (which causes sogginess and falling apart), you pre-bake the bottom layer for just 15 minutes. This creates a sturdy foundation that won’t absorb excess moisture from the apples, and it allows the base to set before you add the filling.
The filling itself uses a technique I learned from my nutrition background: coating the diced apples in a mixture of flour, spices, and a touch of sugar that draws out just enough moisture without making them weep. The flour acts as a binder, the spices add depth (not just sweetness), and keeping the apple pieces small and uniform means they cook evenly and stay distributed throughout the bar instead of sinking to the bottom.
Finally, the crumb topping is intentionally dry and crumbly—not wet, not packed down. You’ll press two-thirds of it firmly into the base, then scatter the remaining third loosely over the filling. This creates texture contrast and prevents the bars from becoming a dense, gluey mess.
Before You Start: What You Need to Know
There are two non-negotiable steps that separate bars you’ll actually want to eat from ones that disappoint. The first is understanding your apples. The second is why parchment paper overhang matters more than you think.
- Choose tart apples (Granny Smith is ideal) – sweet apples like Honeycrisp or Gala will cook down to mush and make the filling too wet. Granny Smiths have enough acid and pectin to hold their shape, and their tartness balances the sweet crumb base and topping perfectly.
- Use parchment paper with overhang so bars lift out cleanly – this prevents you from having to invert them (which can cause them to crumble) or hack them apart with a spatula. Line the pan with parchment that extends 2 inches over the edges on all sides, then grip and lift the entire baked square straight up after cooling. No breakage, no mess.
The Ingredients
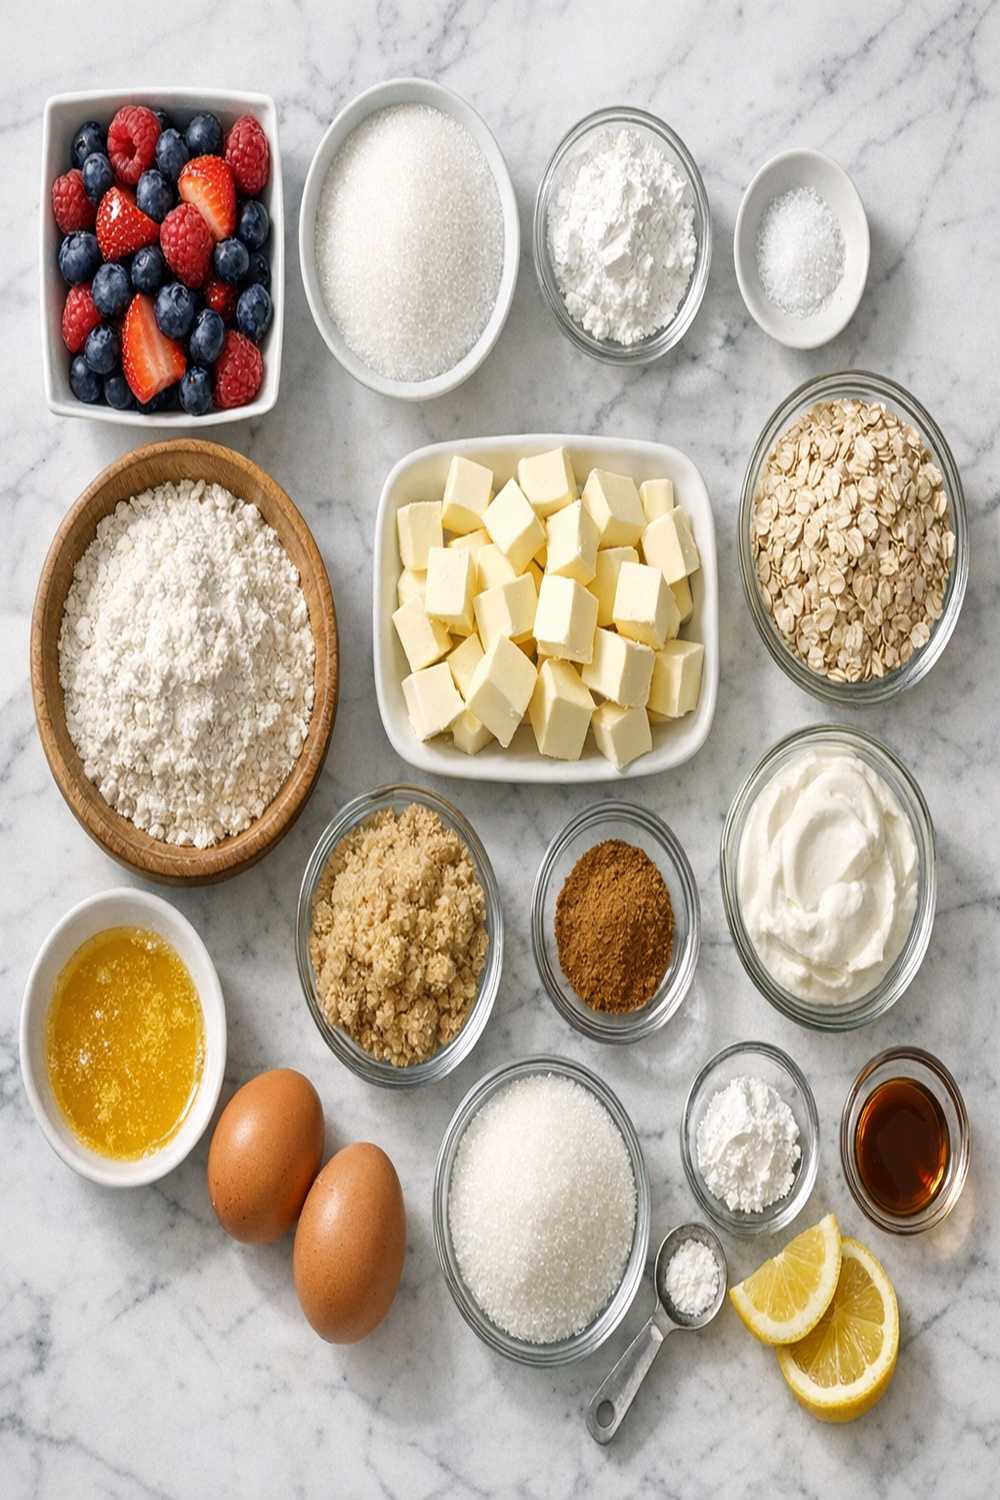
I’ve chosen each ingredient based on what actually works in a professional kitchen and what I know works in mine. This isn’t a “whatever you have on hand” recipe—small changes in ingredient quality and type create noticeable differences in how the bars turn out.
For the Base and Topping
- ½ cup (100g) white sugar (granulated, which creates the right crumb texture—brown sugar makes things too dense)
- ½ teaspoon baking powder (creates a tender crumb base that won’t feel tough or biscuit-like)
- ⅓ cup (30g) rolled oats (old-fashioned, not instant—adds chew and texture to the crumb without being grainy)
- Pinch of fine sea salt (enhances sweetness and prevents a flat-tasting bar)
- 1 stick (125g) unsalted butter (melted and slightly cooled, which helps it distribute evenly without creating greasy pockets)
- 1 large egg (room temperature, which binds the dry ingredients without making them dense)
- 2 cups (300g) all-purpose flour (spooned and leveled, never scooped straight from the bag—this prevents an overly dense base)
For the Apple Filling
- ¼ cup (35g) all-purpose flour (creates structure in the filling and helps bind excess moisture without creating a floury taste)
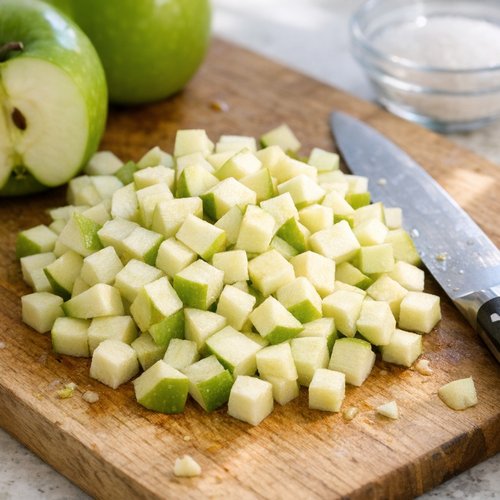
- 3 to 4 large Granny Smith apples (cut into ⅓-inch dice, about 4 cups total—uniform size ensures even cooking)
- ½ teaspoon ground cinnamon (Ceylon cinnamon is worth seeking out—it’s warmer and less bitter than cassia cinnamon)
- ¼ cup (50g) white sugar (brings out the apples’ natural flavor without overwhelming them)
- ¼ teaspoon ground nutmeg (just a whisper—too much tastes medicinal, but it’s essential for depth)
For Serving
- Salted caramel sauce (for drizzling—either homemade or a quality store-bought version)
- Vanilla ice cream (a scoop on warm bars melts into the apple filling, creating something magical)
Yield: Makes 16 bars (a standard 8-inch square pan cut into quarters, then quartered again)
Expert’s Nutritional Insight
Each bar provides approximately 185 calories, 8g of fat, 26g of carbohydrates, and less than 1g of fiber from the filling itself. But here’s what matters professionally: the Granny Smith apples are packed with pectin and resistant starch, which means they digest more slowly than processed sweets—so your blood sugar stays more stable. The rolled oats add additional fiber and beta-glucans, which support heart health. Combined with the small serving size and the pre-baked base (which reduces oil absorption), you’re eating something that tastes indulgent but doesn’t spike your glucose the way a typical dessert would. I serve these to clients who are managing their carbohydrate intake because the ratio of whole fruit to added sugar tips favorably when you cut a proper bar.
Step-by-Step: How to Make Crumb Bar Recipe Without Fail
I’ve made these bars dozens of times—with help from my kids, solo on Friday nights, even in unfamiliar kitchens at family events. The steps are straightforward, but the reasons behind each one matter. Once you understand the “why,” you’ll be able to troubleshoot if something goes slightly different in your oven.
Step 1: Prep Your Pan and Preheat
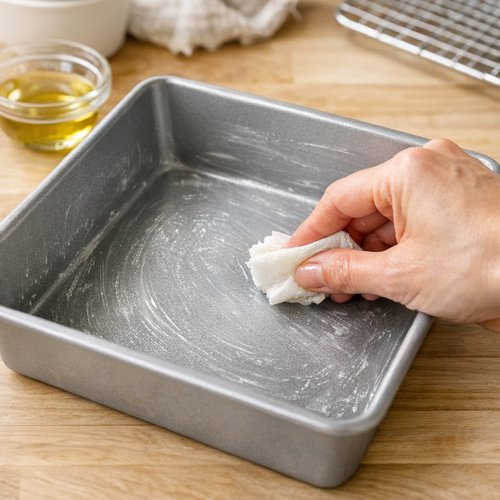
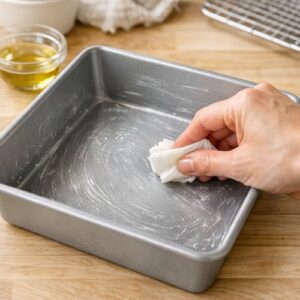
Start by setting your oven to 350°F (180°C). While it’s heating, grab an 8-inch square baking pan and lightly grease the entire interior with a neutral oil or cooking spray. Then tear off a piece of parchment paper about 12 inches long and press it into the pan, allowing 2 inches of overhang on all sides. This overhang is crucial—it gives you something to grip later when lifting the entire baked square out in one piece.
Why this matters: A cold pan can cause uneven baking. Parchment paper with overhang prevents you from having to flip or invert the bars, which is when they crack or crumble apart.
Step 2: Make the Base and Topping Mixture
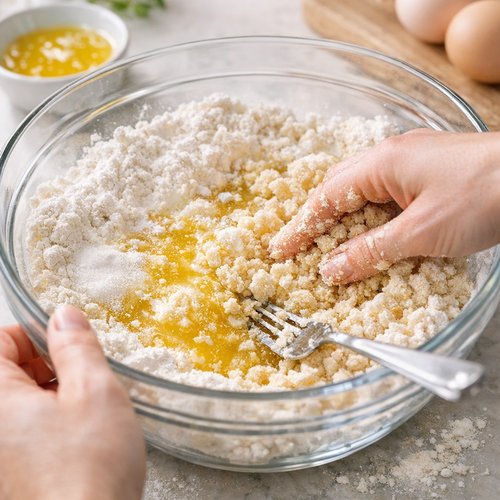
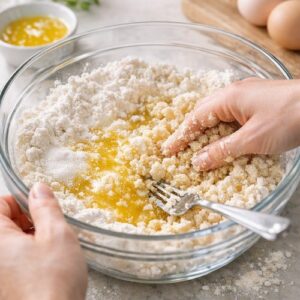
In a large mixing bowl, combine the melted butter, all-purpose flour, white sugar, baking powder, and salt. Using a fork or your fingertips, mix everything together until you no longer see white streaks of flour. The mixture should look like wet sand or coarse breadcrumbs—not sticky, not dry, but crumbly.
This is the texture that tells you the butter has coated all the flour evenly. If you see white bits of flour still clinging to the sides of the bowl, keep mixing.
Why this matters: Uneven mixing creates pockets of dry flour that taste chalky and areas that are too buttery. Mixing to the point where flour disappears ensures a consistent crumb throughout.
Step 3: Add the Egg and Oats
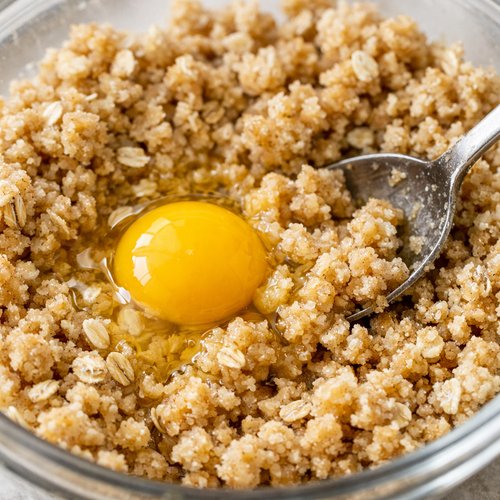
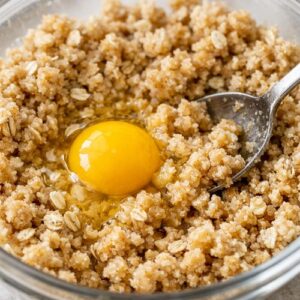
Add one large egg to the crumb mixture and stir until the ingredients just come together. The mixture will look slightly wetter now, but still crumbly—not dough-like. Then add the rolled oats and fold them in gently with a spatula. You want the oats distributed throughout, but not mashed or crushed.
Why this matters: The egg provides just enough moisture to bind everything while the oats add texture and visual interest. Overmixing at this stage creates a dense, cake-like base instead of a tender crumb.
Step 4: Press the Base Into the Pan and Pre-Bake
Measure out about two-thirds of the crumb mixture and press it firmly and evenly into the bottom of your prepared pan. Use your fingertips or the bottom of a measuring cup to create an even layer—you want the base to be compact so it holds together, but not so dense that it’s hard as a brick.
Transfer the pan to your preheated oven and bake for 15 minutes, until the edges are just starting to turn golden and the center is set but still pale. This is the critical step that prevents a soggy, falling-apart bar. You’re not trying to fully bake the base—just set it so it can handle the moisture from the apples.
While the base bakes, prepare the apple filling (see Step 5).
Why this matters: A pre-baked base creates a moisture barrier. Without this step, the apples’ natural juices soak into the base, making it soggy and unstable.
Step 5: Make the Apple Filling
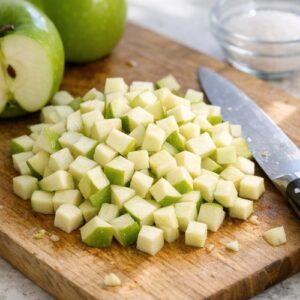
While the base is in the oven, dice your Granny Smith apples into roughly ⅓-inch pieces—aim for consistency in size so they cook evenly. You should have about 4 cups of diced apples.
In a separate bowl, whisk together the ¼ cup all-purpose flour, ¼ cup white sugar, cinnamon, and nutmeg. Add the diced apples to this mixture and toss gently until every piece is coated. The flour coating will draw out a tiny amount of the apples’ natural moisture while also preventing the liquid from pooling at the bottom of the pan.
Why this matters: The flour in the filling acts as a moisture manager. Without it, you’ll end up with a wet, soggy filling that makes the bars impossible to cut cleanly.
Step 6: Add the Filling and Remaining Crumb Topping
Remove the partially baked base from the oven. It should be set but not fully cooked—still pale in the center. Let it cool for just 5 minutes (this helps prevent the filling from sinking into the warm base).
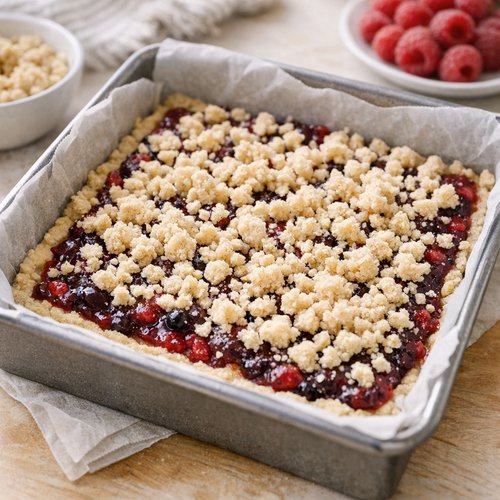
Spread the apple mixture evenly over the cooled base, making sure the apples are distributed all the way to the edges. Then take the remaining one-third of the crumb mixture and scatter it loosely over the apple filling. Do not press down—you want a loose, crumbly topping that will toast into golden clusters, not a dense layer.
Why this matters: A loose topping becomes crispy and flavorful. A pressed-down topping bakes into something dense and heavy. The two-stage process (pressing the base, scattering the topping) creates the textural contrast that makes these bars special.
Step 7: Bake Until Golden and Set
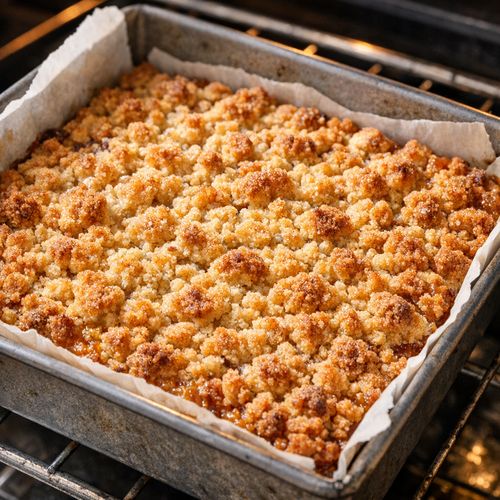
Return the pan to the oven and bake for 25 to 30 minutes, until the crumb topping is deep golden brown and you don’t see any glossy, wet spots on the apples. The bars should smell warm and slightly caramelized. If you gently press the crumb topping with a finger (use protection—it’s hot!), it should feel set and slightly firm, not soft or wet.
Why this matters: This final bake toasts the oats, caramelizes the sugar, and ensures the filling is fully cooked and the moisture has been driven off. Under-baking leaves you with a wet, unstable filling.
Step 8: Cool Completely Before Cutting
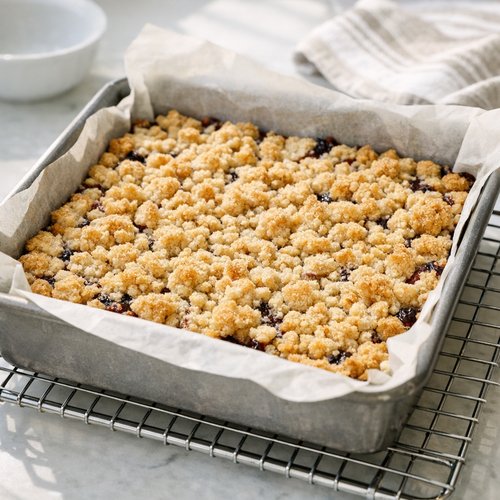
Remove the bars from the oven and let them cool completely in the pan on a wire rack. This usually takes 1 to 2 hours at room temperature. Do not skip this step—cutting into warm bars will cause them to fall apart. The structure sets as the bars cool, and the apples firm up slightly.
Once completely cooled, grip the parchment paper overhang and carefully lift the entire baked square out of the pan. Place it on a cutting board and use a sharp knife (wiping it clean between cuts) to slice the bars into 16 even squares. A 4×4 grid of cuts creates the standard bar size.
Why this matters: Cooling allows the structure to set properly. Lifting with parchment prevents breakage and crumbling.
The Most Common Mistakes (And How to Avoid Them)
- Using soft or sweet apples (like Honeycrisp or Fuji) – these break down into mush during baking, creating a wet, unstable filling. Stick exclusively with Granny Smiths or other tart baking varieties. Your bars will hold their shape, and the flavor will be better balanced.
- Skipping the pre-bake of the base – this is the single biggest reason bars fall apart when you cut them. That 15-minute pre-bake is non-negotiable. It creates a moisture barrier that prevents sogginess.
- Pressing down the crumb topping – when you scatter the topping over the filling, resist the urge to press it down or pat it into place. A loose, uncompacted topping bakes into crispy, golden clusters. A pressed topping becomes dense and heavy.
How Do I Know When It’s Done?
Timing gives you a starting point, but your eyes and nose tell you the real story. When the bars are finished, the crumb topping should be deep golden brown—not pale, not dark brown (which means burned), but a warm, toasted color. You should see caramelization around the edges of the pan.
Look at the apple filling around the edges of the pan. You should no longer see any glossy, wet spots—the liquid has been driven off. When you gently shake the pan, the entire square should feel set and solid, not jiggly.
The aroma is your final check: warm spiced apples mixed with toasted oats and caramelized sugar. If it smells good enough to eat, it’s done.
If you’re uncertain, bake for an extra 2 to 3 minutes. It’s nearly impossible to overbake these bars since the moisture is sealed in by the pre-baked base.
Troubleshooting: When Things Go Wrong
- Bars fall apart when you try to cut them – The most common cause is a wet, under-baked filling or a base that wasn’t pre-baked. Solution: Make sure you baked the base for the full 15 minutes and the final bars for at least 25 minutes. Ensure the filling was coated in flour and sugar (which draws out moisture). Let the bars cool completely before cutting—at least 2 hours.
- Crumb topping tastes dense and heavy, like a cake – You likely pressed the topping down while baking or overmixed the base mixture. Solution: Next time, scatter the topping loosely without pressing. When making the base, stop mixing as soon as you don’t see white flour streaks—don’t keep going. Dense topping is usually a sign of overworking the dough.
- Bottom is soggy or feels greasy – The base didn’t pre-bake long enough, or the pan wasn’t lined properly. Solution: Increase the pre-bake to 18 minutes next time. Make sure the parchment extends into every corner and sits flat against the bottom. If the base is already greasy mid-bake, you’ve used too much butter—measure carefully next time.
Can I Store Crumb Bar Recipe?
These bars stay fresh and delicious longer than you might expect. Store them in an airtight container at room temperature for up to 4 days. The parchment paper they bake on can stay underneath them in the container—it actually helps keep them moist without letting them get soggy.
For longer storage, wrap individual bars in plastic wrap and freeze them for up to 3 months. They thaw at room temperature in about 30 minutes, and I find they taste almost as good frozen as they do fresh. Some of my clients actually prefer them straight from the freezer on hot California afternoons—they’re like an adult apple popsicle.
If you’re baking ahead for a potluck or event, bake these a full day before serving. They actually taste better the next day once the flavors have had time to meld. Wrap them loosely in foil once cooled if you’re transporting them.
Make-Ahead Guide
Prep ahead (up to 2 days before): Dice your apples and store them in an airtight container in the refrigerator. Toss them with the flour, sugar, cinnamon, and nutmeg right before you bake—don’t coat them too early or they’ll weep liquid. You can also mix your dry base ingredients (flour, sugar, baking powder, salt) the night before and store them in a sealed container. Just melt the butter and combine everything on baking day.
Bake the day before: These bars are actually better the day after baking. The flavors deepen, and they’re less fragile to cut and transport. Let them cool completely, store them in an airtight container, and they’re ready to serve or bring to an event.
Freeze for up to 3 months: Wrap baked bars individually in plastic wrap, then place them in a freezer bag. Label with the date. Thaw at room temperature for 30 minutes before serving, or serve them frozen on hot days.
Seasonal Variations
Fall/Winter: Substitute half the Granny Smiths with Honeycrisp apples (which are sweeter and less acidic). Add ¼ teaspoon ground cloves and ⅛ teaspoon ground ginger to the filling for deeper spice notes. Serve with salted caramel and vanilla ice cream.
Spring/Summer: Replace the apples with fresh peaches, pears, or a combination of both. Keep the cinnamon but reduce it to ¼ teaspoon and omit the nutmeg. Add ½ teaspoon of fresh lemon zest to the filling for brightness. The filling will be slightly more delicate, so ensure you bake the base for a full 15 minutes and the final bars for at least 28 minutes.
Year-round adjustment: If you live in a very humid climate, add an extra tablespoon of flour to the apple filling to manage extra moisture. If you’re at high altitude, increase the oven temperature by 25°F and reduce baking times by 5 to 10 minutes.
Nutrition Information
Per bar (serving size = 1 bar of 16): approximately 185 calories, 8g total fat (5g saturated), 27g carbohydrates, 2g protein, and 1g fiber. Based on USDA FoodData Central analysis for the base ingredients plus Granny Smith apples.
From a nutritional standpoint, what excites me is the fiber content combined with the resistant starch in cooked apples. When you bake apples at high heat for an extended period, the pectin and cellulose remain intact—you’re getting soluble fiber that supports digestive health and helps regulate blood sugar response. The whole oats add beta-glucans, which have been shown in clinical studies to support heart health. One bar provides roughly 5% of your daily recommended fiber, which is meaningful for a dessert. This is why I confidently serve these to clients managing blood sugar or metabolic health—the ratio of whole fruit to added sugar, combined with the oats and measured portion size, makes it a genuinely nourishing choice.
What Can I Serve With Crumb Bar Recipe?
These bars are perfectly complete on their own, but there are a few pairings that take them from good to unforgettable. Vanilla ice cream melting into a warm bar is classic for a reason—the cold-hot contrast and the way the ice cream fills the apple-textured space creates something magical. A drizzle of salted caramel sauce echoes the spice and sweetness of the filling.
Serve bars with a cup of hot coffee or tea for an afternoon snack, or alongside other desserts for a potluck or bake sale. I love pairing these with fresh whipped cream and a sprinkle of fleur de sel on top. If you’re building a dessert spread, these work beautifully alongside Blueberry Bar Recipe for color contrast and flavor variety.
- Vanilla ice cream – The chill melts into the warm apples, and the vanilla complements the spice perfectly. This is non-negotiable for warm bars.
- Salted caramel sauce – Drizzle it warm or at room temperature. The salt enhances sweetness and adds sophistication.
- Whipped cream with fleur de sel – Fresh whipped cream (not stabilized) adds lightness and a contrast to the dense, fruit-filled bar. A tiny sprinkle of sea salt on top elevates it.
- Hot coffee or Earl Grey tea – The tannins and warmth balance the sweetness. Honestly, these bars don’t need much beyond a good cup of tea.

Crumb Bar Recipe
Ingredients
Method
- Start by setting your oven to 350°F (180°C). While it's heating, grab an 8-inch square baking pan and lightly grease the entire interior with a neutral oil or cooking spray. Then tear off a piece of parchment paper about 12 inches long and press it into the pan, allowing 2 inches of overhang on all sides. This overhang is crucial—it gives you something to grip later when lifting the entire baked square out in one piece. Why this matters: A cold pan can cause uneven baking. Parchment paper with overhang prevents you from having to flip or invert the bars, which is when they crack or crumble apart.
- In a large mixing bowl, combine the melted butter, all-purpose flour, white sugar, baking powder, and salt. Using a fork or your fingertips, mix everything together until you no longer see white streaks of flour. The mixture should look like wet sand or coarse breadcrumbs—not sticky, not dry, but crumbly. This is the texture that tells you the butter has coated all the flour evenly. If you see white bits of flour still clinging to the sides of the bowl, keep mixing. Why this matters: Uneven mixing creates pockets of dry flour that taste chalky and areas that are too buttery. Mixing to the point where flour disappears ensures a consistent crumb throughout.
- Add one large egg to the crumb mixture and stir until the ingredients just come together. The mixture will look slightly wetter now, but still crumbly—not dough-like. Then add the rolled oats and fold them in gently with a spatula. You want the oats distributed throughout, but not mashed or crushed. Why this matters: The egg provides just enough moisture to bind everything while the oats add texture and visual interest. Overmixing at this stage creates a dense, cake-like base instead of a tender crumb.
- Measure out about two-thirds of the crumb mixture and press it firmly and evenly into the bottom of your prepared pan. Use your fingertips or the bottom of a measuring cup to create an even layer—you want the base to be compact so it holds together, but not so dense that it's hard as a brick. Transfer the pan to your preheated oven and bake for 15 minutes, until the edges are just starting to turn golden and the center is set but still pale. This is the critical step that prevents a soggy, falling-apart bar. You're not trying to fully bake the base—just set it so it can handle the moisture from the apples. While the base bakes, prepare the apple filling (see Step 5). Why this matters: A pre-baked base creates a moisture barrier. Without this step, the apples' natural juices soak into the base, making it soggy and unstable.
- While the base is in the oven, dice your Granny Smith apples into roughly ⅓-inch pieces—aim for consistency in size so they cook evenly. You should have about 4 cups of diced apples. In a separate bowl, whisk together the ¼ cup all-purpose flour, ¼ cup white sugar, cinnamon, and nutmeg. Add the diced apples to this mixture and toss gently until every piece is coated. The flour coating will draw out a tiny amount of the apples' natural moisture while also preventing the liquid from pooling at the bottom of the pan. Why this matters: The flour in the filling acts as a moisture manager. Without it, you'll end up with a wet, soggy filling that makes the bars impossible to cut cleanly.
- Remove the partially baked base from the oven. It should be set but not fully cooked—still pale in the center. Let it cool for just 5 minutes (this helps prevent the filling from sinking into the warm base). Spread the apple mixture evenly over the cooled base, making sure the apples are distributed all the way to the edges. Then take the remaining one-third of the crumb mixture and scatter it loosely over the apple filling. Do not press down—you want a loose, crumbly topping that will toast into golden clusters, not a dense layer. Why this matters: A loose topping becomes crispy and flavorful. A pressed-down topping bakes into something dense and heavy. The two-stage process (pressing the base, scattering the topping) creates the textural contrast that makes these bars special.
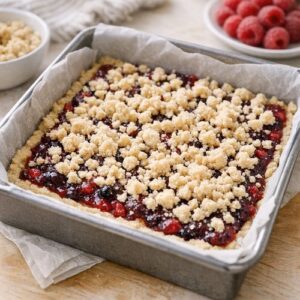
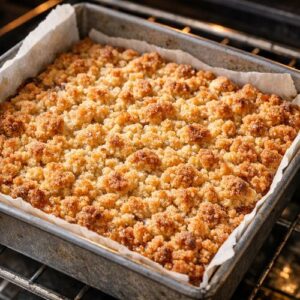
- Return the pan to the oven and bake for 25 to 30 minutes, until the crumb topping is deep golden brown and you don't see any glossy, wet spots on the apples. The bars should smell warm and slightly caramelized. If you gently press the crumb topping with a finger (use protection—it's hot!), it should feel set and slightly firm, not soft or wet. Why this matters: This final bake toasts the oats, caramelizes the sugar, and ensures the filling is fully cooked and the moisture has been driven off. Under-baking leaves you with a wet, unstable filling.
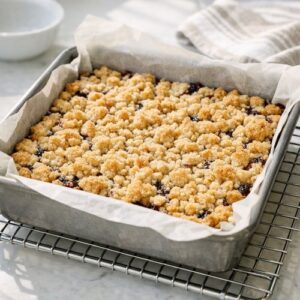
- Remove the bars from the oven and let them cool completely in the pan on a wire rack. This usually takes 1 to 2 hours at room temperature. Do not skip this step—cutting into warm bars will cause them to fall apart. The structure sets as the bars cool, and the apples firm up slightly. Once completely cooled, grip the parchment paper overhang and carefully lift the entire baked square out of the pan. Place it on a cutting board and use a sharp knife (wiping it clean between cuts) to slice the bars into 16 even squares. A 4x4 grid of cuts creates the standard bar size. Why this matters: Cooling allows the structure to set properly. Lifting with parchment prevents breakage and crumbling.
Notes
FAQs
Can I Use a Different Type of Pan?
Yes, but size matters. An 8-inch square pan is standard for this recipe. If you use a 9-inch pan, the bars will be slightly thinner and will bake about 3 minutes faster. If you use a 7-inch pan, they’ll be thicker and may need an extra 5 minutes of baking. Glass and metal pans conduct heat differently—metal bakes slightly faster. Adjust your baking time by 2 to 3 minutes if switching materials and keep an eye on the color rather than relying solely on the timer.
What If I Don’t Have Rolled Oats?
You can substitute old-fashioned oats, but do not use instant oats—they’ll turn to mush. If you have neither, you can increase the flour by ¼ cup (adding 30g all-purpose flour to the base mixture), but you’ll lose some of the textural interest and chewiness that oats provide. The bars will be more cake-like. I’ve also successfully substituted chopped walnuts or pecans for half the oats if you want a different flavor profile.
Can I Make These Ahead for a Bake Sale or Event?
Absolutely—these are perfect for baking ahead. Bake them 1 to 2 days before your event, store them in an airtight container, and they travel beautifully. For a bake sale, I recommend cutting them into bars, wrapping each one individually in plastic wrap or parchment paper, and arranging them on a platter just before serving. They look homemade and special, and customers can see exactly what they’re getting.
What’s the Best Way to Cut Bars Without Them Falling Apart?
Use a sharp knife (a serrated bread knife works wonderfully) and dip it in hot water, then wipe it dry between each cut. The heat helps the knife glide through without dragging. Alternate between horizontal and vertical cuts—don’t saw back and forth. Let the knife do the work. If your bars are still warm when you cut them, they’ll be more fragile. Always wait until they’re completely cooled.
Can I Reduce the Sugar in This Recipe?
You can reduce the sugar in the filling slightly (down to 3 tablespoons) without issue, since the apples provide natural sweetness. I wouldn’t reduce the sugar in the base much—it serves a structural purpose and also helps the crust crisp up. If you want a less sweet bar overall, use the sweetest Granny Smiths you can find and skip the salted caramel sauce, serving them plain or with just ice cream instead.
More Recipes You’ll Love
- Blueberry Bar Recipe – A seasonal spin on the same technique with fresh summer berries and a lemon-forward flavor profile
- this simple cake – For fall entertaining, when you want something richer and more substantial
- these homemade cookies – A different textural experience, but equally perfect for potlucks and bake sales
- Apple Cider Recipe – Pair these bars with homemade spiced apple cider for a fall-inspired gathering
You now have everything you need to make crumb bars that slice cleanly, hold together, and taste like you’ve been baking all morning. The secrets are simple: a pre-baked base, a flour-coated filling, and a loose, scattered topping. Nothing fancy, nothing complicated—just techniques that actually work.
The best part? Once you understand the why behind each step, you can adapt this recipe however you want. Different apples, different spices, even different fruits entirely. You’ve got this. Happy cooking!