This post contains affiliate links. As an Amazon Associate I earn from qualifying purchases.
Learning to make homemade cinnamon pop tarts isn’t just about creating a nostalgic breakfast treat—it’s about mastering one of the most foundational techniques in the kitchen: the all-butter pastry dough. Once you understand how cold butter, measured flour, and ice water transform into those shatteringly flaky, golden-brown layers, you’ll unlock dozens of other recipes. From hand pies to galettes to homemade peach cobbler, this single technique becomes your superpower in the kitchen.
Master the Technique Behind Homemade Cinnamon Pop Tarts (And Never Struggle With Pastry Again)
I’ll never forget the moment this clicked for me. It was a Saturday morning about seven years ago, and my daughter was begging for those boxed pop tarts from the grocery store. I’d tried making pastries before and always ended up with tough, dense results that made me want to throw my apron in the trash. But that morning, something shifted. I stopped rushing. I stopped overworking the dough. I let the butter stay cold, the water stay icy, and I actually paid attention to what the dough was telling me—when it wanted more liquid, when it needed rest, when it was ready to roll. That first batch came out of the oven with crispy, shattering edges that literally made my kids gasp. From that moment, I understood: pastry isn’t about speed or perfection. It’s about respect for the ingredients and patience with the process.
The Core Technique Explained
The heart of this recipe—and the secret to flaky, tender pastry—is called lamination through cold butter distribution. Here’s the science: when you cut cold butter into flour, you’re creating tiny pockets of fat throughout the dough. When that dough hits the hot oven, those butter pockets melt and create steam, which causes the pastry layers to separate and puff up, creating those gorgeous, crispy flakes.
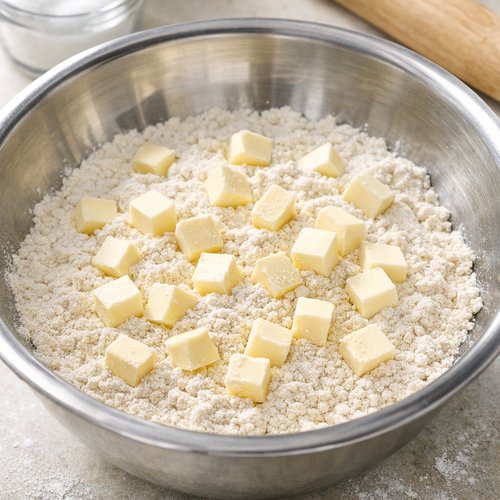
The key to success is keeping everything cold. Warm butter blends into the flour too smoothly, which prevents those crucial fat pockets from forming. Instead, you want pea-sized pieces of cold butter distributed throughout—some will be visible even after you’ve mixed everything together, and that’s exactly what you want. When you roll out the dough, you’ll see little flecks of yellow butter throughout, and those become the layers in your finished pop tarts.
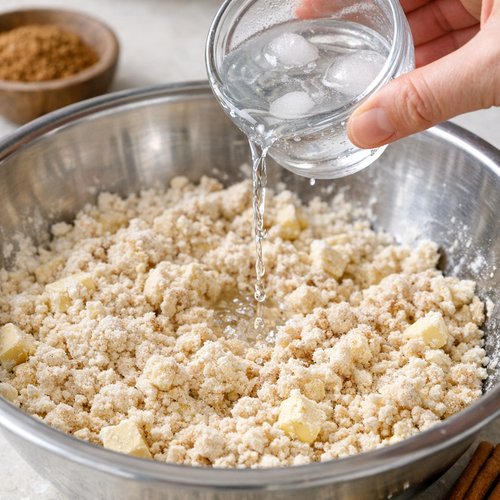
The water acts as a binder, bringing the mixture together just enough so it holds its shape, but not so much that you develop gluten (which creates toughness). This is why we add water gradually, one tablespoon at a time, stopping the moment large clumps form. We’re not making bread dough; we want the dough to be slightly shaggy and underdeveloped.
What This Technique Unlocks
Master this all-butter pastry method, and you’ll be able to make so much more than pop tarts. This single dough recipe opens doors to some of the most beloved desserts and savory applications in baking:
- Hand pies and turnovers – uses the same cold-butter lamination for flaky, portable pastries
- Galettes and rustic fruit tarts – the same dough becomes a canvas for seasonal fruit
- Pie crusts for both sweet and savory applications – this is literally a professional all-butter pie dough
- Biscuits and scones – the same technique creates those tender, flaky layers
- Cheese straws and savory pastry appetizers – the dough is endlessly versatile
- Fruit cobblers with crispy pastry tops – like that peach cobbler you’ve been wanting to try
The Ingredients—Chosen to Teach the Technique
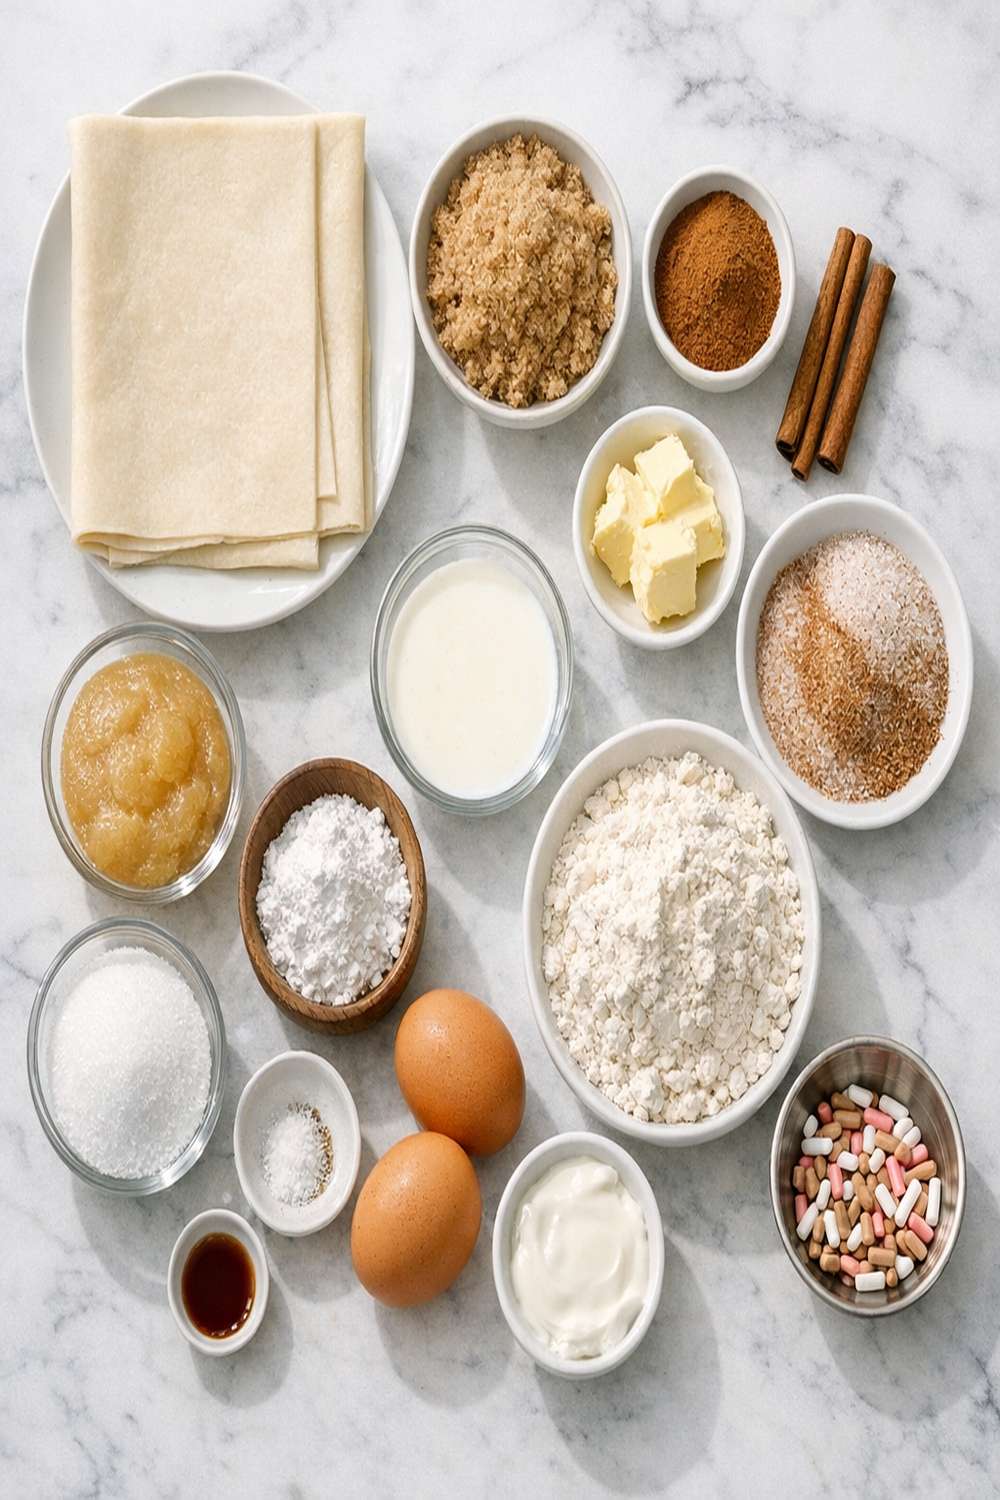
I’ve selected each ingredient specifically to demonstrate how the cold-butter pastry technique works. Notice there are no fancy additions or complicated components—this is intentionally simple so you can focus on technique, not flavor masking. The cinnamon filling is equally straightforward, letting you practice assembly without distraction. Makes 18 pop tarts (9 from each dough disc).
For the Pastry Dough
- 2 teaspoons granulated sugar (enhances browning without sweetness)
- 2½ cups all-purpose flour, spooned and leveled (never pack—use the spoon-and-level method)
- 1 cup unsalted butter, chilled and cubed into ½-inch pieces (the cold fat creates those crucial flaky layers)
- Extra flour for dusting your work surface (prevents sticking without developing excess gluten)
- 1 teaspoon fine sea salt (balances flavor and strengthens gluten slightly)
- ½ cup ice water, plus 2-3 tablespoons more if needed (keeps dough cold and helps hydrate flour)
For the Cinnamon Filling
- 1 tablespoon all-purpose flour (prevents filling from being too wet, which can soften pastry)
- 2 teaspoons ground cinnamon (the star flavor—use good-quality cinnamon for best results)
- ¼ teaspoon ground nutmeg (complements cinnamon with warm depth, optional but recommended)
- ½ cup packed light brown sugar (adds moisture and subtle molasses flavor compared to white sugar)
For Assembly & Icing
- ¼ teaspoon pure vanilla extract (not imitation—adds subtle complexity to glaze)
- 1 large egg mixed with 2 teaspoons milk (egg wash creates that glossy, golden-brown finish)
- ½ teaspoon ground cinnamon (echoes the filling flavor in the icing)
- ¾ cup confectioners’ sugar, sifted (removes lumps for smooth icing)
- 1 tablespoon whole milk, plus more as needed (creates spreadable glaze consistency)
The Masterclass: How to Make Homemade Cinnamon Pop Tarts
This isn’t just a recipe—it’s a step-by-step education in pastry technique. Pay attention to how the dough feels at each stage. Your hands are the best tool you have. Let them tell you when something needs adjusting. I recommend making this dough the night before, which gives the gluten time to relax and makes rolling much easier.
Step 1: Build Your Dough Foundation with Cold Butter Distribution
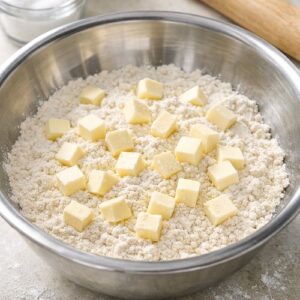
In a large bowl, whisk together your flour, sugar, and salt until completely combined. This uniform distribution ensures even seasoning throughout your dough. Now for the most important part: cutting in the cold butter. Working quickly so the butter stays cold, use a pastry cutter, two forks, or your fingertips to break the chilled butter cubes into increasingly smaller pieces mixed throughout the flour. You’re aiming for a texture that resembles coarse breadcrumbs or wet sand—you want pea-sized and slightly larger pieces of butter visible throughout, not a smooth paste. This takes about 5-7 minutes by hand. If you use a food processor (which I do when I’m short on time), pulse the mixture 8-10 times, stopping frequently to check the texture. Over-processing is the enemy here—it blends the butter too smoothly and you lose those precious fat pockets.
Step 2: Hydrate Gradually—The Most Critical Step
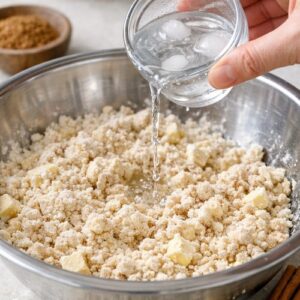
Here’s where many home bakers make their first mistake: adding all the water at once. Instead, drizzle your ice water over the flour mixture one tablespoon at a time, stirring gently with a spatula after each addition. Watch for large clumps to form, but don’t stir them into a unified dough. The dough should look somewhat shaggy and underdeveloped—almost like it’s not quite ready. This is perfect. You’re stopping before you think you should, which means you’re stopping at exactly the right moment. If your dough is too dry and crumbly to hold together, dip your fingers in cold water and gently bring it together. If it feels sticky, sprinkle a tiny bit more flour and continue gathering it. The total liquid needed is usually ½ cup, but humidity varies, so trust the feel over a rigid measurement.
Step 3: Develop Minimal Gluten Through Gentle Handling
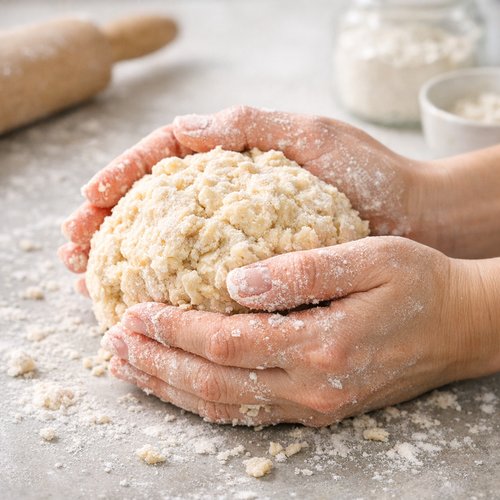
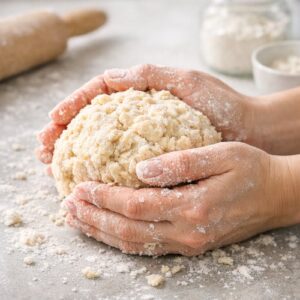
Transfer your shaggy dough to a lightly floured work surface. Using your floured hands, gently bring the dough together into a rough ball. This is not the time to knead or work the dough—resist that urge. You’re simply bringing the pieces together enough to hold their shape. It’s okay if it looks slightly rough and underdeveloped. Using a sharp knife or bench scraper, cut the dough in half, then gently press each half into a disc about 1 inch thick. Wrap each disc tightly in plastic wrap and refrigerate for at least 2 hours, or up to 5 days. You can also freeze for up to 3 months. This resting period is crucial—it allows the gluten to relax and the flour to fully hydrate, making the dough easier to roll and less likely to shrink in the oven.
Step 4: Roll with Confidence—All About Control
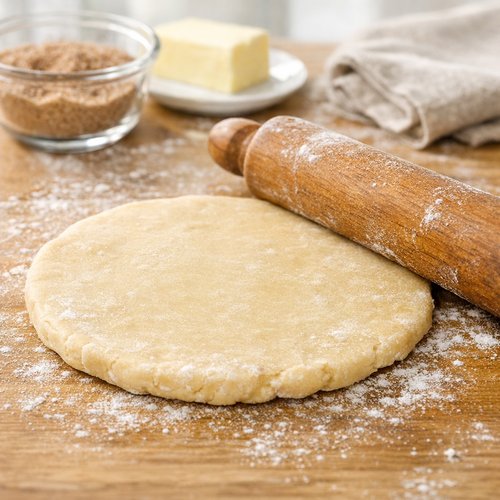
Remove one chilled dough disc from the refrigerator and let it sit at room temperature for exactly 5 minutes. This slight warming makes it pliable enough to roll without cracking. Place the disc on a lightly floured work surface—and here’s a pro tip: flour your rolling pin, not just the surface, to prevent sticking without incorporating excess flour into your dough. Roll the dough into a 9×12-inch rectangle, about ⅛ inch thick. Use a ruler to ensure accuracy, and trim the edges with a sharp knife or pizza cutter so they’re clean and straight. This matters not just for appearance—even edges help the dough cook uniformly. Cut the dough into thirds (three 3×12-inch strips), then cut each strip into thirds again, creating nine 3×4-inch rectangles. Place these on a parchment-lined baking sheet and refrigerate while you repeat with the second dough disc.
Step 5: Mix Your Filling—Simplicity Is Key
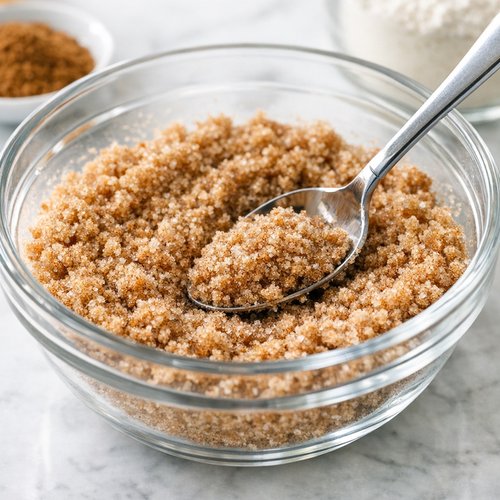
While your dough rectangles chill, combine your brown sugar, cinnamon, and flour in a small bowl. Stir until the cinnamon is evenly distributed throughout the brown sugar. This is your only filling, and that’s intentional—we’re keeping flavors simple so the pastry technique stays front and center. The flour in the filling is critical: it absorbs the moisture from the brown sugar and prevents your filling from making the pastry soggy during baking.
Step 6: Assemble with Precision Sealing Technique
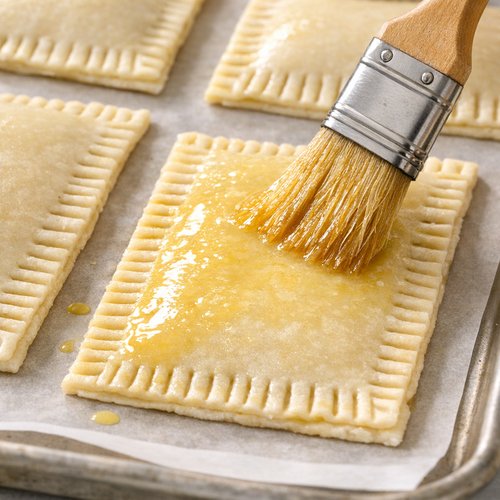
Remove one baking sheet of rectangles from the refrigerator (these are your bottoms). Using a pastry brush, lightly brush egg wash over the entire surface of each rectangle. This will help seal the edges and create that glossy finish. Place a heaping tablespoon of filling in the center of each rectangle and spread it gently with the back of a spoon, leaving at least a ¼-inch border of bare dough around all edges. This border is your seal—if filling touches the edge, it will prevent the two pastry layers from bonding properly. Remove the second sheet of rectangles from the refrigerator (these are your tops). Brush egg wash over their surfaces, then place each one egg-wash-side-down directly on top of a filled bottom, sealing in the filling. Press firmly around all edges using your fingertips, paying special attention to the corners. You can also use the tines of a fork to crimp the edges, which both seals and decorates. Poke 6-8 small holes in the top of each pop tart using a toothpick—this allows steam to escape and prevents the pastry from puffing up too much during baking.
Step 7: The Final Chill and Bake
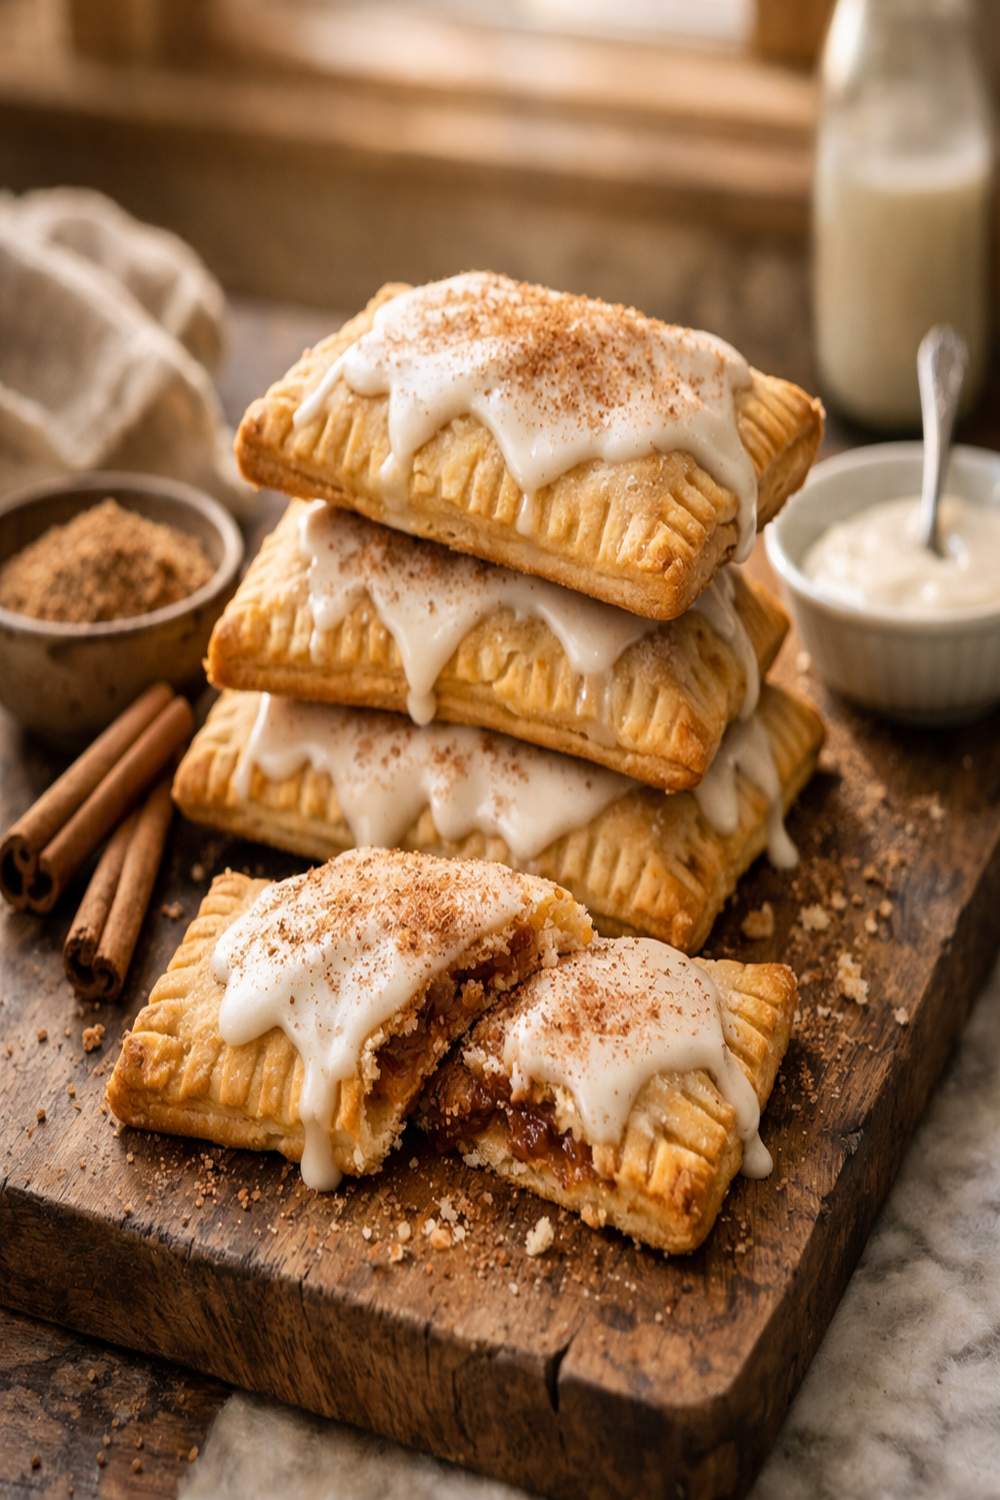
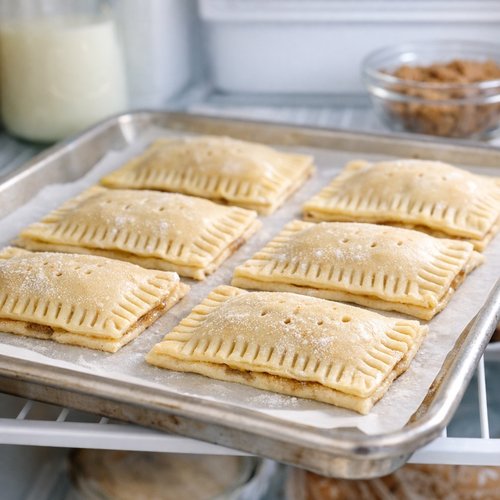
Refrigerate your assembled pop tarts uncovered for at least 20 minutes, up to 1 hour. This final chill is essential—it allows the dough to relax again and helps the filling set slightly, preventing leaking during baking. Preheat your oven to 350°F. Remove the pop tarts from the refrigerator and brush the tops with the remaining egg wash. Bake for 25-30 minutes, rotating the pan halfway through, until the pastry is deep golden brown. The edges should look almost caramelized. Let them cool on the pan for 5 minutes (they’ll be incredibly delicate when hot), then transfer to a cooling rack to cool completely before icing.
Step 8: Create Your Cinnamon Glaze
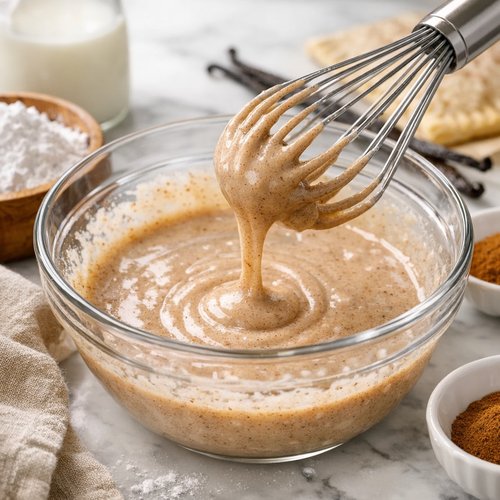
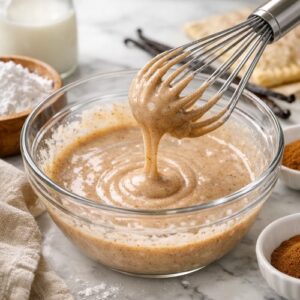
While your pop tarts cool, whisk together your sifted confectioners’ sugar, milk, cinnamon, and vanilla in a medium bowl. Sifting the confectioners’ sugar is non-negotiable—it removes lumps that will never fully incorporate and creates a smooth glaze. You want a glaze that’s thick but spreadable, like the consistency of yogurt. If it’s too thick, add milk one teaspoon at a time until it reaches the right consistency. Spoon the icing onto the center of each cooled pop tart and use the back of the spoon or an icing spatula to spread it evenly across the top. The icing will set in about 1 hour at room temperature.
How to Know You’ve Mastered the Technique
When you’ve truly nailed the all-butter pastry technique, your pop tarts will show specific signs of success. These aren’t subjective feelings—they’re concrete, observable indicators that you’ve executed the technique correctly:
- Visible, shattered flakes when you break the pastry – the pastry should literally break apart into layers when you bite into it, with flakes falling onto your plate. The butter pockets did their job.
- Deep golden-brown color with caramelized edges – this indicates proper browning and suggests the butter was cold enough during mixing to create structure that held during baking.
- The pastry feels crispy on the outside but tender inside – not tough or hard, but not soft either. This balance is the hallmark of well-executed cold-butter pastry.
- No significant leaking of filling – tight sealing and the flour in the filling work together to keep filling contained.
- Even rise across the entire surface – no flat spots or under-puffed areas, indicating even cold butter distribution during mixing.
Common Technique Mistakes and How to Fix Them
- Dense, tough pastry instead of flaky layers – This happens when butter gets too warm during mixing (it blends into the flour) or when you add too much water and develop too much gluten. Next time: work faster, keep everything cold, and add water more gradually. Pre-chill your bowl if your kitchen is warm.
- Dough tears or cracks when rolling out – Your dough either didn’t rest long enough (it needs at least 2 hours) or it’s too cold to roll. Let it sit at room temperature for 5-7 minutes before rolling. If it’s still cracking, it likely didn’t have enough water—next batch, add water a bit more generously early on.
- Filling leaks out during baking – Your sealing wasn’t tight enough, or filling touched the edges. Make sure you leave a ¼-inch border of bare dough and press very firmly around all edges with your fingertips. Also ensure the flour in your filling is well-mixed to prevent moisture from pooling.
- Pastry is pale, not golden brown – Your oven may be running cool (invest in an oven thermometer), or your pop tarts weren’t in long enough. Also check that you applied egg wash evenly. Bake until you see actual caramelization at the edges—they’ll look darker than you think is safe, but that’s when you know they’re done.
Practice Variations to Build Your Skill
Once you’ve mastered the basic cinnamon pop tart, challenge yourself with these progressively more complex variations. Each one teaches you something new about the pastry technique:
Variation 1: Brown Butter Cinnamon Pop Tarts (Intermediate) – Melt your cold butter until it’s brown and nutty, let it cool and solidify in the refrigerator, then cut it into the flour as usual. This deepens flavor while maintaining technique. The brown milk solids create slightly less dramatic flaking, but richer taste. This teaches you how browning affects pastry texture.
Variation 2: Double-Spice Apple & Cinnamon Pop Tarts (Intermediate) – Make a filling with diced fresh apples, cinnamon, brown sugar, and a pinch of cardamom. Sauté the apples for 2 minutes first to drive off excess moisture. This teaches you how to handle wetter fillings and shows how the technique adapts to more complex ingredients.
Variation 3: Laminated Swirl Pop Tarts with Cinnamon-Sugar Filling (Advanced) – After rolling out your dough rectangle, brush it with melted butter, sprinkle with cinnamon-sugar, roll it up, chill, then slice into rectangles before assembly. This teaches you how to incorporate additional fat and layers without over-developing gluten, taking your flaking to the next level.
Can I Store Cinnamon Pop Tarts?
As a busy mom, I love that these keep beautifully. Store completely cooled, iced pop tarts in an airtight container at room temperature for up to 3 days. They’ll stay crispy if kept in a single layer (stack parchment between layers if needed). For longer storage, keep them in the refrigerator for up to 5 days—they’ll firm up slightly but remain delicious.
To reheat, place pop tarts on a baking sheet and warm in a 350°F oven for 8-10 minutes until heated through. This restores some of the initial crispness. You can also toast them like regular pop tarts, though watch carefully as homemade versions are thinner than commercial ones. I don’t recommend microwaving—it creates a soft, rubbery texture that defeats the purpose of crispy pastry.
Make-Ahead Tip: You can assemble the pop tarts, skip the final chill, wrap them tightly, and freeze for up to 3 months. Bake directly from frozen, adding 5-7 minutes to the baking time. There’s no need to thaw—the frozen dough actually bakes beautifully because it has maximum structure.
Expert’s Nutritional Tip
As a registered dietitian, I’m not here to tell you that homemade pop tarts are “healthy”—they’re an indulgent treat, and that’s okay. But I will tell you this: they contain no refined seed oils, no artificial colors, and no preservatives. The butter is real. The flour has substance. When you make these from scratch, you control every ingredient, which means you’re not consuming anything mystery chemicals. One homemade pop tart contains roughly 8-10g of fat (most of it from the butter), 35-40g of carbohydrates, and about 3-4g of protein. They’re meant to be enjoyed occasionally, not daily. That said, pairing one with a protein-rich breakfast (like Greek yogurt or eggs) transforms it into a more balanced meal.
Nutrition Information
Per pop tart (based on 18 servings): 280 calories, 14g fat (9g saturated), 38g carbohydrates, 1g fiber, 24g sugar, 3g protein, 180mg sodium. Based on USDA food composition data for all-purpose flour, butter, and cinnamon. Individual pop tarts may vary slightly based on filling distribution.
What to Serve With Cinnamon Pop Tarts?
These aren’t just breakfast items—I serve them at brunch with coffee, as afternoon snacks with tea, and sometimes even as dessert after dinner. Here are the pairings that let the pastry technique shine:
- Strong coffee or espresso – the bitterness balances the sweetness, and the warmth makes you appreciate the pastry’s contrast between crispy outside and tender inside
- Apple cider – if you’re making these in fall, a warm mug of homemade apple cider with one of these is absolute perfection
- Greek yogurt with honey – the creamy tartness of yogurt against the sweet, crispy pastry creates beautiful balance
- Cold whole milk – simple and classic, it cuts through the richness of the butter
- Alongside pecan cookies – if you’re making a dessert spread, pair these with crispy pecan cookies for textural contrast
- As part of a breakfast board – arrange alongside fresh fruit, cheese, nuts, and other pastries for a stunning presentation

Cinnamon Pop Tart Recipe
Ingredients
Method
- In a large bowl, whisk together your flour, sugar, and salt until completely combined. This uniform distribution ensures even seasoning throughout your dough. Now for the most important part: cutting in the cold butter. Working quickly so the butter stays cold, use a pastry cutter, two forks, or your fingertips to break the chilled butter cubes into increasingly smaller pieces mixed throughout the flour. You're aiming for a texture that resembles coarse breadcrumbs or wet sand—you want pea-sized and slightly larger pieces of butter visible throughout, not a smooth paste. This takes about 5-7 minutes by hand. If you use a food processor (which I do when I'm short on time), pulse the mixture 8-10 times, stopping frequently to check the texture. Over-processing is the enemy here—it blends the butter too smoothly and you lose those precious fat pockets.
- Here's where many home bakers make their first mistake: adding all the water at once. Instead, drizzle your ice water over the flour mixture one tablespoon at a time, stirring gently with a spatula after each addition. Watch for large clumps to form, but don't stir them into a unified dough. The dough should look somewhat shaggy and underdeveloped—almost like it's not quite ready. This is perfect. You're stopping before you think you should, which means you're stopping at exactly the right moment. If your dough is too dry and crumbly to hold together, dip your fingers in cold water and gently bring it together. If it feels sticky, sprinkle a tiny bit more flour and continue gathering it. The total liquid needed is usually ½ cup, but humidity varies, so trust the feel over a rigid measurement.
- Transfer your shaggy dough to a lightly floured work surface. Using your floured hands, gently bring the dough together into a rough ball. This is not the time to knead or work the dough—resist that urge. You're simply bringing the pieces together enough to hold their shape. It's okay if it looks slightly rough and underdeveloped. Using a sharp knife or bench scraper, cut the dough in half, then gently press each half into a disc about 1 inch thick. Wrap each disc tightly in plastic wrap and refrigerate for at least 2 hours, or up to 5 days. You can also freeze for up to 3 months. This resting period is crucial—it allows the gluten to relax and the flour to fully hydrate, making the dough easier to roll and less likely to shrink in the oven.
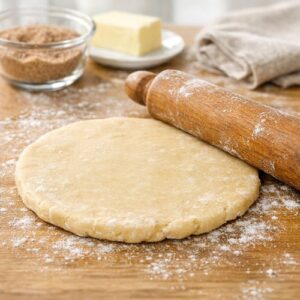
- Remove one chilled dough disc from the refrigerator and let it sit at room temperature for exactly 5 minutes. This slight warming makes it pliable enough to roll without cracking. Place the disc on a lightly floured work surface—and here's a pro tip: flour your rolling pin, not just the surface, to prevent sticking without incorporating excess flour into your dough. Roll the dough into a 9×12-inch rectangle, about ⅛ inch thick. Use a ruler to ensure accuracy, and trim the edges with a sharp knife or pizza cutter so they're clean and straight. This matters not just for appearance—even edges help the dough cook uniformly. Cut the dough into thirds (three 3×12-inch strips), then cut each strip into thirds again, creating nine 3×4-inch rectangles. Place these on a parchment-lined baking sheet and refrigerate while you repeat with the second dough disc.
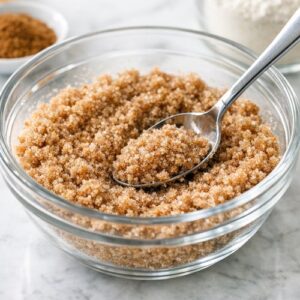
- While your dough rectangles chill, combine your brown sugar, cinnamon, and flour in a small bowl. Stir until the cinnamon is evenly distributed throughout the brown sugar. This is your only filling, and that's intentional—we're keeping flavors simple so the pastry technique stays front and center. The flour in the filling is critical: it absorbs the moisture from the brown sugar and prevents your filling from making the pastry soggy during baking.
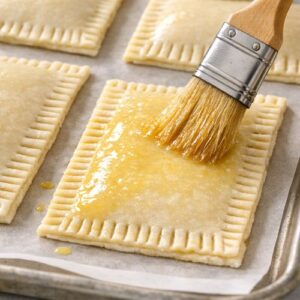
- Remove one baking sheet of rectangles from the refrigerator (these are your bottoms). Using a pastry brush, lightly brush egg wash over the entire surface of each rectangle. This will help seal the edges and create that glossy finish. Place a heaping tablespoon of filling in the center of each rectangle and spread it gently with the back of a spoon, leaving at least a ¼-inch border of bare dough around all edges. This border is your seal—if filling touches the edge, it will prevent the two pastry layers from bonding properly. Remove the second sheet of rectangles from the refrigerator (these are your tops). Brush egg wash over their surfaces, then place each one egg-wash-side-down directly on top of a filled bottom, sealing in the filling. Press firmly around all edges using your fingertips, paying special attention to the corners. You can also use the tines of a fork to crimp the edges, which both seals and decorates. Poke 6-8 small holes in the top of each pop tart using a toothpick—this allows steam to escape and prevents the pastry from puffing up too much during baking.
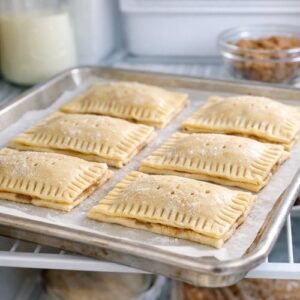
- Refrigerate your assembled pop tarts uncovered for at least 20 minutes, up to 1 hour. This final chill is essential—it allows the dough to relax again and helps the filling set slightly, preventing leaking during baking. Preheat your oven to 350°F. Remove the pop tarts from the refrigerator and brush the tops with the remaining egg wash. Bake for 25-30 minutes, rotating the pan halfway through, until the pastry is deep golden brown. The edges should look almost caramelized. Let them cool on the pan for 5 minutes (they'll be incredibly delicate when hot), then transfer to a cooling rack to cool completely before icing.
- While your pop tarts cool, whisk together your sifted confectioners' sugar, milk, cinnamon, and vanilla in a medium bowl. Sifting the confectioners' sugar is non-negotiable—it removes lumps that will never fully incorporate and creates a smooth glaze. You want a glaze that's thick but spreadable, like the consistency of yogurt. If it's too thick, add milk one teaspoon at a time until it reaches the right consistency. Spoon the icing onto the center of each cooled pop tart and use the back of the spoon or an icing spatula to spread it evenly across the top. The icing will set in about 1 hour at room temperature.
Notes
FAQs
Can I make the dough in a food processor?
Absolutely, and I do this when I’m short on time. Combine flour, sugar, and salt, then pulse in the cold cubed butter 8-10 times until pea-sized pieces remain. Transfer to a bowl, then add water by hand one tablespoon at a time, stirring gently. The advantage of food processor is speed; the disadvantage is you have less tactile feedback about texture. If you go this route, slightly under-process the butter—it’s easier to add more mixing time than to reverse over-processing.
What if my dough is too sticky to work with?
This usually means you added too much water. Sprinkle flour lightly over the dough and continue bringing it together gently. For future batches, remember that humidity varies—start with ½ cup water and add more gradually. If your dough is sticky after resting in the refrigerator, your kitchen is likely warm. Let it sit at room temperature for just 3-4 minutes (not 5) before rolling, and work quickly. Keep your work surface and rolling pin well-floured.
Can I use salted butter instead of unsalted?
Yes, but reduce the salt in the recipe to ½ teaspoon instead of 1 teaspoon. Salted butter contains about ¼ teaspoon salt per stick, so you need to account for that. I prefer unsalted because it gives me control over salt levels and lets the butter flavor shine through more clearly, but both work.
Why did my pop tarts leak filling everywhere?
Three likely culprits: First, your sealing wasn’t tight enough around the edges—press much more firmly with your fingertips, dedicating real pressure to all four edges. Second, filling touched the dough border—be more conservative with the ¼-inch border next time. Third, you didn’t skip the holes in the top before baking, which allows steam to escape slowly rather than forcing its way through the seams. Make sure you poke 6-8 holes with a toothpick.
How can I tell if my oven is hot enough?
Invest in an oven thermometer—they’re $10-15 and reveal so much. Preheat for 20 minutes, then check the actual temperature. Many ovens run 25-50 degrees cooler than the dial indicates. If your oven runs cold, increase the temperature by 25 degrees and watch closely toward the end of baking. Properly baked pop tarts should show caramelization on the edges, not just pale browning.
More Recipes Using This Technique
- Best Peach Cobbler Recipe with Fresh Peaches – uses the same all-butter pastry dough for the cobbler topping
- Blueberry Cream Cheese Hand Pies – applies the same cold-butter lamination technique to individual hand pies
- Blueberry Bar Recipe with Buttery Crust – the crust uses identical pastry technique for maximum flakiness
You’ve just learned one of the most valuable techniques in baking—one that professional pastry chefs spend years mastering. The beauty is, you can start using it today. This all-butter pastry method is forgiving, it’s teachable, and once it clicks in your hands and eyes, you’ll never struggle with pastry again. You’ll look at recipes for galettes, hand pies, and cobblers not with anxiety, but with excitement, knowing you have the skill to execute them beautifully. That’s the real gift of mastering technique: confidence that carries into every kitchen project you undertake. So make these cinnamon pop tarts this weekend. Feel the dough transform under your hands. Watch your oven work its magic. And then, remember this feeling the next time you’re ready to try something new. Happy cooking!