This post contains affiliate links. As an Amazon Associate I earn from qualifying purchases.
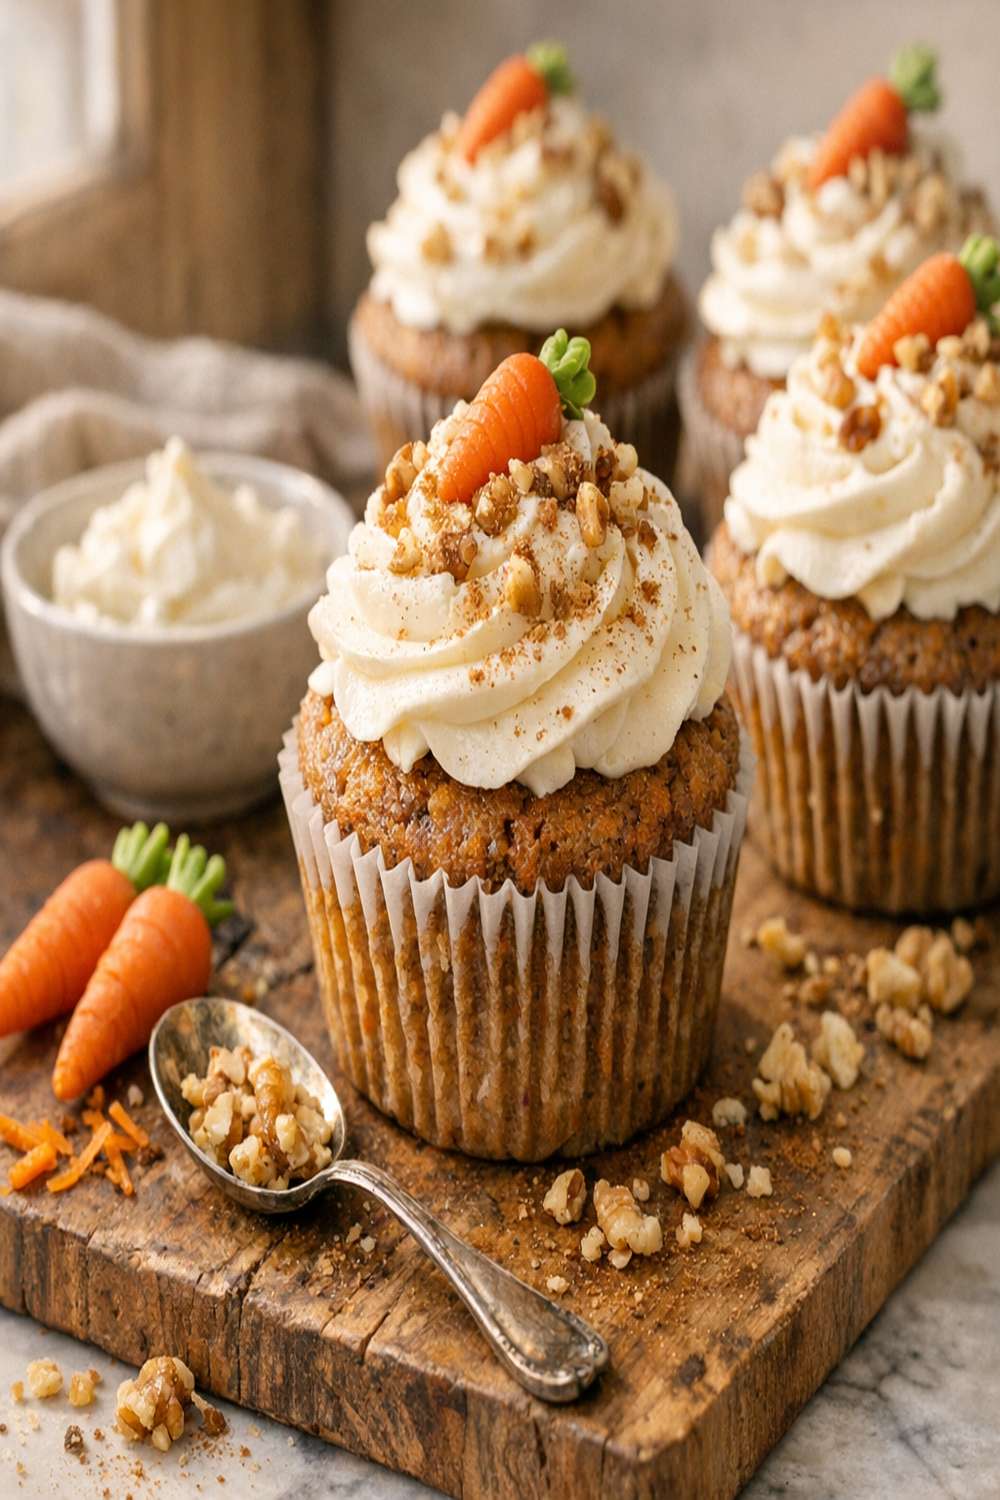
These carrot cupcakes look and taste like they cost $8 per cupcake at a fancy bakery. The truth? A batch of twelve costs under $10 total. I’ve spent years balancing nutrition science with real family budgets, and this recipe proves you don’t need to choose between indulgent flavor and smart spending. Whether you’re baking for a school fundraiser, a birthday celebration, or just because Tuesday needs a little joy, these moist, spiced cupcakes deliver that restaurant-quality result your family deserves. If you love carrot cake but want something portion-controlled and faster to bake, this is your answer. And if you’re looking for the full-size version, my best moist carrot cake recipe is equally budget-friendly.
Restaurant-Quality Carrot Cupcake Recipe for Under $10 (No Shortcuts on Flavor)
I remember the first time I made these for my daughter’s preschool potluck. I was stretched thin—two kids, full-time dietitian gig, and honestly, my checking account was smaller than my to-do list. I wanted to send something impressive, not store-bought. So I did what I always do: I grabbed what was already in my pantry, bought fresh carrots on sale, and built something beautiful from there.
The teacher pulled me aside afterward and asked for the recipe because everyone assumed I’d ordered them from a bakery. That moment—when someone believes you spent more money, time, and effort than you actually did—that’s when I knew this recipe was a keeper. It’s not about tricking people. It’s about knowing that feeding your family (or your community) well doesn’t require emptying your wallet.
These cupcakes are tender, deeply spiced with cinnamon and nutmeg, studded with toasted walnuts if you’ve got them, and topped with a tangy cream cheese frosting that costs pennies to make. They freeze beautifully, travel well, and taste even better the next day. Let me show you how to make them.
The Real Cost Breakdown
Let me show you exactly where your dollars go. Prices vary by region and season, but I’m basing this on typical California grocery store pricing (checking Trader Joe’s, Sprouts, and local markets). I’m calculating cost per cupcake for a batch of 12.
- All-purpose flour (1¼ cups) – approximately $0.35 total. Buy the 5-lb bag at warehouse stores or regular grocery stores; it’s cheaper per ounce than smaller boxes.
- Granulated sugar (½ cup) – approximately $0.20 total. Stock up when you see sales; sugar keeps indefinitely.
- Packed light brown sugar (½ cup) – approximately $0.25 total. Same deal as white sugar—buy bulk when prices dip.
- Vegetable oil (¾ cup) – approximately $0.45 total. This is your cheapest fat option for this recipe.
- Large eggs (2) – approximately $0.60 total. Buy the dozen when they’re on promotion.
- Fresh carrots (1½ cups grated) – approximately $1.20 total. Buy whole carrots, not pre-shredded; they’re half the price and taste fresher. Shop farmers markets on final day (deep discounts) or buy loose carrots rather than packaged.
- Baking soda, baking powder, salt, cinnamon, nutmeg – approximately $0.30 total. These are pantry staples you probably have; I’m calculating only the small amount you actually use.
- Pure vanilla extract (1½ teaspoons) – approximately $0.15 total. Buy the larger bottle; cost per teaspoon drops significantly.
- Whole milk (2 tablespoons) – approximately $0.10 total.
- Chopped walnuts or pecans (½ cup, optional) – approximately $1.50 total. Buy raw nuts in bulk and toast them yourself; roasted pre-packaged nuts cost 2-3x more.
- Cream cheese frosting ingredients – approximately $2.50 total for the full batch (cream cheese, butter, powdered sugar, vanilla).
Total cost: approximately $8.10 for 12 cupcakes = about $0.68 per cupcake. Compare that to a bakery cupcake ($4–$6 each) or a specialty cake shop ($8–$12 per cupcake). You’re looking at roughly 85–90% savings per serving.
Smart Shopping Tips for This Recipe
- Buy whole carrots from the bulk bin, not pre-shredded bags. Pre-shredded carrots cost nearly triple and oxidize quickly, losing flavor and nutrition. Whole carrots stay fresh for 3 weeks in your crisper drawer. I use my box grater (the flat side is fastest) or a food processor, which takes 60 seconds.
- Purchase raw nuts and toast them yourself. Raw walnuts from the bulk section at Sprouts or Trader Joe’s cost $5–$7 per pound. Pre-roasted packaged nuts cost $12–$15 per pound. Toast them in a 350°F oven for 8–10 minutes while your oven preheats for the cupcakes—no extra time, double the savings.
- Choose vegetable or canola oil over butter for this recipe. Oil keeps baked goods moister longer and costs less per ounce than butter. Save butter for your frosting, where you can actually taste it.
- Buy eggs when they’re on sale and hard-boil extras for snacks. Room-temperature eggs mix better; I set them out while I gather ingredients, or run them under warm water for 30 seconds.
- Make your own cream cheese frosting rather than buying pre-made. Store-bought frosting is $4–$6 per container. Homemade costs $2 and tastes infinitely better. I’ll link my frosting recipe below.
- Stock your spice rack strategically. Cinnamon and nutmeg are used in dozens of recipes. Buy them once in bulk and you’re covered for years. Those tiny jars at regular grocery stores are marked up 300%.
The Ingredients
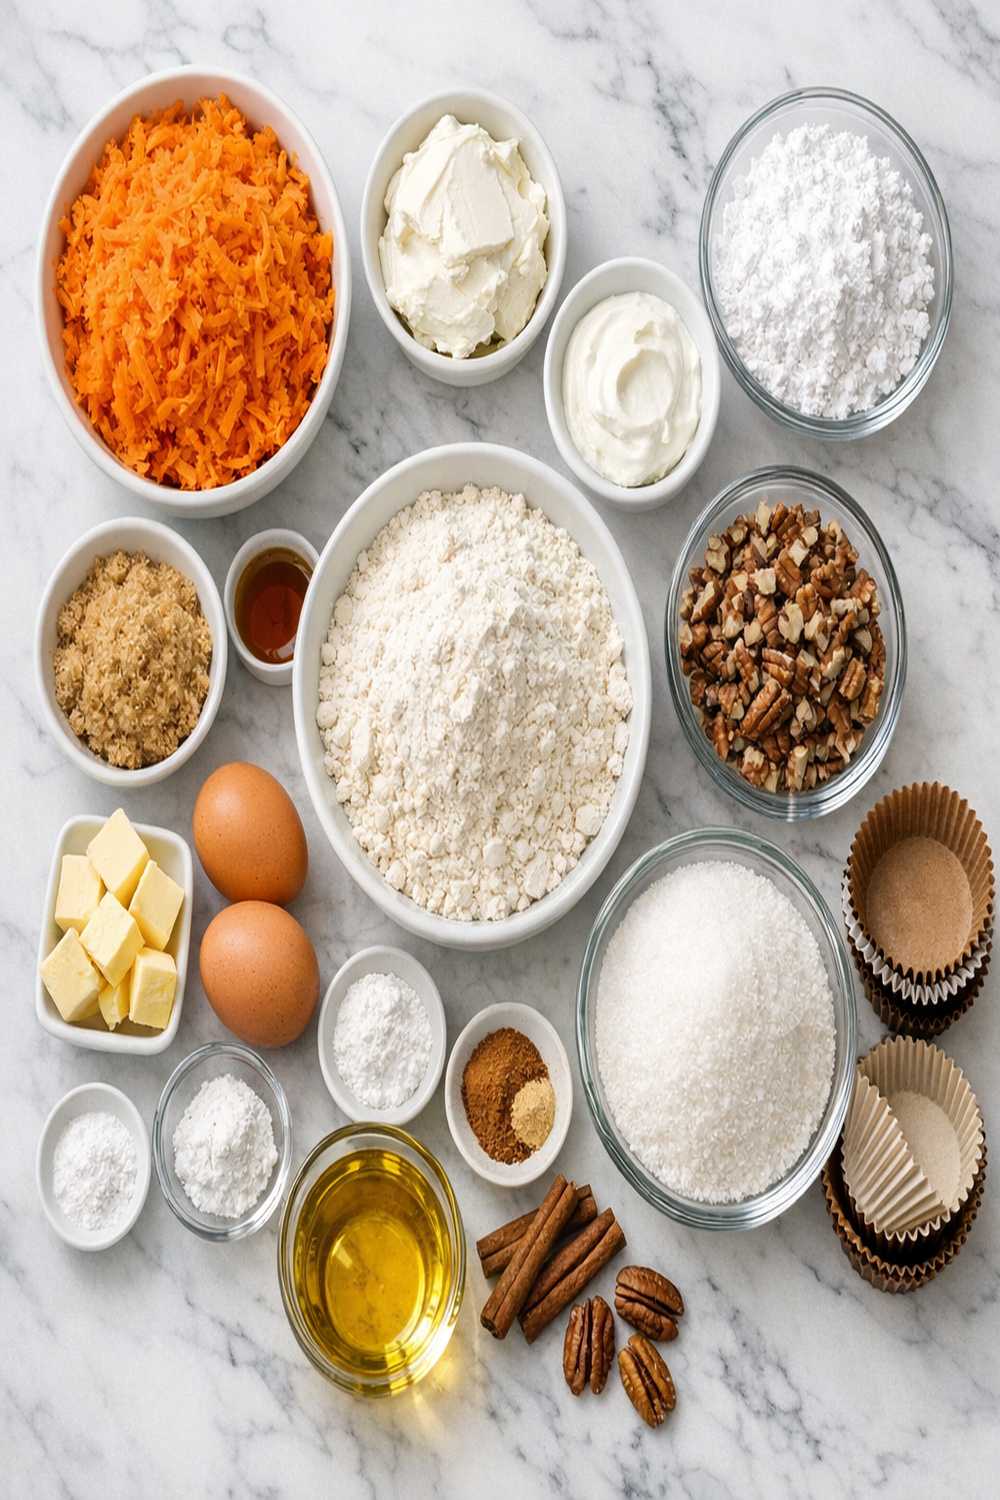
Every ingredient here earns its place and its cost. I’ve built this recipe around what delivers maximum flavor and nutrition for minimum dollars. Notice there’s no fancy extracts, no exotic spices, no premium ingredients that only appear in one recipe. This is California-fresh simplicity.
For the Cake
- 1½ teaspoons pure vanilla extract (not imitation—the flavor difference is real)
- ½ cup chopped raw walnuts or pecans, toasted (optional, but they add texture and richness)
- 1 teaspoon ground cinnamon (this is where flavor happens—use good quality if you can)
- ½ teaspoon baking powder (double-acting is fine—standard stuff)
- ¼ cup unsweetened shredded coconut (optional but adds lovely subtle flavor—toast it in a dry pan first)
- ½ cup granulated sugar (standard white sugar, nothing fancy needed)
- 1¼ cups all-purpose flour (spooned and leveled, never packed—this matters for texture)
- 2 tablespoons whole milk (full-fat creates a more tender crumb)
- ½ cup packed light brown sugar (adds moisture and subtle molasses depth)
- ½ teaspoon fine sea salt or table salt (balances sweetness)
- ¼ teaspoon freshly grated nutmeg (pre-ground is fine, but fresh is noticeably better and not much more expensive)
- 2 large eggs (brought to room temperature before mixing)
- 1½ cups freshly grated carrots (about 3–4 medium carrots, lightly packed)
- ¾ teaspoon baking soda (leavening agent, make sure it’s fresh—test it by dropping a pinch in vinegar; it should fizz)
- ¾ cup neutral vegetable oil, avocado oil, or canola oil (room temperature)
For the Frosting
- 4 tablespoons unsalted butter (softened to room temperature)
- 1 teaspoon pure vanilla extract
- 2 cups powdered sugar (sifted to avoid lumps)
- Pinch of fine sea salt
- 8 ounces cream cheese (softened to room temperature)
Recipe yields: 12 cupcakes
How to Make Carrot Cupcake Recipe Without Breaking the Bank
This isn’t about cutting corners—it’s about smart technique. Professional bakers understand that precision and timing matter more than expensive ingredients. I’m going to walk you through each step the way I teach it at home, with money-saving wisdom baked in.
Step 1: Prep Your Station and Preheat the Oven
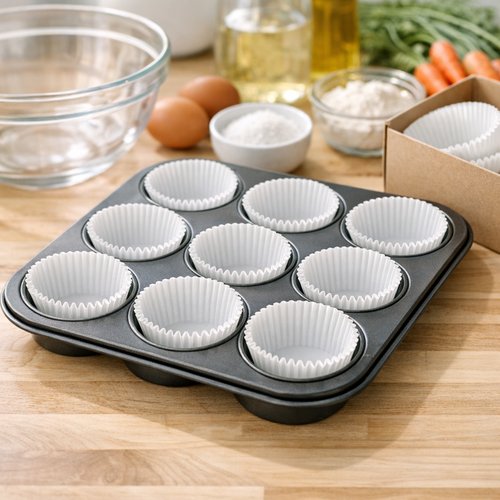
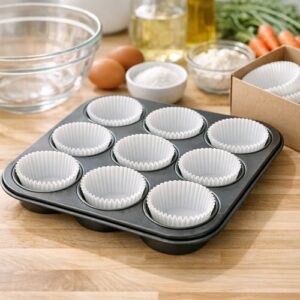
Preheat your oven to 350°F (175°C). Line a standard 12-cup muffin tin with paper liners. This is where I save money: I buy the bulk box of liners from restaurant supply stores or Costco instead of the tiny grocery store boxes. Same liners, 60% cheaper. If you don’t have liners, grease the tin generously with a bit of oil or cooking spray—they’ll pop right out if you let them cool first.
While the oven heats, gather all your ingredients on the counter. Professional bakers call this “mise en place”—everything in its place. It prevents forgotten ingredients and keeps you moving quickly.
Step 2: Combine Your Dry Ingredients
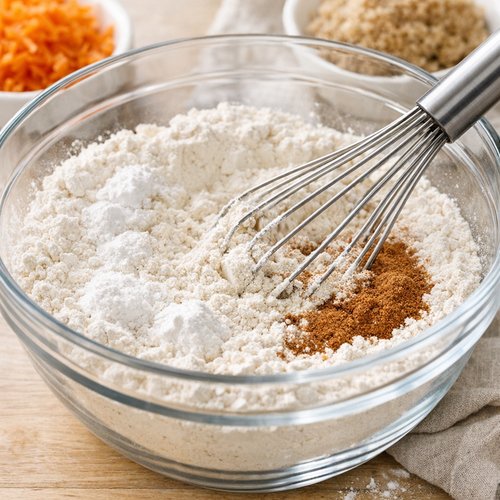
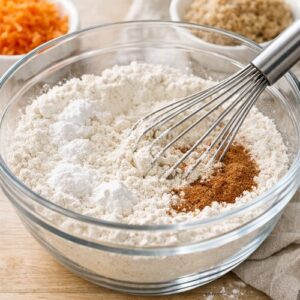
In a large mixing bowl (or the bowl of a stand mixer if you have one—I use both depending on how many dishes I want to wash), whisk together the flour, both sugars, baking soda, baking powder, salt, cinnamon, and nutmeg.
Pro tip from my dietitian background: whisking your dry ingredients for about 30 seconds incorporates air and distributes the leavening agents evenly. This costs nothing but creates a noticeably lighter, more tender crumb. It’s the difference between good and restaurant-quality.
Make sure your baking soda and baking powder aren’t old and stale. Baking soda lasts about 3–5 years; baking powder lasts 6 months to a year. If your baked goods come out dense, expired leavening agents are often the culprit.
Step 3: Create Your Wet Base
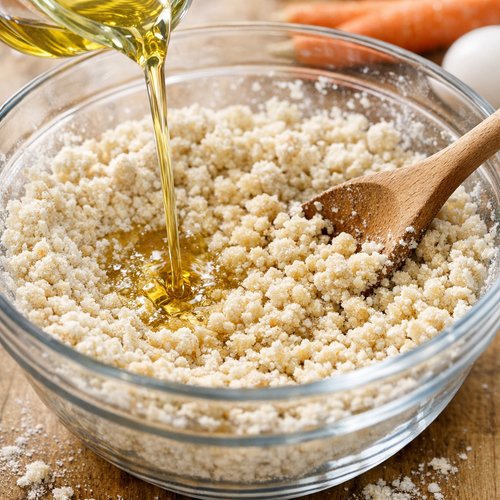
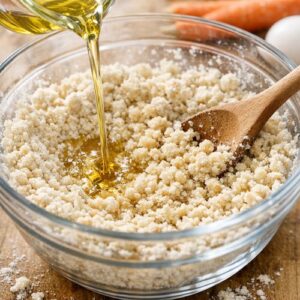
Pour the oil into your flour mixture and stir until the texture resembles coarse breadcrumbs. Don’t overmix—this step should take about 30 seconds of gentle stirring. This technique costs nothing extra but prevents overdeveloped gluten, which leads to tough, dry cupcakes.
Crack your room-temperature eggs into a small bowl first (easier to fish out shells). Add them one at a time to your flour-oil mixture, stirring gently after each addition until combined. Pause to scrape down the sides of the bowl with a rubber spatula—make sure you’re incorporating the ingredients at the bottom.
Stir in your vanilla extract and milk. The milk adds moisture and helps create that tender crumb everyone loves. Don’t skip it even though it’s only 2 tablespoons.
Step 4: Fold In Your Stars: Carrots and Nuts
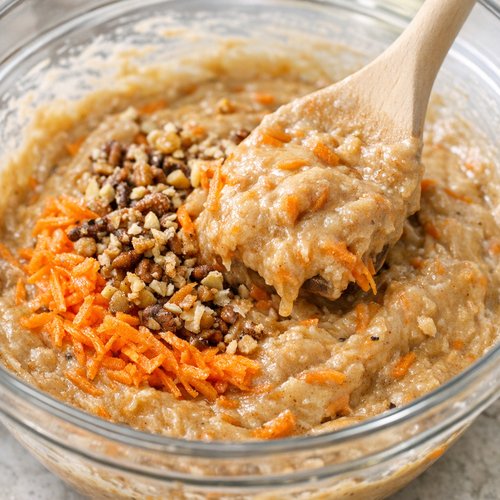
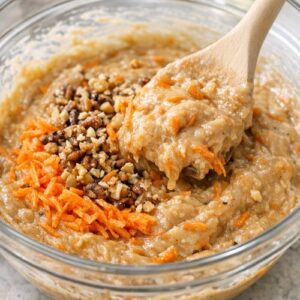
Now add your freshly grated carrots and toasted nuts (if using). Stir just until combined—you want a few visible carrot shreds in the batter, not a uniform orange paste. This takes about 20 seconds of gentle stirring.
Fresh carrots are crucial here. Pre-shredded carrots have added preservatives and oxidize quickly, losing flavor and some nutrients. Fresh carrots grate in 2 minutes and taste noticeably better. If you’re using a food processor to shred, pulse gently so you don’t end up with carrot juice at the bottom of the bowl.
If you’re adding coconut, toss it in now. Coconut adds subtle flavor, texture, and actually increases the fiber content slightly.
Step 5: Fill Your Cupcake Liners
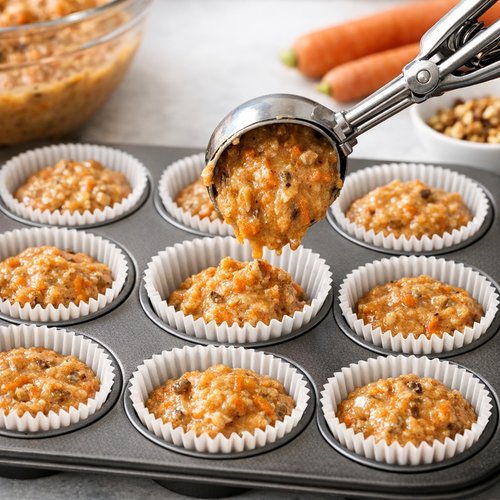
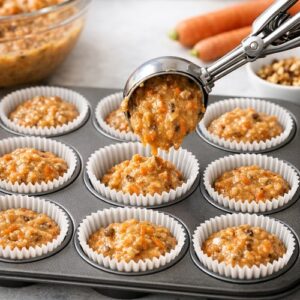
Using a cookie scoop (costs $3–$5 and eliminates waste from uneven filling) or a spoon, divide the batter evenly among your 12 muffin cups. Fill each liner about ⅔ to ¾ of the way full. This is important: underfilled cupcakes bake too fast and dry out; overfilled ones overflow and create a mess.
Money-saving technique: if you have an ice cream scoop, use it to portion. It ensures even cupcakes, which bake in the same amount of time, and reduces guesswork.
Step 6: Bake Until Golden and Set
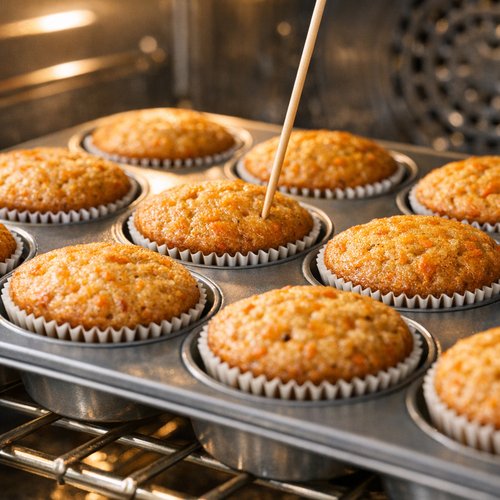
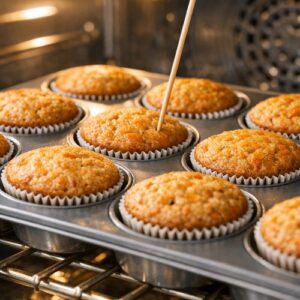
Transfer your muffin tin to the preheated oven. Bake for 18–22 minutes, until a toothpick inserted in the center comes out clean or with just a few moist crumbs clinging to it. Don’t overbake—this is where flavor and moisture live or die.
Your cupcakes are ready when they’re light golden on top and spring back slightly when you gently press the center. A toothpick should come out with no wet batter, though a few crumbs are perfect. Wet batter means more time; dry means you’ve crossed the line.
Oven temperatures vary, so check at 18 minutes. Better to peek than to pull out dry cupcakes.
Step 7: Cool Properly (This Matters!)
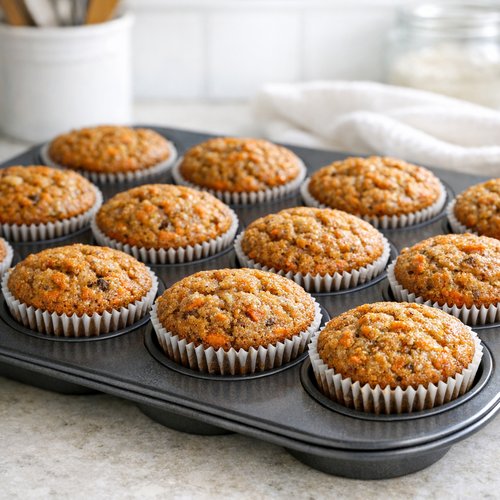
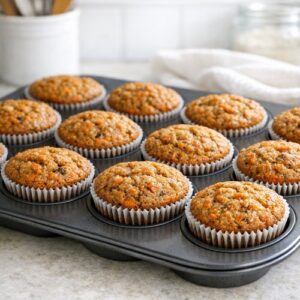
Let the cupcakes cool in the muffin tin for exactly 5 minutes. This allows them to set enough to handle without falling apart. After 5 minutes, carefully transfer them to a wire cooling rack.
Don’t skip the cooling rack. If you leave them in the tin too long, residual heat steams them and makes them soggy. If you move them to a plate instead of a rack, the bottoms trap moisture and turn gummy. A cooling rack costs $8–$12 and is one of the best kitchen investments I’ve made.
Let them cool completely—about 45 minutes to an hour—before frosting. Frosting warm cupcakes melts and slides right off.
Step 8: Frost with Cream Cheese Frosting
While cupcakes cool, prepare your frosting. Beat softened cream cheese and butter together in a bowl until light and fluffy, about 2 minutes. Gradually add sifted powdered sugar, vanilla extract, and a pinch of salt. Beat until smooth and spreadable.
Pro move: room-temperature cream cheese and butter blend smoothly. Cold cream cheese creates lumps. If you forgot to soften them, cut into small cubes and let sit for 10 minutes.
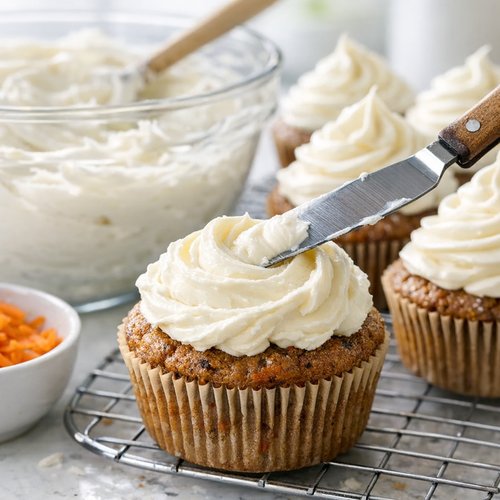
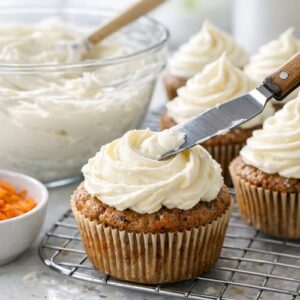
Once your cupcakes are completely cool, frost each one with a thin offset spatula or the back of a spoon. I use about 2 tablespoons of frosting per cupcake, which gives you plenty of coverage without turning them into frosting delivery vehicles.
How to Stretch This Recipe Further
- Make 18 mini cupcakes instead of 12 standard ones. Use a mini muffin tin, reduce bake time to 12–14 minutes, and you’ve tripled your serving count without buying more ingredients. Mini cupcakes are perfect for parties, lunches, or portion control. Frosting cost stays the same; serving count increases.
- Transform day-old cupcakes into trifle. Crumble unfrosted cooled cupcakes into a parfait glass with Greek yogurt (adds protein, costs less than traditional whipped cream), whipped coconut cream, and a drizzle of honey. One cupcake now feeds two people as a dessert parfait.
- Freeze unfrosted cupcakes for up to three months. Wrap individually in plastic wrap, then place in a freezer bag. Frosting fresh on the day you want to serve them tastes better than pre-frosted. This is game-changing for busy families—you’ve made a dozen cupcakes once, and you have dessert ready to go three different times.
- Make cupcake crumbs for snacking or topping yogurt. If a cupcake breaks or you overbaked an edge, crumble it and store in an airtight container. Use as a base for parfaits, yogurt toppers, or crumble into ice cream (I call this “carrot cake cookie dough bites”).
Budget Substitutions That Don’t Sacrifice Quality
- Vegetable oil -> melted coconut oil: Creates a slightly denser, more tender crumb and adds subtle coconut flavor. Some people love this; others prefer pure carrot flavor. Cost is similar; flavor shifts slightly toward richer.
- Cream cheese frosting -> whipped Greek yogurt frosting: Blend ½ cup Greek yogurt with 2 tablespoons honey, 1 tablespoon softened butter, and ½ teaspoon vanilla. It’s tangier, lower in calories, and costs about 30% less. Texture is lighter and less rich—different, not worse.
- Walnuts or pecans -> sunflower seeds or pumpkin seeds: Toasted seeds cost half as much, add crunch, and are a nice flavor change. Toast them the same way and use the same amount. Slightly earthier flavor profile but equally delicious.
- Cinnamon and nutmeg -> pumpkin pie spice: If you have it on hand, 1 teaspoon pumpkin pie spice replaces both cinnamon and nutmeg. No additional cost; flavor is slightly more complex. This is what makes my pumpkin cheesecake so craveable.
- Whole milk -> non-dairy milk or buttermilk: Almond milk works fine; buttermilk adds tang and slight tenderness. Neither changes cost significantly and both work beautifully.
Can I Store Carrot Cupcake Recipe?
Room temperature (unfrosted cupcakes): up to 2 days in an airtight container. Store in a cool part of your kitchen away from direct heat. They’ll stay moist thanks to the oil base.
Refrigerated (frosted cupcakes): up to 5 days in an airtight container. Cream cheese frosting requires refrigeration. These actually taste better on day 2—the flavors meld and the texture becomes almost cake-like.
Frozen (unfrosted cupcakes): up to 3 months. Wrap each individually in plastic wrap, then place in a freezer-safe zip-top bag. Thaw at room temperature for 1–2 hours before frosting. This is my secret weapon for entertaining—I bake two batches on a Sunday, freeze one, and have cupcakes ready whenever I need them.
Frozen (frosted cupcakes): up to 1 month, though frosting doesn’t freeze beautifully. Frosting tastes better fresh. If you’re freezing, apply frosting after thawing.
Leftover frosting: keeps refrigerated for up to 2 weeks. Use on cookies, layer cakes, dollop on oatmeal, or thin with a bit of milk and use as dip for fresh fruit.
Expert’s Nutritional Tip
Here’s what I love about carrot cupcakes from a nutrition perspective: carrots are loaded with beta-carotene (vitamin A), fiber, and natural sweetness. In this recipe, the carrots aren’t just flavor—they’re nutrition. One cupcake gives you about 15–20% of your daily vitamin A needs and roughly 1 gram of fiber.
The brown sugar adds a trace of minerals (molasses contains potassium and iron); the eggs provide choline for brain health; and the walnuts contribute omega-3 fatty acids. I’m not claiming these are health food—they’re dessert. But they’re dessert with actual nutritional substance, which matters when you’re feeding a family and want indulgence to have some real value.
The cream cheese frosting adds fat-soluble vitamins that help your body absorb the beta-carotene from carrots. This is why full-fat frosting actually makes nutritional sense here—not just flavor sense.
Make-Ahead Guide: Meal Prep Strategy
Here’s how I approach batch-baking carrot cupcakes for maximum efficiency:
One week before: Shop and prep carrots. Buy fresh carrots, wash them, and store in the crisper. If you grate them now, they’ll oxidize and lose some flavor, so I hold off. But having them ready means assembly day is truly quick.
Two days before: Bake unfrosted cupcakes. Cool completely, wrap individually in plastic wrap, and store in an airtight container on the counter. This timing gives you flexibility—they’re still fresh but you’re not scrambling the morning of your event.
One day before: Make frosting. Prepare the full batch of frosting, store in an airtight container in the refrigerator. It actually tastes better on day two because the flavors meld.
Morning of event: Frost and serve. Pull frosting from the fridge 15 minutes before frosting so it spreads smoothly. Frost all 12 cupcakes in about 10 minutes. They’re ready to go.
For freezing and entertaining: Bake a full double batch on a free weekend. Cool completely, wrap individually, and freeze. You now have 24 cupcakes ready for any occasion for the next three months. Thaw, frost, and you’re the person who makes impressive homemade dessert while actually spending minimal effort and money.
Common Mistakes to Avoid
- Using pre-shredded carrots. They’re oxidized before they reach your mixing bowl, so you lose flavor and some nutrition. Whole carrots shred in 90 seconds (food processor) or 3 minutes (box grater). Worth the tiny effort.
- Overmixing the batter. Every extra stir develops gluten, which makes cupcakes tough and dense. Mix until just combined—a few flour streaks are fine. This is especially important after adding carrots. Stir for 20 seconds max.
- Frosting warm cupcakes. Frosting melts and slides off. Let them cool completely (45 minutes minimum). I often bake them in the morning and frost in the evening, which also saves me stress.
- Skipping the cooling rack. This seems small but it’s huge. Cupcakes sitting on a plate trap steam, leading to gummy bottoms. A cooling rack costs $10 and eliminates this problem forever.
- Not bringing eggs and frosting ingredients to room temperature. Cold eggs don’t emulsify smoothly into batter; cold cream cheese doesn’t blend into butter. This affects texture. Set them out 30 minutes before you start.
Seasonal Variations: Adapt by Season
Spring (fresh carrot season): Use the youngest, sweetest carrots available at farmers markets (late April through May). Their natural sugar is higher, so reduce granulated sugar by 1 tablespoon. Add zest of one lemon to the batter and use a light lemon buttercream frosting instead of cream cheese. Seasonal flavor, same cost.
Summer: Add ½ teaspoon cardamom to the spices (warm but slightly floral). Use pineapple juice instead of milk (¼ cup pineapple juice, reduce milk to 1 tablespoon). This is my most-requested summer variation.
Fall: Add ¼ teaspoon cloves and replace ¼ cup of the flour with whole wheat flour for deeper flavor. Use the pumpkin pie spice variation I mentioned earlier. These become autumn-feeling without any actual pumpkin.
Winter: Add ¼ teaspoon ginger (fresh grated is lovely, ground is fine) and use a vanilla-cinnamon cream cheese frosting. This becomes cozy and warming without being heavy.
What Can I Serve With Carrot Cupcake Recipe?
Carrot cupcakes pair beautifully with simple, cool beverages and lighter dessert companions. Here’s what I serve:
- Cold milk (dairy or non-dairy): The classic pairing. The cool creaminess offsets the spiced warmth. Cost: essentially free if you’re already buying milk.
- Afternoon tea or coffee: Carrot cupcakes are perfect with both. The spices complement warm beverages. Serve alongside fresh fruit (berries, apple slices) to lighten the sweetness.
- Whipped cream and fresh berries: Top a cupcake with a dollop of whipped cream and a handful of fresh raspberries or blueberries. You’ve created a more elegant, fruit-forward dessert that looks fancy but costs minimal more.
- Greek yogurt as a side: I serve a small bowl of plain Greek yogurt alongside cupcakes at summer gatherings. Guests can dollop it on like a frosting alternative. It adds protein, reduces portion guilt, and costs less than making extra frosting.
- Pairing with my peach cobbler: If you’re serving both cupcakes and cobbler at a gathering, guests appreciate the contrast. Warm cobbler with a cool cupcake creates a balanced dessert experience.

Carrot Cupcake Recipe
Ingredients
Method
- Preheat your oven to 350°F (175°C). Line a standard 12-cup muffin tin with paper liners. This is where I save money: I buy the bulk box of liners from restaurant supply stores or Costco instead of the tiny grocery store boxes. Same liners, 60% cheaper. If you don't have liners, grease the tin generously with a bit of oil or cooking spray—they'll pop right out if you let them cool first. While the oven heats, gather all your ingredients on the counter. Professional bakers call this "mise en place"—everything in its place. It prevents forgotten ingredients and keeps you moving quickly.
- In a large mixing bowl (or the bowl of a stand mixer if you have one—I use both depending on how many dishes I want to wash), whisk together the flour, both sugars, baking soda, baking powder, salt, cinnamon, and nutmeg. Pro tip from my dietitian background: whisking your dry ingredients for about 30 seconds incorporates air and distributes the leavening agents evenly. This costs nothing but creates a noticeably lighter, more tender crumb. It's the difference between good and restaurant-quality. Make sure your baking soda and baking powder aren't old and stale. Baking soda lasts about 3–5 years; baking powder lasts 6 months to a year. If your baked goods come out dense, expired leavening agents are often the culprit.
- Pour the oil into your flour mixture and stir until the texture resembles coarse breadcrumbs. Don't overmix—this step should take about 30 seconds of gentle stirring. This technique costs nothing extra but prevents overdeveloped gluten, which leads to tough, dry cupcakes. Crack your room-temperature eggs into a small bowl first (easier to fish out shells). Add them one at a time to your flour-oil mixture, stirring gently after each addition until combined. Pause to scrape down the sides of the bowl with a rubber spatula—make sure you're incorporating the ingredients at the bottom. Stir in your vanilla extract and milk. The milk adds moisture and helps create that tender crumb everyone loves. Don't skip it even though it's only 2 tablespoons.
- Now add your freshly grated carrots and toasted nuts (if using). Stir just until combined—you want a few visible carrot shreds in the batter, not a uniform orange paste. This takes about 20 seconds of gentle stirring. Fresh carrots are crucial here. Pre-shredded carrots have added preservatives and oxidize quickly, losing flavor and some nutrients. Fresh carrots grate in 2 minutes and taste noticeably better. If you're using a food processor to shred, pulse gently so you don't end up with carrot juice at the bottom of the bowl. If you're adding coconut, toss it in now. Coconut adds subtle flavor, texture, and actually increases the fiber content slightly.
- Using a cookie scoop (costs $3–$5 and eliminates waste from uneven filling) or a spoon, divide the batter evenly among your 12 muffin cups. Fill each liner about ⅔ to ¾ of the way full. This is important: underfilled cupcakes bake too fast and dry out; overfilled ones overflow and create a mess. Money-saving technique: if you have an ice cream scoop, use it to portion. It ensures even cupcakes, which bake in the same amount of time, and reduces guesswork.
- Transfer your muffin tin to the preheated oven. Bake for 18–22 minutes, until a toothpick inserted in the center comes out clean or with just a few moist crumbs clinging to it. Don't overbake—this is where flavor and moisture live or die. Your cupcakes are ready when they're light golden on top and spring back slightly when you gently press the center. A toothpick should come out with no wet batter, though a few crumbs are perfect. Wet batter means more time; dry means you've crossed the line. Oven temperatures vary, so check at 18 minutes. Better to peek than to pull out dry cupcakes.
- Let the cupcakes cool in the muffin tin for exactly 5 minutes. This allows them to set enough to handle without falling apart. After 5 minutes, carefully transfer them to a wire cooling rack. Don't skip the cooling rack. If you leave them in the tin too long, residual heat steams them and makes them soggy. If you move them to a plate instead of a rack, the bottoms trap moisture and turn gummy. A cooling rack costs $8–$12 and is one of the best kitchen investments I've made. Let them cool completely—about 45 minutes to an hour—before frosting. Frosting warm cupcakes melts and slides right off.
- While cupcakes cool, prepare your frosting. Beat softened cream cheese and butter together in a bowl until light and fluffy, about 2 minutes. Gradually add sifted powdered sugar, vanilla extract, and a pinch of salt. Beat until smooth and spreadable. Pro move: room-temperature cream cheese and butter blend smoothly. Cold cream cheese creates lumps. If you forgot to soften them, cut into small cubes and let sit for 10 minutes. Once your cupcakes are completely cool, frost each one with a thin offset spatula or the back of a spoon. I use about 2 tablespoons of frosting per cupcake, which gives you plenty of coverage without turning them into frosting delivery vehicles.
Notes
FAQs
Can I substitute applesauce for oil in this recipe?
You can, but the result is noticeably different. Applesauce removes fat, which reduces moisture and tenderness. If you want to try it, replace ½ cup of the oil with ½ cup unsweetened applesauce. The cupcakes will be slightly denser and more cake-like (which some people prefer). The cost is similar. I’d recommend making a test batch before serving at an event.
Why does the recipe call for both granulated and brown sugar?
Granulated sugar provides structure and helps cupcakes rise; brown sugar adds moisture and molasses flavor (and slight tang from the acid). Using both creates better texture and deeper flavor than either alone. This is professional baking technique that costs the same but delivers noticeably better results.
Can I make these vegan?
Yes. Replace the 2 eggs with a “flax egg” (2 tablespoons ground flaxseed mixed with 5 tablespoons water, let sit 5 minutes). Replace the milk with non-dairy milk. Frosting: use vegan cream cheese and vegan butter in equal amounts to the dairy versions. Texture will be slightly different (a touch denser) but completely delicious. Cost is nearly identical if you already buy these staples.
How can I make these cupcakes without a muffin tin?
You have a few options: bake this as a full sheet cake (same recipe, 25–30 minute bake time in a 9×13 pan), or use ramekins or oven-safe coffee mugs (10–12 minutes, depending on size). Honestly, a muffin tin is a $5–$10 investment that makes baking easier forever. I’d grab one.
Can I double this recipe?
Absolutely. Scale all ingredients exactly double (so 2½ cups flour, 1 cup sugar, etc.). You’ll make 24 cupcakes. Bake time stays the same. This is my go-to for bigger gatherings. Cost still stays incredibly low—roughly $16 total for 24 cupcakes, or about $0.67 each.
Nutrition Information
Per cupcake (with frosting), based on USDA nutrient database calculations for this recipe:
- Calories: approximately 280–300 (depending on frosting thickness)
- Protein: 2–3 grams
- Carbohydrates: 38–42 grams (about 28–32g from sugar/refined carbs, 4–6g fiber from carrots)
- Fat: 14–16 grams (mostly from oil and cream cheese; includes some beneficial fats from walnuts if used)
- Fiber: 0.8–1.2 grams (from carrots)
- Vitamin A: 350–400 mcg RAE (about 40% of daily value, thanks to the carrots)
- Calcium: 45–60 mg (from cream cheese and eggs)
- Iron: 0.8–1.2 mg
The nutritional standout here is vitamin A from the carrots. One cupcake provides nearly half your daily needs, which is remarkable for a dessert. The fiber, though modest, is still meaningful. The fat content might seem high, but remember: fat carries flavor and creates tenderness. It’s part of what makes these cupcakes taste indulgent.
More Budget-Friendly Recipes
- these fresh muffins – Same budget-