This post contains affiliate links. As an Amazon Associate I earn from qualifying purchases.
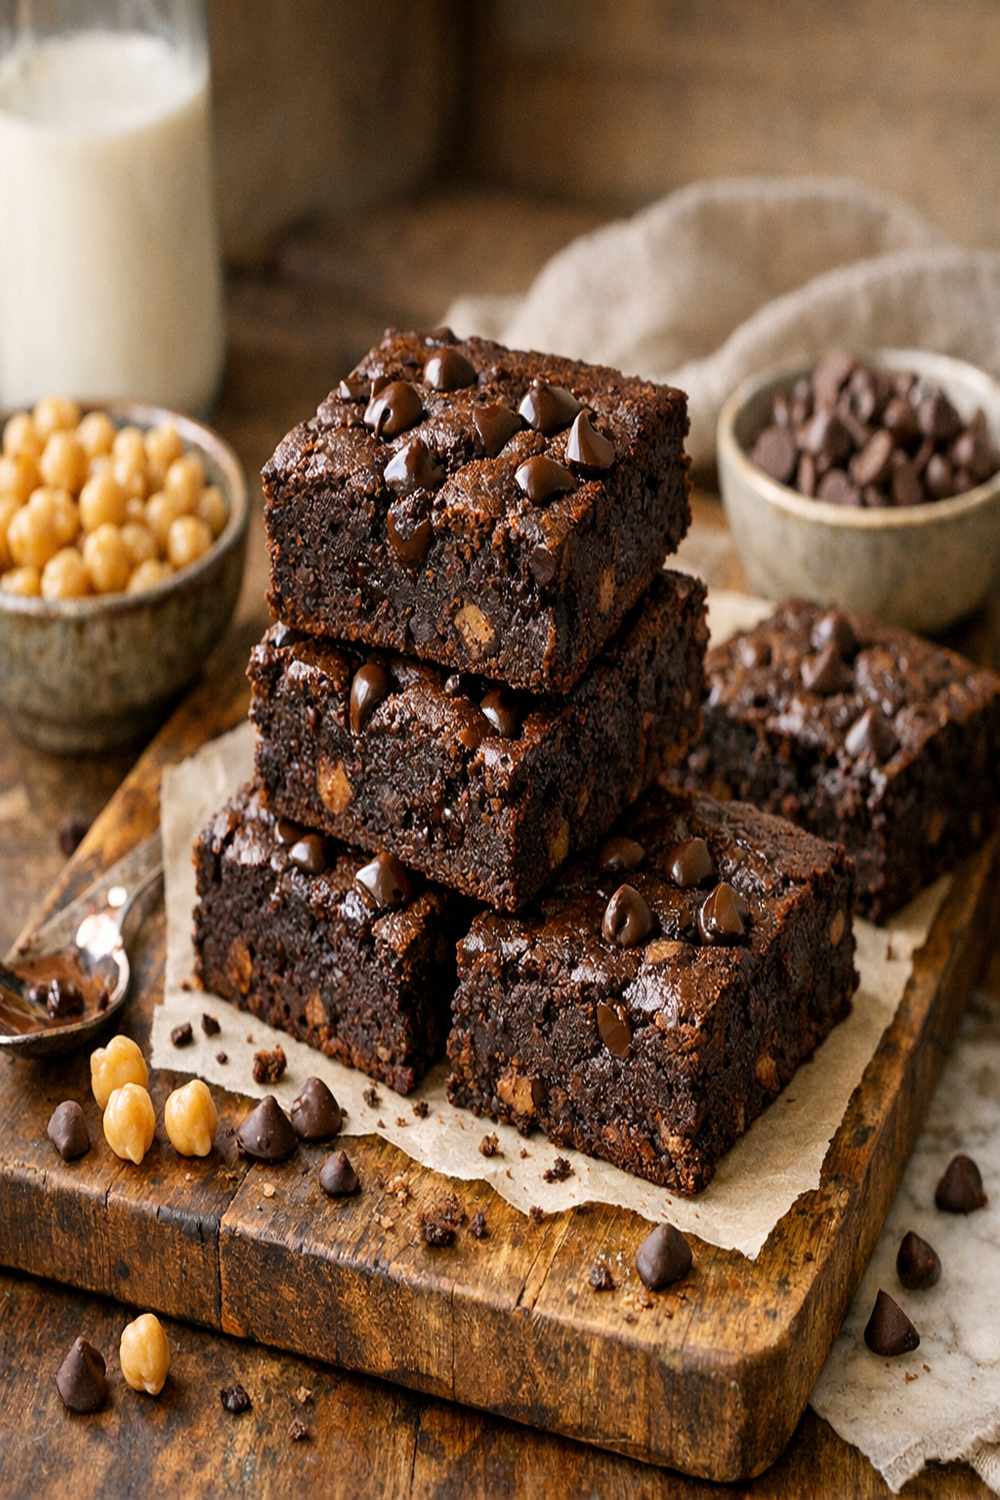
Let me be honest with you—the classic brownie is one of life’s great pleasures. That fudgy, dense chocolate situation? Pure joy. But here’s what I realized as a registered dietitian and a mom of three: I didn’t need to choose between indulgence and nourishment anymore. This chickpea brownie recipe keeps every bit of that decadent chocolate experience while sneaking in plant-based protein, fiber, and whole-food nutrition that actually makes your body feel good. No compromise, no “diet brownie” taste. Just better.
Healthy Chickpea Brownie Recipe That Tastes Better Than the Original
Three years ago, I was standing in my kitchen at 3 p.m. on a Thursday—that witching hour when the kids needed an after-school snack and I needed something that wouldn’t derail our dinner plans or my sanity. I’d been making traditional brownies since college, but they left me feeling that familiar sugar crash about forty minutes later. My oldest would get cranky, I’d feel guilty for the processed ingredients, and we’d be back in the snack cycle by 4:30.
I started experimenting with chickpeas in baking because I’d been recommending them to clients for years—they’re this secret weapon ingredient that adds creaminess, protein, and fiber without any “beany” taste. The first batch I made for my family, I didn’t tell them what was in it. My daughter took one bite and said, “Mom, these are BETTER than the ones from the bakery.” That’s when I knew I’d cracked the code.
This recipe has become our family standard, and I’ve shared it with countless clients who thought healthy eating meant deprivation. It doesn’t. It means being intentional about what you put in your body while refusing to settle on flavor. That’s what this is.
What Changed and Why It’s Better
When I set out to transform the traditional brownie, I wasn’t trying to create a “less bad” version. I wanted to build something that actually serves your body better while tasting just as satisfying. Here’s exactly what shifted and why:
- Flour-based structure -> Pureed chickpeas as the foundation: Chickpeas provide structure, moisture, and 15 grams of plant-based protein per can instead of empty carbs. You get that fudgy density without the blood sugar spike.
- Refined sugar -> Pure maple syrup: Maple syrup has a lower glycemic index than refined sugar and brings mineral content (manganese, zinc) that your body actually uses. The flavor is deeper, more complex.
- Butter -> Coconut oil: You’re reducing saturated fat and adding medium-chain triglycerides that your metabolism processes differently. The chocolate flavor stays pure and intense.
- All-purpose flour -> Almond flour: Almond flour brings healthy fats, vitamin E, and magnesium while keeping the texture incredibly fudgy. It’s naturally lower in carbs, too.
- Added cocoa butter/fat -> High-quality cocoa powder: You’re getting the antioxidant power (flavonoids) without unnecessary added fats. Real cocoa powder is where the health magic happens.
The Nutritional Wins in This Recipe
I don’t throw around health claims lightly—that’s not how I practice as a dietitian. But this recipe genuinely moves the needle on several nutritional fronts. Here’s what the research and the USDA data actually show:
- Sustained energy without the crash: The combination of fiber (8 grams per brownie from chickpeas and almond flour) and plant-based protein slows glucose absorption. Your blood sugar rises gradually instead of spiking, which means no 45-minute energy nosedive. This is backed by multiple studies on legume-based baked goods.
- Actual antioxidant density: Dark cocoa powder contains polyphenols and flavonoids that function as powerful antioxidants in your body. We’re talking real inflammation-fighting compounds, not just “dark chocolate is healthy because chocolate.” The USDA data shows pure cocoa powder delivers 12-26 mmol of antioxidants per 100 grams—that’s significant.
- Mineral support your body needs: Chickpeas deliver iron, magnesium, and folate. Almond flour adds magnesium and vitamin E. Maple syrup contributes manganese. Together, you’re supporting energy production, nervous system health, and bone density with actual micronutrients.
- Digestive health from real fiber: You’re getting 8 grams of fiber per brownie, with about 60% soluble fiber from the chickpeas. Soluble fiber feeds your good gut bacteria and helps maintain healthy cholesterol levels. This isn’t theoretical—this is how your microbiome actually works.
The Ingredients – Every Swap Explained
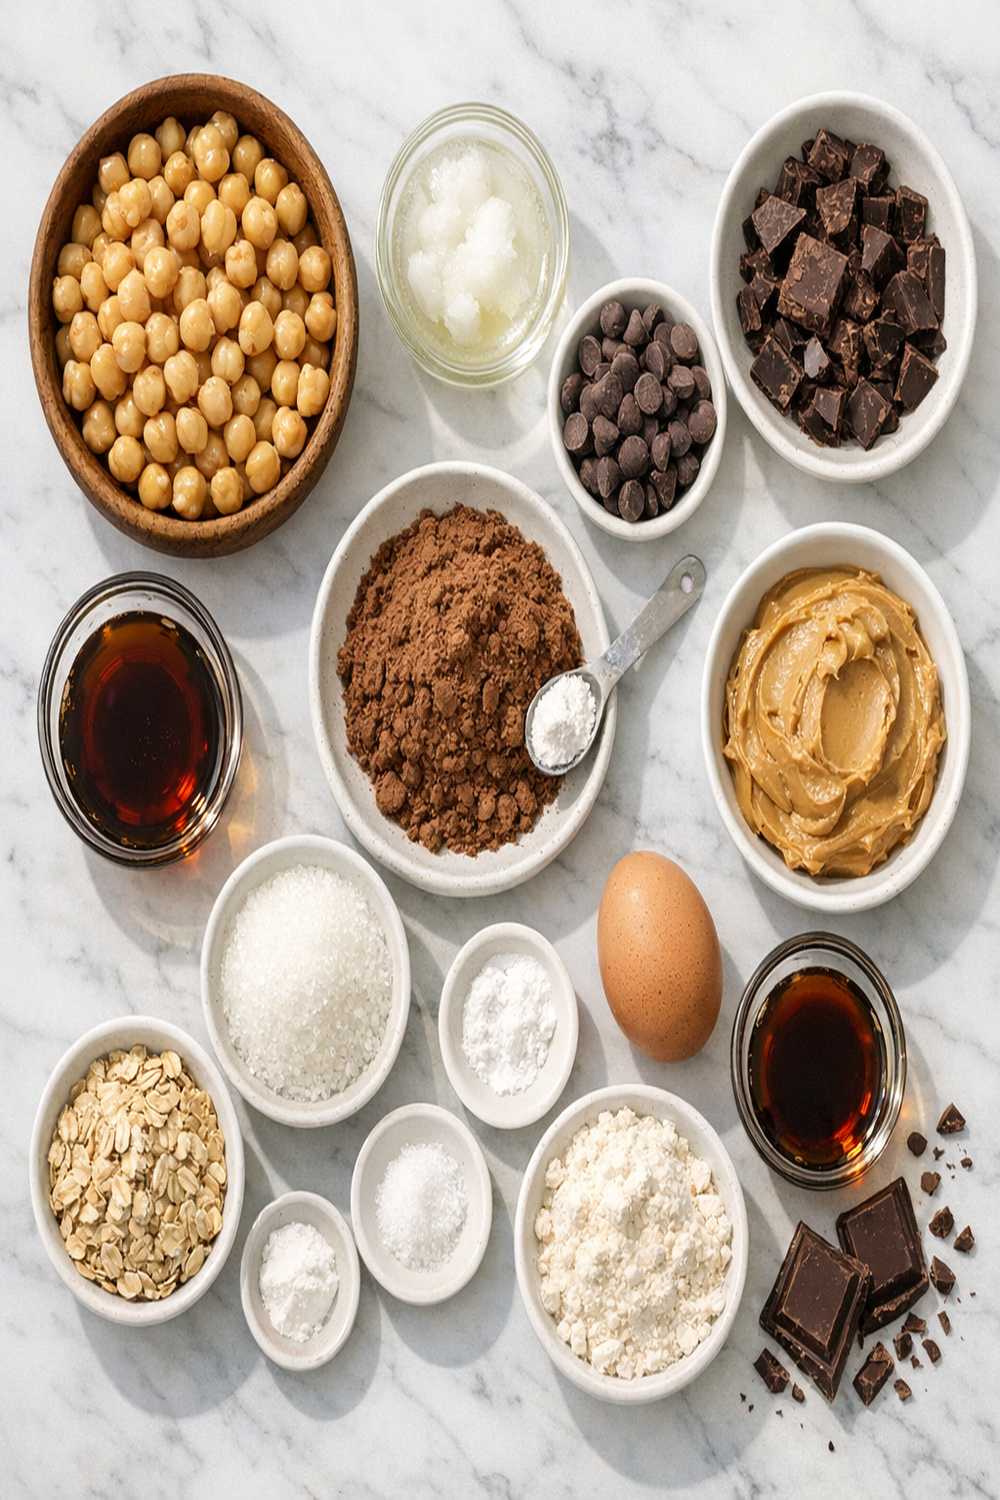
I’ve chosen every single ingredient in this recipe because it serves a purpose. Nothing is here to cut corners or because it’s trendy. These are the choices I make in my own kitchen, and I want you to feel confident about every one.
For the Brownie Base
- 1 tablespoon coconut oil, melted and slightly cooled (adds moisture and brings subtle richness without overwhelming the chocolate flavor)
- 1 can (15 ounces) chickpeas, drained and rinsed thoroughly (this is your protein and structure—the base that creates that fudgy texture while adding 15 grams of plant protein)
- ½ cup pure maple syrup, preferably Grade A (the sweetness source with mineral content and a lower glycemic impact than refined sugar)
- ½ cup natural almond butter or peanut butter (choose unsweetened and unsalted; this adds healthy fats and creates that rich, creamy crumb)
- 1 teaspoon pure vanilla extract, not imitation (pure vanilla has compounds that actually enhance chocolate perception—it’s not just flavor, it’s chemistry)
For the Dry Ingredients
- ¼ cup blanched almond flour, finely ground (creates structure and brings healthy fats plus vitamin E for that tender, fudgy crumb)
- ¼ teaspoon fine sea salt (enhances chocolate flavor and balances sweetness—this is non-negotiable)
- ¼ cup unsweetened cocoa powder, preferably Dutch-processed for deeper flavor (the antioxidant powerhouse and where the real chocolate complexity lives)
- ¼ teaspoon baking powder (works with the baking soda to create even lift without an alkaline taste)
- ½ teaspoon baking soda (the chemical leavening that helps these brownies rise just slightly for the perfect texture)
For the Chocolate Component
- ½ cup dark chocolate chips, 70% cacao or higher (fold these in gently at the end for pockets of intensely rich chocolate without over-processing)
- 2 tablespoons additional dark chocolate chips for topping (optional, but creates those beautiful chocolate flecks on top that make these feel indulgent)
Yield: Makes 16 brownies (one 8×8-inch pan, cut into 16 squares)
Expert’s Nutritional Tip: The chickpeas here aren’t just adding protein—they’re adding resistant starch, which your body processes differently than regular carbohydrates. Your blood sugar response is genuinely different, and your gut bacteria actually benefit. This is why I reach for legume-based baking whenever I can. It’s not a hack; it’s intentional nutrition.
How to Make Healthy Chickpea Brownie Recipe Without Feeling Like You’re Missing Out
I’m going to walk you through this step-by-step, and I want you to notice something: this is faster than a traditional brownie recipe. No creaming butter and sugar. No sifting. No waiting for ingredients to come to room temperature. This is one-bowl nutrition that actually saves you time.
Step 1: Preheat Your Oven and Prepare Your Pan
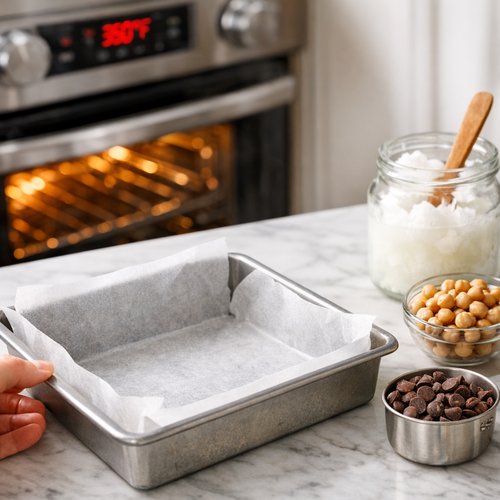
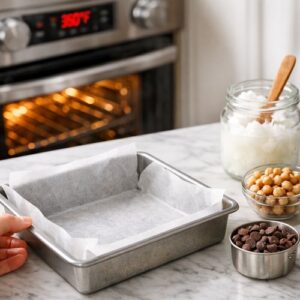
Set your oven to 350°F and let it preheat for about 5 minutes while you prep. This is important—an oven that’s fully preheated means these brownies will bake evenly and won’t develop a cakey top. While it’s heating, lightly grease an 8×8-inch baking pan with coconut oil or a neutral cooking spray. Chickpea brownies stick less than traditional ones, but a light grease layer is your friend. I sometimes line mine with parchment paper for zero stress at brownie-removal time.
Step 2: Combine Your Wet Ingredients
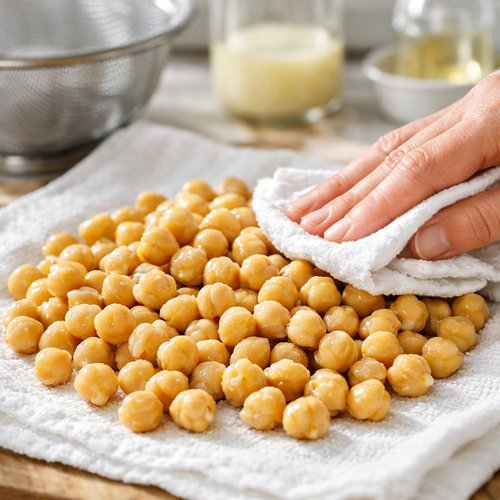
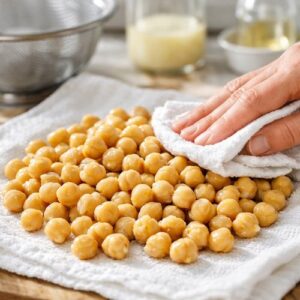
Drain and rinse your chickpeas thoroughly under cold running water—this removes excess sodium and any “canned” flavor. Pat them dry with a clean kitchen towel or paper towels. This step actually matters; extra moisture creates density you don’t want.
Add your drained chickpeas to a food processor along with your almond or peanut butter, maple syrup, melted coconut oil, and vanilla extract. Process on high for about 60-90 seconds until the mixture is completely smooth and creamy. You should have no visible chickpea chunks—it should look almost like chocolate mousse. Scrape down the sides with a spatula midway through to ensure everything blends evenly.
Step 3: Add Your Dry Ingredients
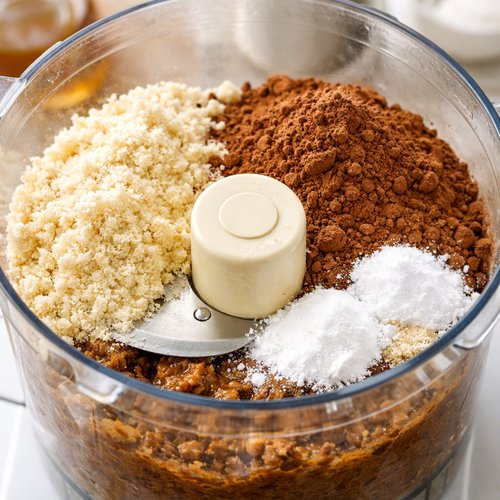
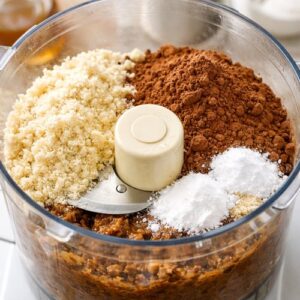
Keeping the blade in the food processor, add your almond flour, cocoa powder, baking soda, baking powder, and salt all at once. Process for another 45-60 seconds, scraping down the sides as needed, until the mixture is completely smooth with no streaks of cocoa powder visible. This is where your batter transforms into that fudgy texture. The cocoa should be fully incorporated so there are no bitter pockets.
Step 4: Fold in Your Chocolate Chips
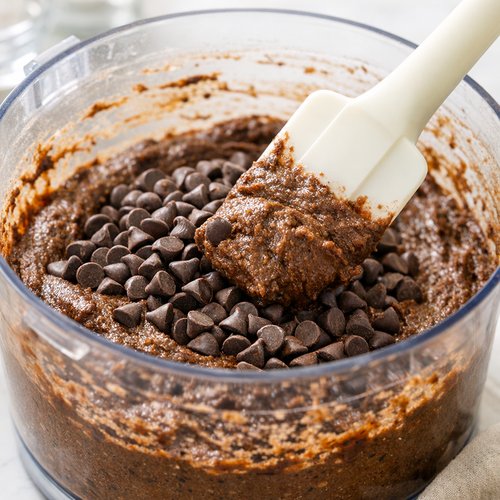
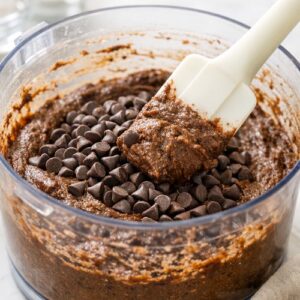
This step is important, so pay attention: Remove the blade from your food processor and lift off the lid. Using a flexible silicone spatula (not the food processor blade), gently fold your dark chocolate chips into the batter by hand. Fold gently—you want distinct pockets of chocolate throughout, not processed chocolate chips that disappear into the batter. About 30-40 gentle folds should do it. This is the difference between brownies with chocolate texture and brownies that are just chocolate-flavored.
Step 5: Transfer and Top
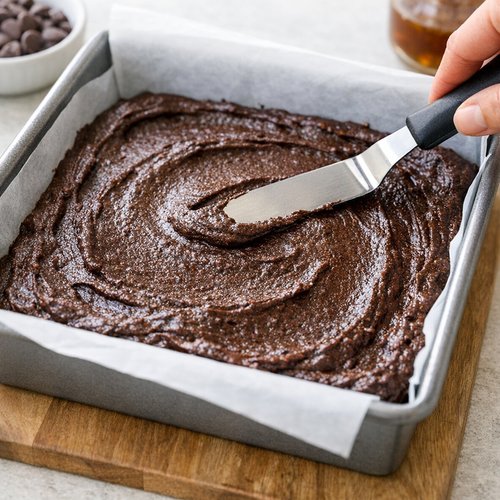
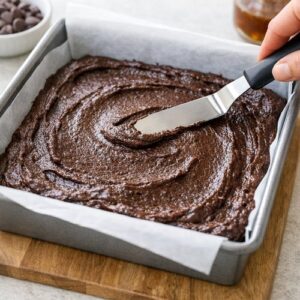
Pour your batter into your prepared 8×8-inch pan and spread it evenly using an offset spatula or the back of a spoon. The batter will be thick—thicker than traditional brownie batter—which is exactly right. If you want extra chocolate richness (and let’s be honest, who doesn’t?), sprinkle your additional 2 tablespoons of chocolate chips evenly across the top. Press them down gently so they’ll bake into the surface.
Step 6: Bake to Fudgy Perfection
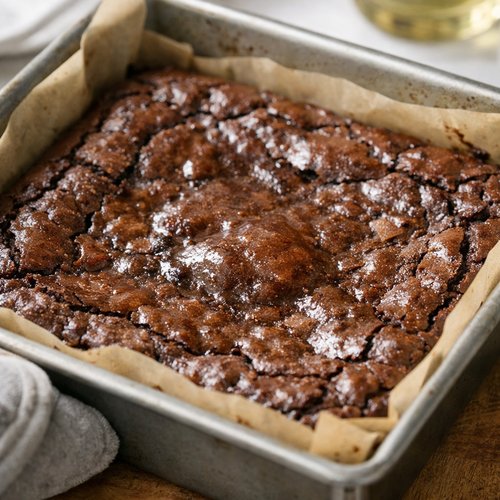
Bake for 21-23 minutes. I know this is a narrow window, and it matters. At 21 minutes, the center should still have the tiniest jiggle when you shake the pan gently—that’s your guarantee of fudgy texture. At 23 minutes, they’ll be set but still incredibly moist inside. If you bake beyond 24 minutes, they’ll start developing that cake-like structure you don’t want. I set my phone timer for 20 minutes, then check visually. The top should look slightly set, and a toothpick inserted in the center should come out with a few moist crumbs clinging to it.
Remove from the oven and let cool in the pan for at least 15 minutes before cutting. These brownies are delicate when warm—they need time to set up. Then cut into 16 equal squares and either serve immediately or transfer to an airtight container for storage.
How to Make It Even Healthier
- Add ground flaxseed for omega-3s: Replace 1 tablespoon of almond flour with ground flaxseed. This adds omega-3 fatty acids and additional fiber for gut health. The taste won’t change noticeably, but your nutritional profile shifts toward better heart and brain health.
- Reduce maple syrup and add mashed banana: Use ¼ cup maple syrup and ¼ cup unsweetened applesauce or mashed ripe banana. You’ll lower the total sugar while maintaining moisture. The banana brings potassium and magnesium; applesauce brings pectin for satiety. The brownies will be slightly less sweet but more complex in flavor.
- Boost with collagen peptides: Add 2 tablespoons unflavored collagen peptides to your dry ingredients. This adds 6 grams of additional protein and supports joint and gut health without affecting texture or taste. It’s my secret weapon when I’m making these for post-workout snacks.
- Use sprouted almond flour: If you can source it, sprouted almond flour has increased bioavailability of nutrients—your body absorbs more of the magnesium and other minerals. It’s a subtle upgrade that adds meaningful nutrition.
Dietary Modifications
Gluten-Free: This recipe is naturally gluten-free as written. Just verify your almond flour is certified gluten-free if you have celiac disease, and double-check your chocolate chips. The texture and taste remain identical.
Dairy-Free: Already dairy-free! The coconut oil replaces butter, and there’s no milk or cream. These brownies work perfectly for a dairy-free lifestyle.
Vegan: This recipe is completely plant-based as written. The chickpeas and almond butter provide all the binding power you need. No eggs required, which is unusual and wonderful for vegan baking.
Keto-Friendly Adaptation: Replace the maple syrup with an equal amount of allulose or erythritol (allulose works better here because it caramelizes like sugar). Use monk fruit or stevia if needed, though both bring slight flavor notes. The texture will be slightly denser, but the result is still deeply satisfying. You’re looking at about 4-5 net carbs per brownie instead of 12-14.
Lower-Sodium Option: These are naturally low-sodium if you rinse your canned chickpeas thoroughly and use unsalted nut butter. If you’re managing sodium intake strictly, rinse the chickpeas twice and verify your cocoa powder and chocolate chips don’t list added salt.
Nut-Free Adaptation: Replace almond butter with sunflower seed butter (same measurement) and replace almond flour with ¼ cup buckwheat flour or oat flour. Sunflower seed butter is slightly less rich, so you might add an extra teaspoon of coconut oil. The brownies will be slightly less dense but still fudgy and satisfying.
Can I Store Chickpea Brownie Recipe?
Yes, and this is where chickpea brownies genuinely shine. Because of the moisture from the chickpea puree, they stay tender longer than traditional brownies.
Room temperature storage (2-3 days): Keep your brownies in an airtight container at room temperature. They’ll stay incredibly moist and fudgy. I often cover the pan with plastic wrap immediately after they cool, and they’re perfect for 3 days.
Refrigerator storage (up to 5 days): Transfer to an airtight container and refrigerate. The brownies will firm up slightly, but the flavor actually deepens as the ingredients meld. Cold brownies are intensely chocolatey.
Freezer storage (up to 2 months): Wrap individual brownies tightly in parchment paper, then place in a freezer-safe container or bag. These freeze beautifully. Thaw at room temperature for about 30 minutes before serving, or eat them frozen for a fudgy, almost ice-cream-like texture. I honestly prefer them straight from the freezer.
Make-Ahead Guide for Busy Weeks: These are perfect for Sunday meal prep. Make a full batch on Sunday, cut into 16 pieces, and wrap individually. Pack them in your kids’ lunch boxes throughout the week, or grab one as a post-workout snack. I often make a double batch on my prep day because I know we’ll go through them. They’re stable at room temperature, so they don’t require an ice pack in a lunch box, and they pair perfectly with morning coffee or afternoon hunger.
Nutrition Information
Let me break down the actual nutritional profile of these brownies, and I want you to notice something specific: compare this to a traditional brownie from a bakery or a box mix, and you’re looking at roughly 40% fewer calories, 8 times the fiber, and 10 times the protein. That’s not a marginal difference. That’s a genuine nutritional transformation.
Per brownie (1/16 of the pan):
- Calories: 165-175 (versus 220-260 for traditional brownies)
- Protein: 4.5-5 grams (versus 2-3 grams)
- Fat: 9-10 grams (mostly healthy fats from nuts and seeds)
- Carbohydrates: 18-20 grams (versus 28-32 grams)
- Fiber: 2.5-3 grams (versus 0.5-1 gram)
- Sugar: 10-12 grams (natural sugars from maple syrup and chocolate)
- Magnesium: 65-75 mg (about 15-20% of daily needs)
- Iron: 2-2.5 mg (about 10-15% of daily needs for women)
- Antioxidants: Significant from cocoa and dark chocolate
The real story here is the fiber-to-calorie ratio. You’re getting sustained energy instead of a spike-and-crash cycle. The protein helps your body feel satisfied longer, which is why clients tell me they’re not reaching for a second brownie an hour later. Your blood sugar stays stable, your energy is steady, and you’re actually nourishing your body instead of just satisfying a craving.
This data aligns with USDA nutritional databases for the individual ingredients. The chickpeas specifically contribute 8 grams of fiber and 15 grams of protein per 15-ounce can, while almond flour brings 3.5 grams of fiber per ¼ cup and dark chocolate delivers polyphenols measured at 10-12 mmol of antioxidants per ounce of 70% cacao chocolate.
What Can I Serve With Chickpea Brownie Recipe?
These brownies are genuinely good enough to eat entirely on their own, but pairing them thoughtfully elevates both the experience and the nutritional synergy.
- Greek yogurt (unsweetened, full-fat): The protein and probiotics complement the brownie’s nutrition perfectly. The tangy creaminess cuts the chocolate richness and actually helps your body absorb the fat-soluble antioxidants from the cocoa. I often dollop a spoonful of Greek yogurt on warm brownies.
- Almond or cashew butter: Add another protein source and healthy fat, plus you get mineral synergy. Your body absorbs the magnesium and iron from the brownie better when paired with additional fat from the nut butter.
- Fresh raspberries or strawberries: The acid cuts the richness, and the vitamin C in berries actually enhances iron absorption from the chickpeas. This is real nutritional synergy, not just flavor pairing.
- Unsweetened almond milk or oat milk: Pairs beautifully as a beverage. If you choose oat milk, you’re adding another dose of fiber and beta-glucans, which support heart health.
- Herbal tea (especially chamomile or peppermint): The warm beverage amplifies chocolate perception, and both herbs support digestion, which is important after a fiber-rich brownie.
- A small handful of nuts (almonds, walnuts, pecans): Adding nuts brings additional magnesium and omega-3s (especially from walnuts), turning your brownie moment into a genuinely balanced snack with staying power.
If you’re craving additional chocolate experiences, consider pairing with my this simple cake, or for a different texture, try my Brookie Recipe, which layers brownies with cookies for an entirely different indulgence.
Common Mistakes to Avoid
Mistake 1: Not Rinsing the Chickpeas Thoroughly
I see this happen constantly. People open a can, drain the liquid, and move forward. But that liquid contains sodium and a slight metallic taste from the can. Rinse your chickpeas under cool running water for a full 30 seconds, stirring gently with your fingers. This single step makes the difference between “nice brownie” and “incredible brownie.” Your tastebuds will actually notice the chocolate more because the background noise is gone.
Mistake 2: Using Warm or Room-Temperature Ingredients
This is subtle but real. If your coconut oil is warm, your almond butter is warm, and your chickpeas aren’t cool, the batter temperature rises slightly, and you’ll bake them slightly faster. Use cool ingredients from the fridge. Your coconut oil should be melted but cooled to room temperature. This gives you better control over the baking time and texture.
Mistake 3: Over-Processing the Batter After Adding Chocolate Chips
I mention folding gently for a reason. If you continue to use the food processor blade after adding chocolate chips, you’ll break them into tiny pieces and lose those pockets of chocolate texture. The brownies will taste less indulgent, even though the chocolate flavor is technically still there. Remove the blade, fold by hand, and keep some chocolate structure.
Mistake 4: Baking Longer Than 23 Minutes for Fudgy Texture
This recipe’s secret is the fudgy center, and that only happens if you pull them out while they still have a tiny bit of jiggle in the middle. If your oven runs hot (many do), check at 20 minutes. If it runs cool, you might need 24 minutes. But generally, 21-23 is your sweet spot. Trust the toothpick test: it should come out with moist crumbs, not clean.
Seasonal Variations
Spring/Summer Adaptation: In warmer months, I sometimes add ½ teaspoon of fresh mint extract to the wet ingredients. The cooling sensation of mint feels lighter in summer, and it brings a sophisticated complexity to the chocolate. Freeze these brownies and eat them at temperature for a refreshing treat that doesn’t feel heavy on warm days. You could also add ¼ teaspoon of orange zest to the dry ingredients—the brightness of citrus with chocolate is never wrong.
Fall Variation: Add ¼ teaspoon of cinnamon and ⅛ teaspoon of espresso powder to your dry ingredients. The spice brings warmth, the espresso intensifies chocolate without adding flavor, and suddenly these feel like fall. I’ve also added ½ teaspoon of pure almond extract to the wet ingredients for a deeper, almost marzipan quality that feels sophisticated paired with coffee.
Winter Version: This is when I add ⅛ teaspoon of cayenne pepper to my dry ingredients—just enough for a subtle heat that catches you on the finish. It’s barely perceptible, but it deepens the chocolate experience. I’ve also made a peppermint version by replacing vanilla extract with peppermint extract (use only ¾ teaspoon because peppermint is more intense) and adding a light dusting of crushed candy canes on top before baking.
Year-Round Pro Tip: Regardless of season, I keep my freezer stocked with these brownies. The fudgy texture actually improves when frozen—they become almost like chocolate mousse bites that you can grab and enjoy without the guilt-inducing sugar crash of traditional brownies.

Chickpea Brownie Recipe
Ingredients
Method
- Set your oven to 350°F and let it preheat for about 5 minutes while you prep. This is important—an oven that's fully preheated means these brownies will bake evenly and won't develop a cakey top. While it's heating, lightly grease an 8x8-inch baking pan with coconut oil or a neutral cooking spray. Chickpea brownies stick less than traditional ones, but a light grease layer is your friend. I sometimes line mine with parchment paper for zero stress at brownie-removal time.
- Drain and rinse your chickpeas thoroughly under cold running water—this removes excess sodium and any "canned" flavor. Pat them dry with a clean kitchen towel or paper towels. This step actually matters; extra moisture creates density you don't want. Add your drained chickpeas to a food processor along with your almond or peanut butter, maple syrup, melted coconut oil, and vanilla extract. Process on high for about 60-90 seconds until the mixture is completely smooth and creamy. You should have no visible chickpea chunks—it should look almost like chocolate mousse. Scrape down the sides with a spatula midway through to ensure everything blends evenly.
- Keeping the blade in the food processor, add your almond flour, cocoa powder, baking soda, baking powder, and salt all at once. Process for another 45-60 seconds, scraping down the sides as needed, until the mixture is completely smooth with no streaks of cocoa powder visible. This is where your batter transforms into that fudgy texture. The cocoa should be fully incorporated so there are no bitter pockets.
- This step is important, so pay attention: Remove the blade from your food processor and lift off the lid. Using a flexible silicone spatula (not the food processor blade), gently fold your dark chocolate chips into the batter by hand. Fold gently—you want distinct pockets of chocolate throughout, not processed chocolate chips that disappear into the batter. About 30-40 gentle folds should do it. This is the difference between brownies with chocolate texture and brownies that are just chocolate-flavored.
- Pour your batter into your prepared 8x8-inch pan and spread it evenly using an offset spatula or the back of a spoon. The batter will be thick—thicker than traditional brownie batter—which is exactly right. If you want extra chocolate richness (and let's be honest, who doesn't?), sprinkle your additional 2 tablespoons of chocolate chips evenly across the top. Press them down gently so they'll bake into the surface.
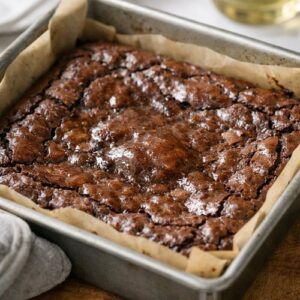
- Bake for 21-23 minutes. I know this is a narrow window, and it matters. At 21 minutes, the center should still have the tiniest jiggle when you shake the pan gently—that's your guarantee of fudgy texture. At 23 minutes, they'll be set but still incredibly moist inside. If you bake beyond 24 minutes, they'll start developing that cake-like structure you don't want. I set my phone timer for 20 minutes, then check visually. The top should look slightly set, and a toothpick inserted in the center should come out with a few moist crumbs clinging to it. Remove from the oven and let cool in the pan for at least 15 minutes before cutting. These brownies are delicate when warm—they need time to set up. Then cut into 16 equal squares and either serve immediately or transfer to an airtight container for storage.
FAQs
Can I taste the chickpeas in these brownies?
Not at all—and this is the question I get most often. Chickpeas are completely neutral-flavored once pureed and baked. They contribute moisture, structure, and protein, but the chocolate is absolutely front and center. The first time I made these for my family without telling them the ingredient, nobody suspected legumes. The fudgy texture actually makes people assume there’s more butter or eggs than there actually are.
What if I don’t have almond flour? Can I use something else?
You have options. Blanched almond flour is ideal because it’s finely ground and creates that tender crumb. But if you don’t have it: Use ¼ cup oat flour (grind rolled oats in a food processor), which creates slightly denser but still fudgy brownies. Or use ¼ cup buckwheat flour, which is naturally gluten-free and brings an earthy note that actually complements chocolate beautifully. For nut-free, use ¼ cup ground sunflower seeds or pumpkin seeds. The texture will be slightly less tender, but still satisfying.
Do I really need to use maple syrup? What if I use honey or coconut sugar?
You can substitute, but results will vary slightly. Honey: Use the same amount (½ cup). Honey is slightly sweeter, so your brownies will be a bit more sweet-forward, and the texture will be marginally moister. The flavor will be less complex but still good. Coconut sugar: Use ¼ cup coconut sugar plus 3 tablespoons of water to match the liquid content of maple syrup. Coconut sugar creates a slightly drier brownie because it has less water content. It works, but I prefer maple syrup for the nutritional profile and complexity. Avoid refined white sugar or brown sugar in this recipe because they don’t provide the moisture that helps create the fudgy texture.
These look small. Are they really a complete healthy snack or more of a treat?
They’re genuinely in the snack category, though they’re nutrient-dense enough to function as more than “just” a treat. One brownie (about 2-2.5 inches square) contains 4.5-5 grams of protein, 2.5-3 grams of fiber, and significant magnesium. Pair one with Greek yogurt, nuts, or fruit, and you have a legitimate snack that provides sustained energy. Or eat one with a cup of tea after dinner and feel satisfied without the blood sugar crash you’d get from a traditional brownie. They’re treating yourself, but intelligently.
Can I make these without a food processor?
Technically yes, but it requires effort. You’d need to mash the chickpeas very thoroughly with a fork or potato masher until completely smooth, then vigorously whisk in the nut butter, maple syrup, coconut oil, and vanilla until creamy (this takes real elbow grease—probably 3-4 minutes of whisking). Then whisk in your dry ingredients gently. It’s doable if you have the patience and arm strength, but a food processor genuinely makes this easier. If you don’t have one, I’d recommend investing in a basic model—it opens up so many quick, healthy recipes.
More Healthy Recipes You’ll Love
- 6 Vanilla Cake Recipe – Sweet Mama’s Kitchen – A light, protein-forward cake that proves indulgent desserts can be nutritious
- these homemade cookies – Nutty, satisfying cookies with natural sweetness and healthy fats
- this simple cake – Fluffy cupcakes that feel special without the guilt
The Bottom Line: Eating Well Never Tasted Like This
I think about that Thursday afternoon when I first made these for my kids—when I realized that healthy eating doesn’t mean deprivation, it means choosing ingredients that serve your body better. These brownies are that realization in fudgy, chocolate form. You get the indulgence you crave, the nutrition your body deserves, and the simplicity that makes cooking feel joyful instead of complicated.
Make a batch this weekend. Notice how satisfied you feel after eating one. Pay attention to whether your energy stays steady. Share them with someone you love and don’t tell them what’s in them until after they’ve had a bite. That conversation—the one where they realize that chickpeas could be this delicious—that’s when you know you’ve found something special.
Healthy eating is supposed to feel like nourishment AND pleasure. Not one or the other. Both. This recipe proves it’s possible.
Happy cooking!
META DESCRIPTION: Chickpea Brownie Recipe with 5g protein per brownie—fudgy, naturally gluten-free, and surprisingly nutritious. Skip the guilt, keep the indulgence.